Using SSO with SCIM
SSO handles user login - letting your customers sign in with their existing company credentials.
SCIM syncs user accounts - automatically creating, updating, and deactivating users based on changes in their identity provider.
They can be very powerful when used together, as SCIM ensures that only the right users have access to your application, and SSO makes it easy for those users to log in.
Pairing SSO and SCIM
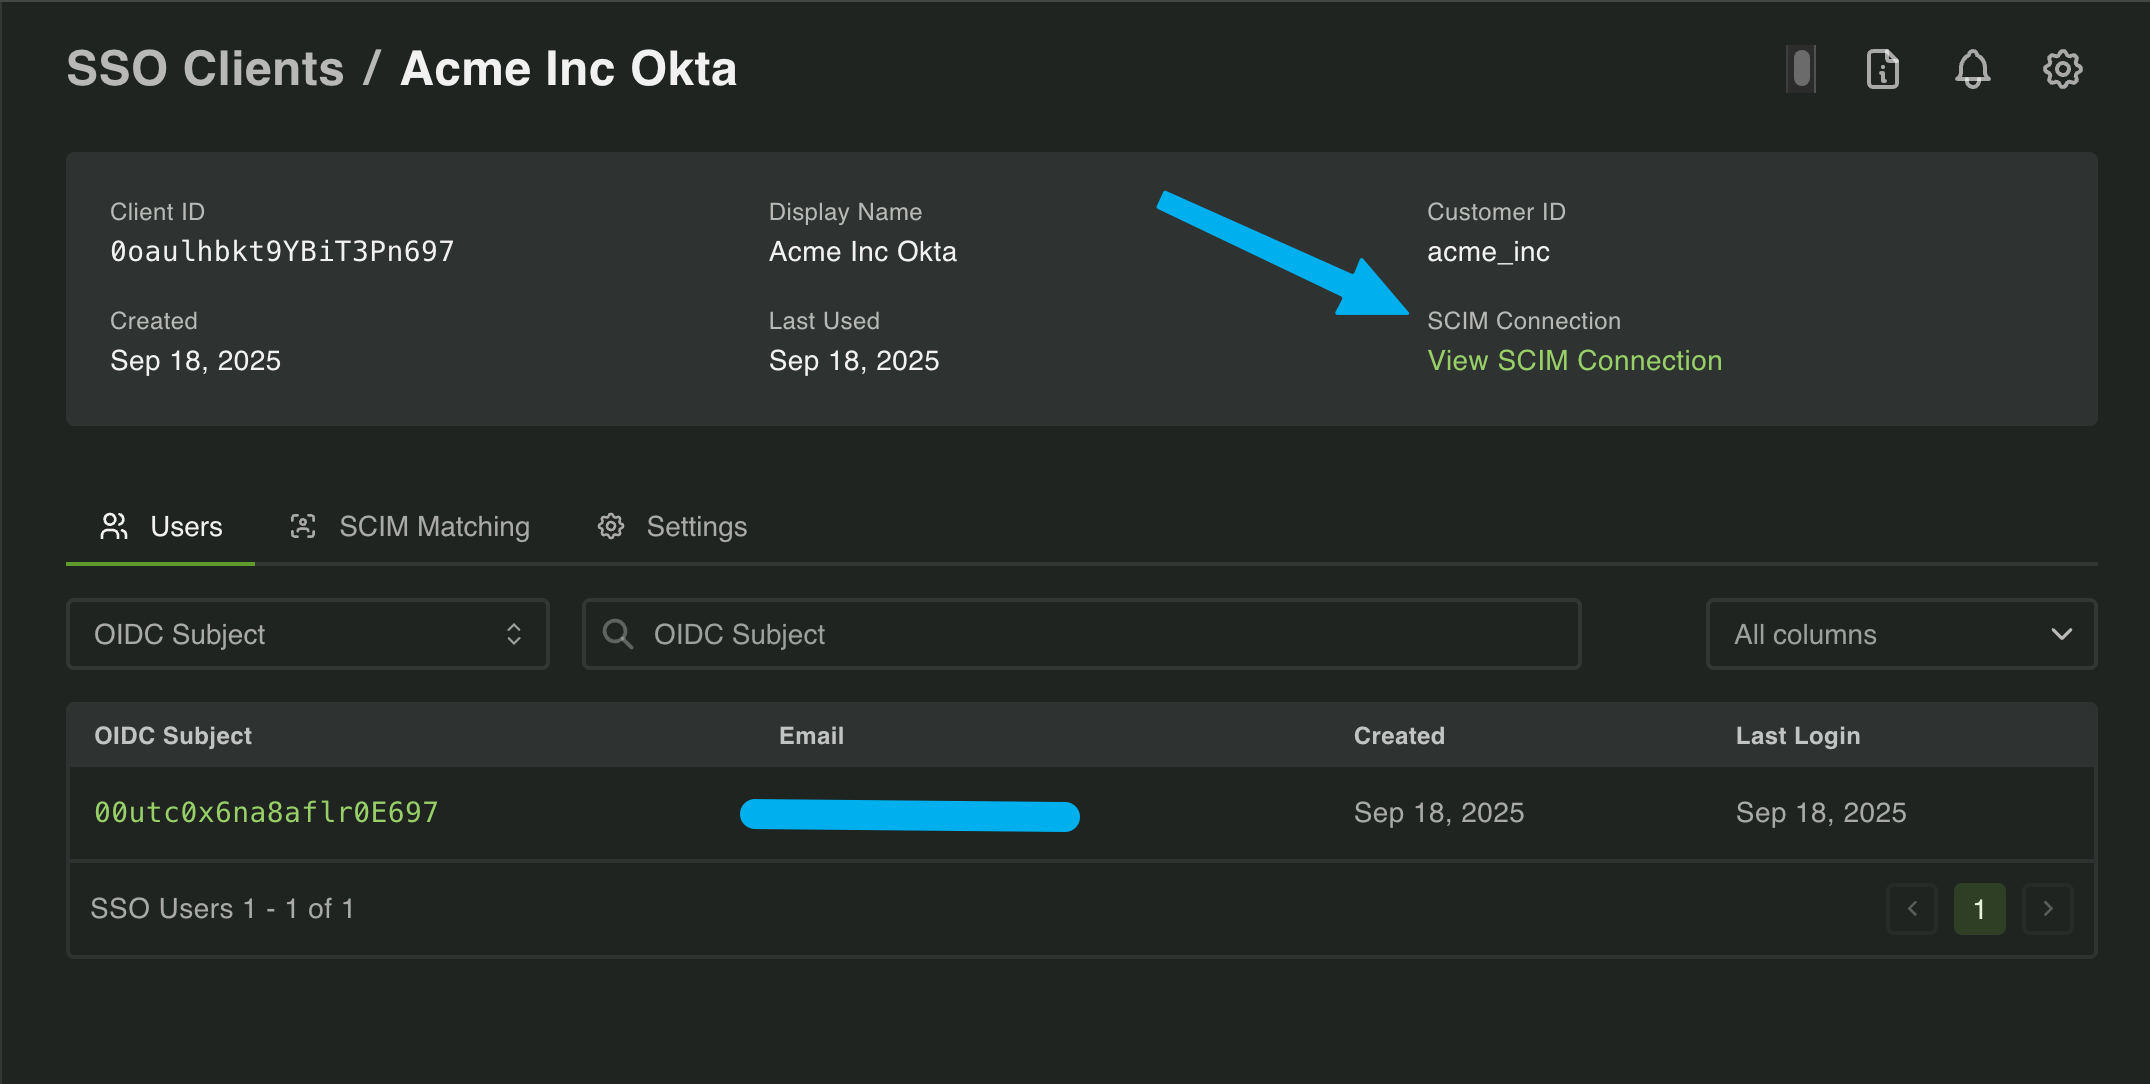
Section titled “Pairing SSO and SCIM”Combining SSO and SCIM starts with the Customer ID - an argument included in both the Create OIDC Client and Create SCIM Connection functions.
Each Customer ID can only have one SSO connection and one SCIM connection associated with it.
SSO and SCIM connections will become “paired” when they have matching Customer IDs.
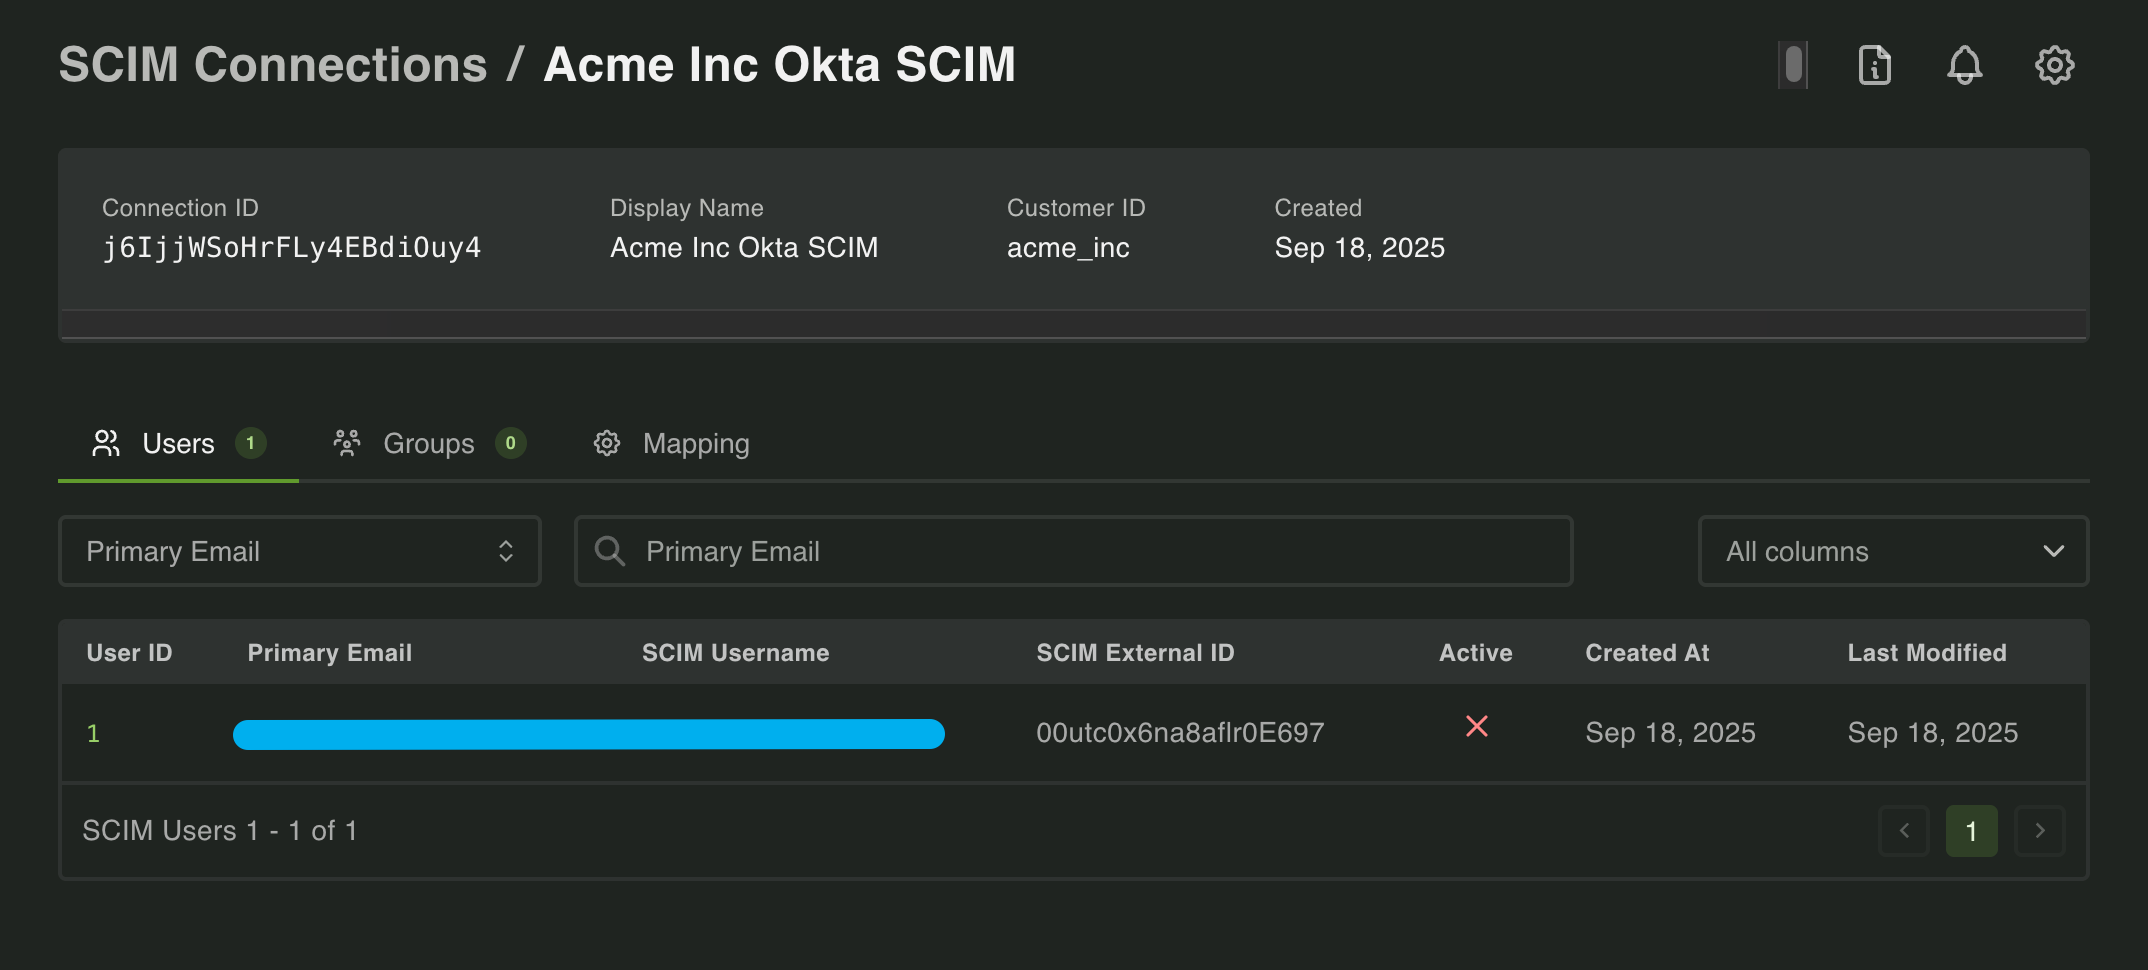
This can be shown by navigating to either connection in the Dashboard and seeing a link to the other connection.
Now that they are paired, there’s one big problem to solve:
When a user logs in with SSO, you need to match that user’s SSO account to their SCIM-provisioned account. This is important because SCIM is responsible for things like deprovisioning users. When a user is deprovisioned via SCIM, we need to ensure that same user cannot log in via SSO.
Unfortunately, identity providers don’t make this easy - they send different user IDs in different places across the two protocols.
The Matching Problem
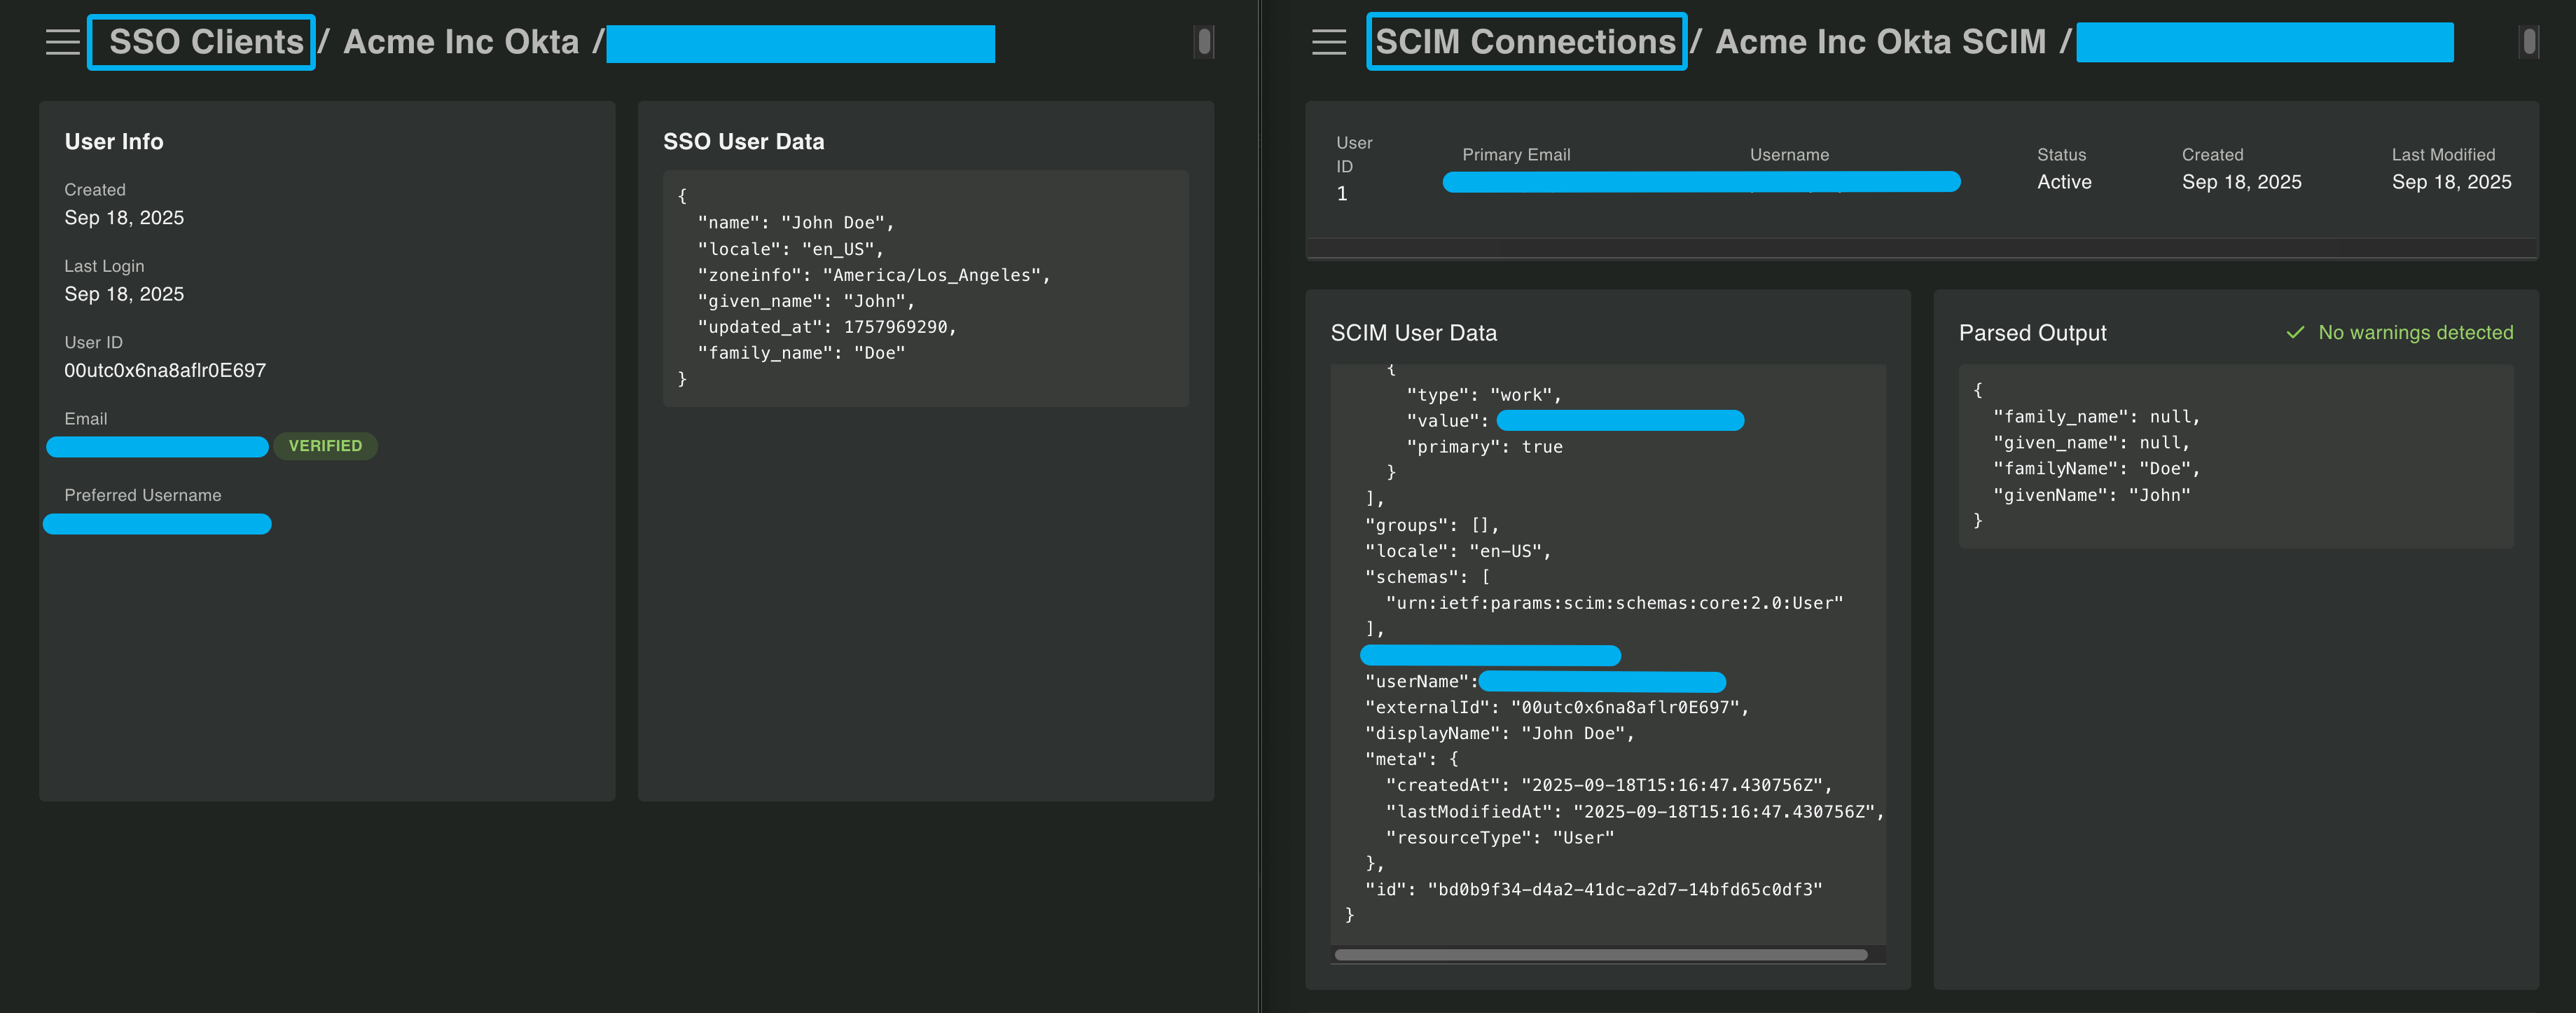
Section titled “The Matching Problem”Here are two JSON payloads for the same user - one from an SSO connection and one from a SCIM connection.
// SSO User{  "oidcUserId": "00utc0x6na8aflr0E697",  "email": "john@acmeinc.com",  "emailVerified": true,  "preferredUsername": "john@acmeinc.com",  "dataFromSso": {    "name": "John Doe",    "locale": "en_US",    "given_name": "John",    "family_name": "Doe",    "zoneinfo": "America/Los_Angeles",    "updated_at": 1757969290  }}
// SCIM User{  "active": true,  "emails": [    {      "type": "work",      "value": "john@acmeinc.com",      "primary": true    }  ],  "groups": [],  "locale": "en-US",  "schemas": [    "urn:ietf:params:scim:schemas:core:2.0:User"  ],  "userName": "john@acmeinc.com",  "externalId": "00utc0x6na8aflr0E697",  "displayName": "John Doe",  "id": "bd0b9f34-d4a2-41dc-a2d7-14bfd65c0df3"}
Notice the problem? The user’s IDs don’t match. The oidcUserId from SSO is different from the id in SCIM.
The oidcUserId does match the externalId in SCIM, but externalId is actually optional in SCIM and not all identity providers populate it.
Even worse, a lot of Identity Providers (IdPs) will let you customize what gets sent in these fields, so you can’t rely on them being consistent across customers.
Let’s look at how to solve this problem.
Set a SCIM Matching Definition
Section titled “Set a SCIM Matching Definition”The SCIM Matching Definition defines how to match a user from an SSO connection to the same user’s account in a SCIM connection. SSO and SCIM both return user information in different formats, and those formats can vary across identity providers such as Okta, Entra, and JumpCloud.
When creating or updating an OIDC/SSO client we can set a SCIM Matching Definition strategy. This can equal any of the following:
OidcSubToScimUsernameOidcSubToScimExternalIdOidcEmailToScimUsernameOidcEmailUsernameToScimUsernameOidcPreferredUsernameToScimUsername
Looking again at the example above, we have a few options.
Match on External ID: The SSO/OIDC user’s oidcUserId matches the SCIM user’s externalId. If we wanted to match on this property we could use the OidcSubToScimExternalId strategy.
Match on Email Address: The SSO/OIDC user’s email is set on both the email and preferredUsername properties. On the SCIM side it’s set on email.value and userName.
We can therefore use either the OidcEmailUsernameToScimUsername or OidcPreferredUsernameToScimUsername strategies to successfully link our two SCIM connections.
Setting Matching Strategies in the Dashboard
Section titled “Setting Matching Strategies in the Dashboard”Setting the right matching strategy can be tricky, but luckily the Dashboard has a user friendly tool to help you find the perfect match. Navigate to the SSO section of the Dashboard followed by your customer’s SSO connection. Then, click on SCIM Matching.
If the SCIM Matching Strategy cannot find a match across connections you’ll see a list of any affected users. Additionally, you’ll see two dropdowns to assist in updating the matching strategy.
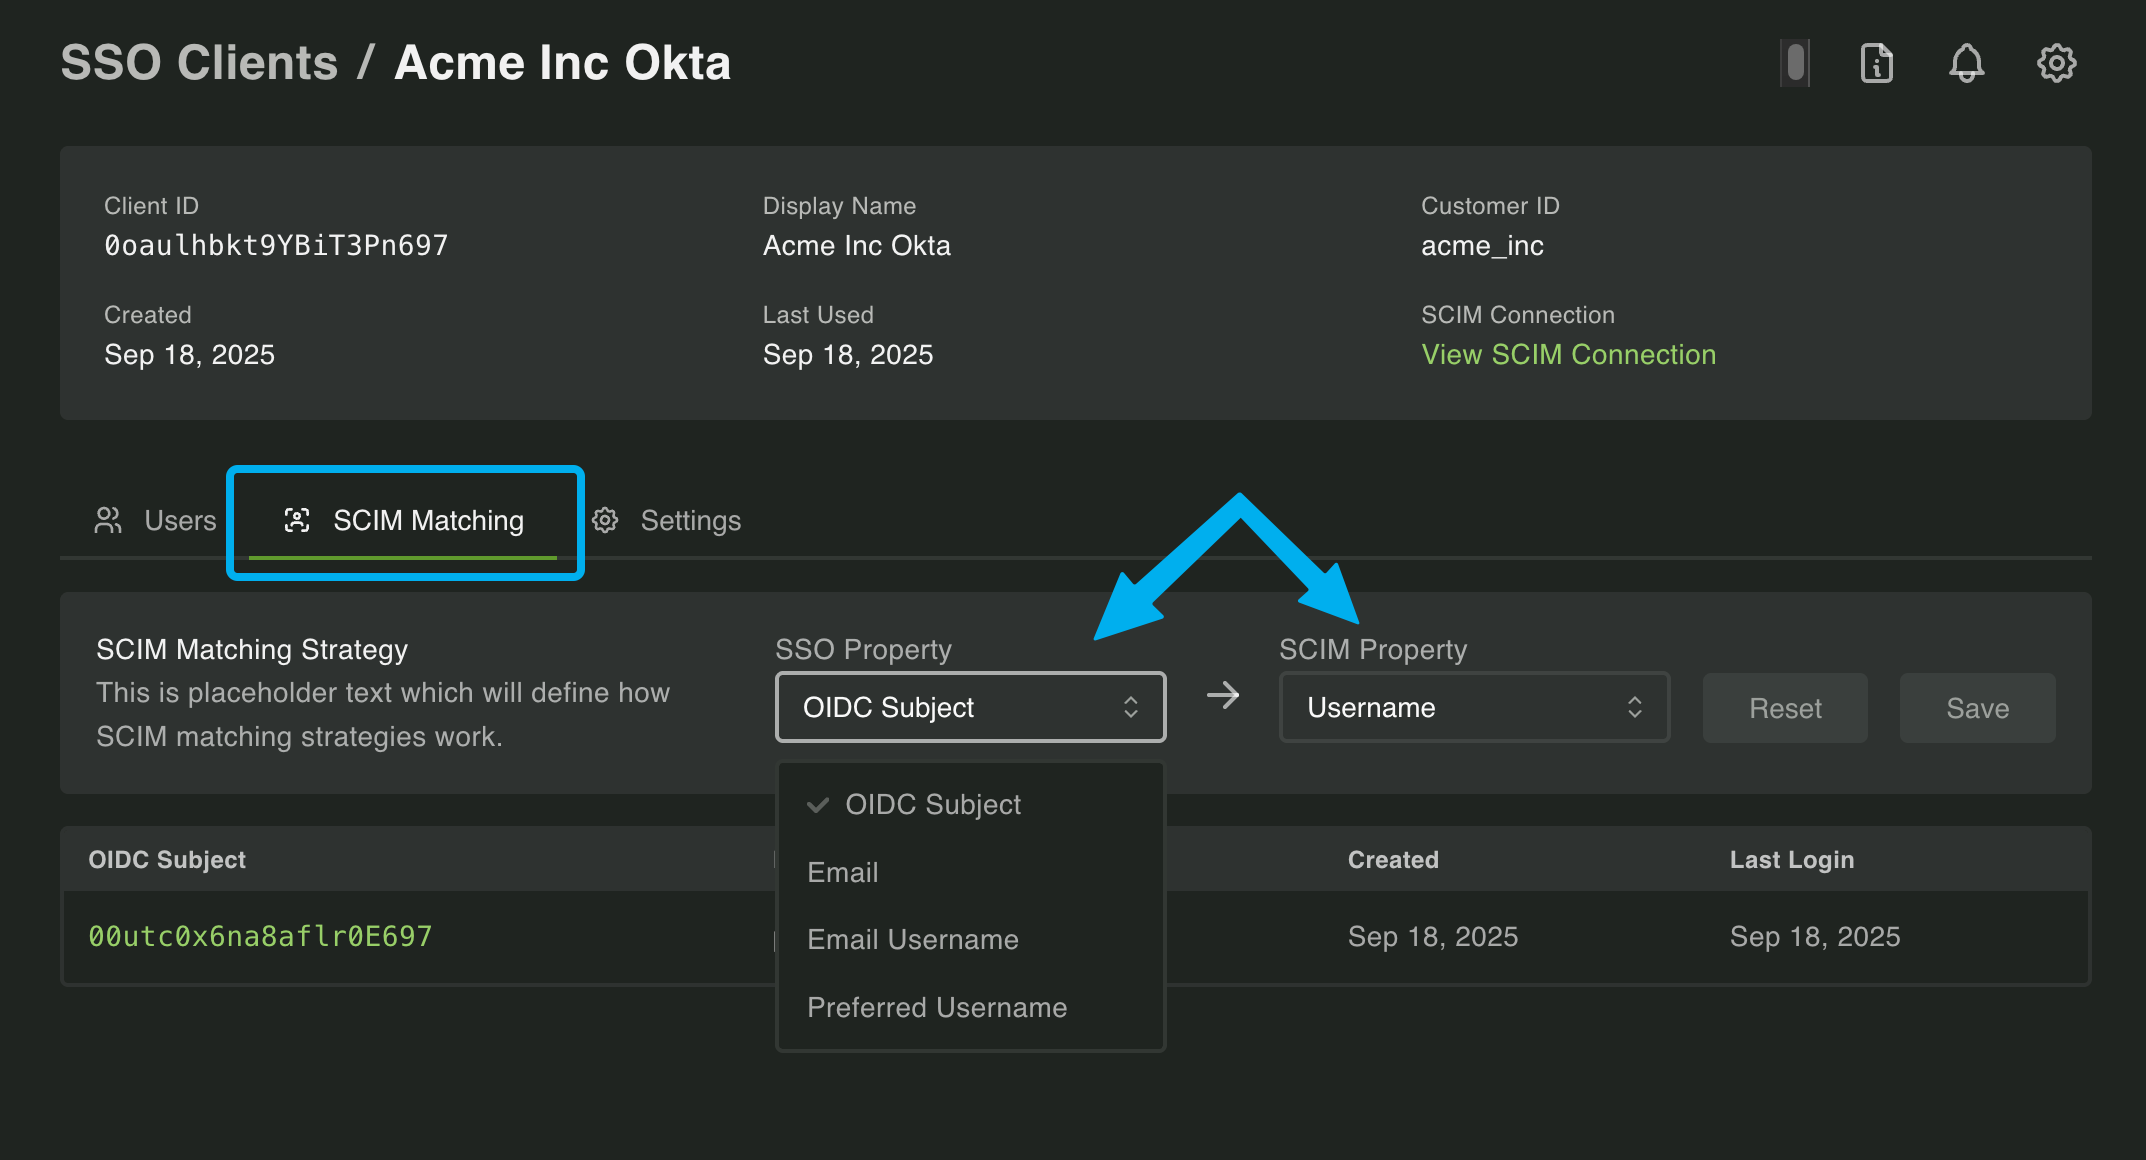
You have a few options here to find the correct strategy. First, you can simply toggle through each combination until no users are listed. Then, click Save.
Alternatively, you can click on one of the users and open a separate tab to the SCIM user, allowing you to compare user data across connections to help find the best strategy.
IdP Specific Matching Strategies
Section titled “IdP Specific Matching Strategies”Included in the Create OIDC Client is an Idp Type field. This can be set to one of the following:
OktaMicrosoftEntraGeneric
When you select either Okta or MicrosoftEntra we’ll automatically set the matching strategy that we have found works best for that identity provider.
If the recommended matching strategy does not work you can always update it programmatically or via the Dashboard.
| Identity Provider | Matching Strategy |
|---|---|
| Okta | OidcEmailToScimUsername |
| MicrosoftEntra | OidcSubToScimExternalId |
| Generic | OidcEmailToScimUsername (default) |
See here for more information on setting an IdP when creating an OIDC client.
Inactive Users
Section titled “Inactive Users”There may be instances where a user is provisioned to their IdP’s SSO application but not their SCIM app. When this occurs the user will be marked as Inactive.
If the user were to log in via the SSO connection you will get back a ScimUserNotActive error when completing the OIDC login, blocking the login.