SSO Example Setup Guides
Part of the power of BYO SSO is the ability to hand the setup and configuration of SSO to your users. To help with this process, we provide a series of example setup guides for popular identity providers. These guides walk your customers through the necessary steps to configure SSO for each provider. Feel free to use these guides as a starting point for your own documentation.
- Okta OIDC Setup Guide
- Entra / Azure OIDC Setup Guide
- Google Workspace OIDC Setup Guide
- OneLogin OIDC Setup Guide
Along with providing a guide for your users, we recommend building a UI that collects the necessary information from your users and then calls the Create OIDC Client command on your backend. This UI should collect the following information:
- Client ID: The unique identifier for your application.
- Client Secret: The secret key used to authenticate your application.
- Authorize URL: The URL used to initiate the authorization request.
- Token URL: The URL used to exchange the authorization code for an access token.
- Userinfo URL: The URL used to retrieve user information.
However, we provide IdP-specific configurations for Okta and Entra/Azure that you can use to streamline the setup process for your users. These configurations automatically populate the necessary fields based on the identity provider selected by the user. See the example guides linked above for more details.
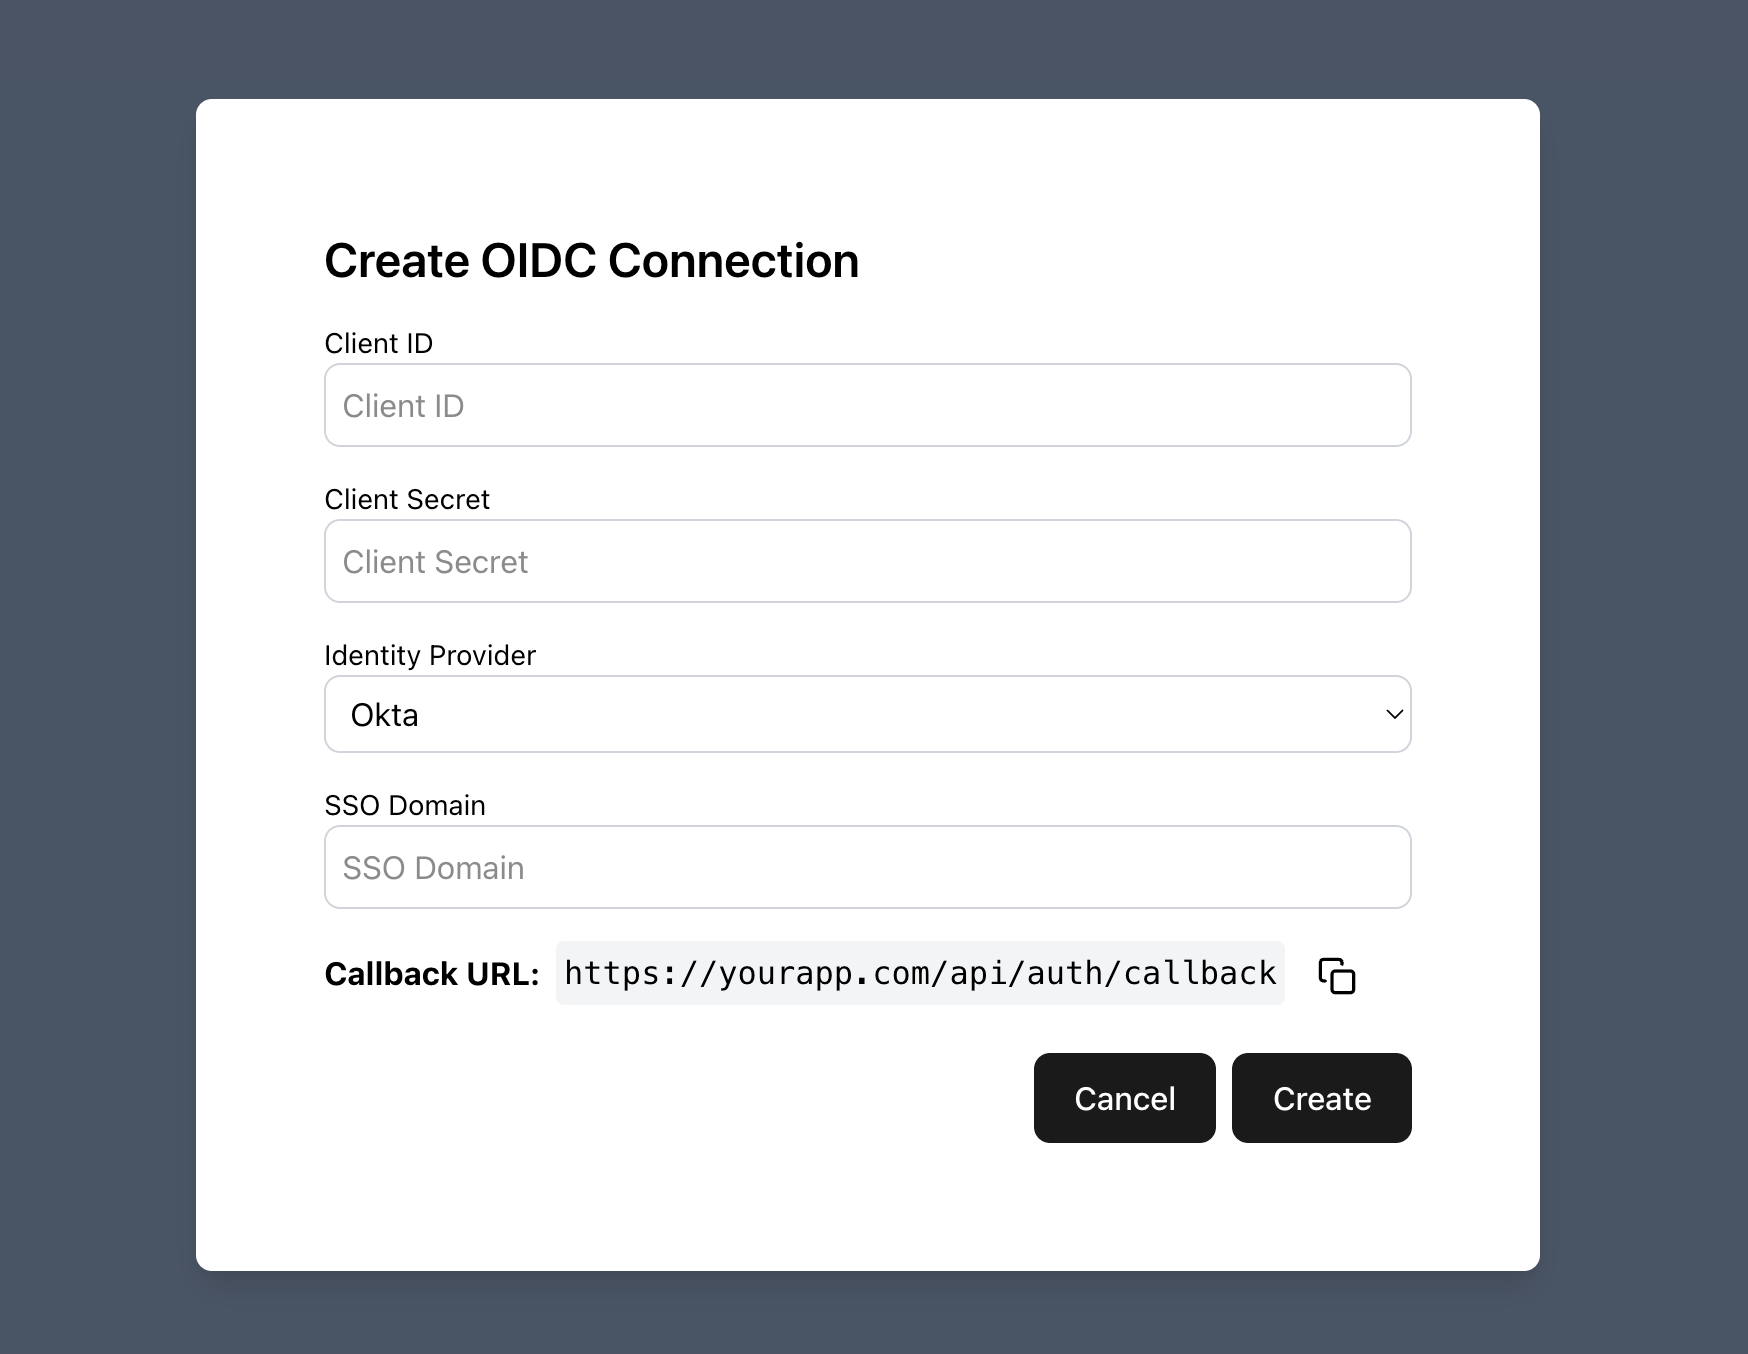
Regardless of the identity provider you should always include the Redirect URI / Callback URI in the setup instructions. This is the URL that your identity provider will redirect users to after they have authenticated. This URL should point to the route in your frontend application that handles the OIDC callback by sending the state and URL path to the Complete OIDC Login command.
By collecting this information through a user-friendly interface, you can streamline the sections setup process and ensure that your users have a smooth experience.