Okta SCIM Setup Guide
Providing documentation to your users on how to set up SCIM with Okta is important for a smooth integration process. Below is an example guide of what this documentation could look like.
-
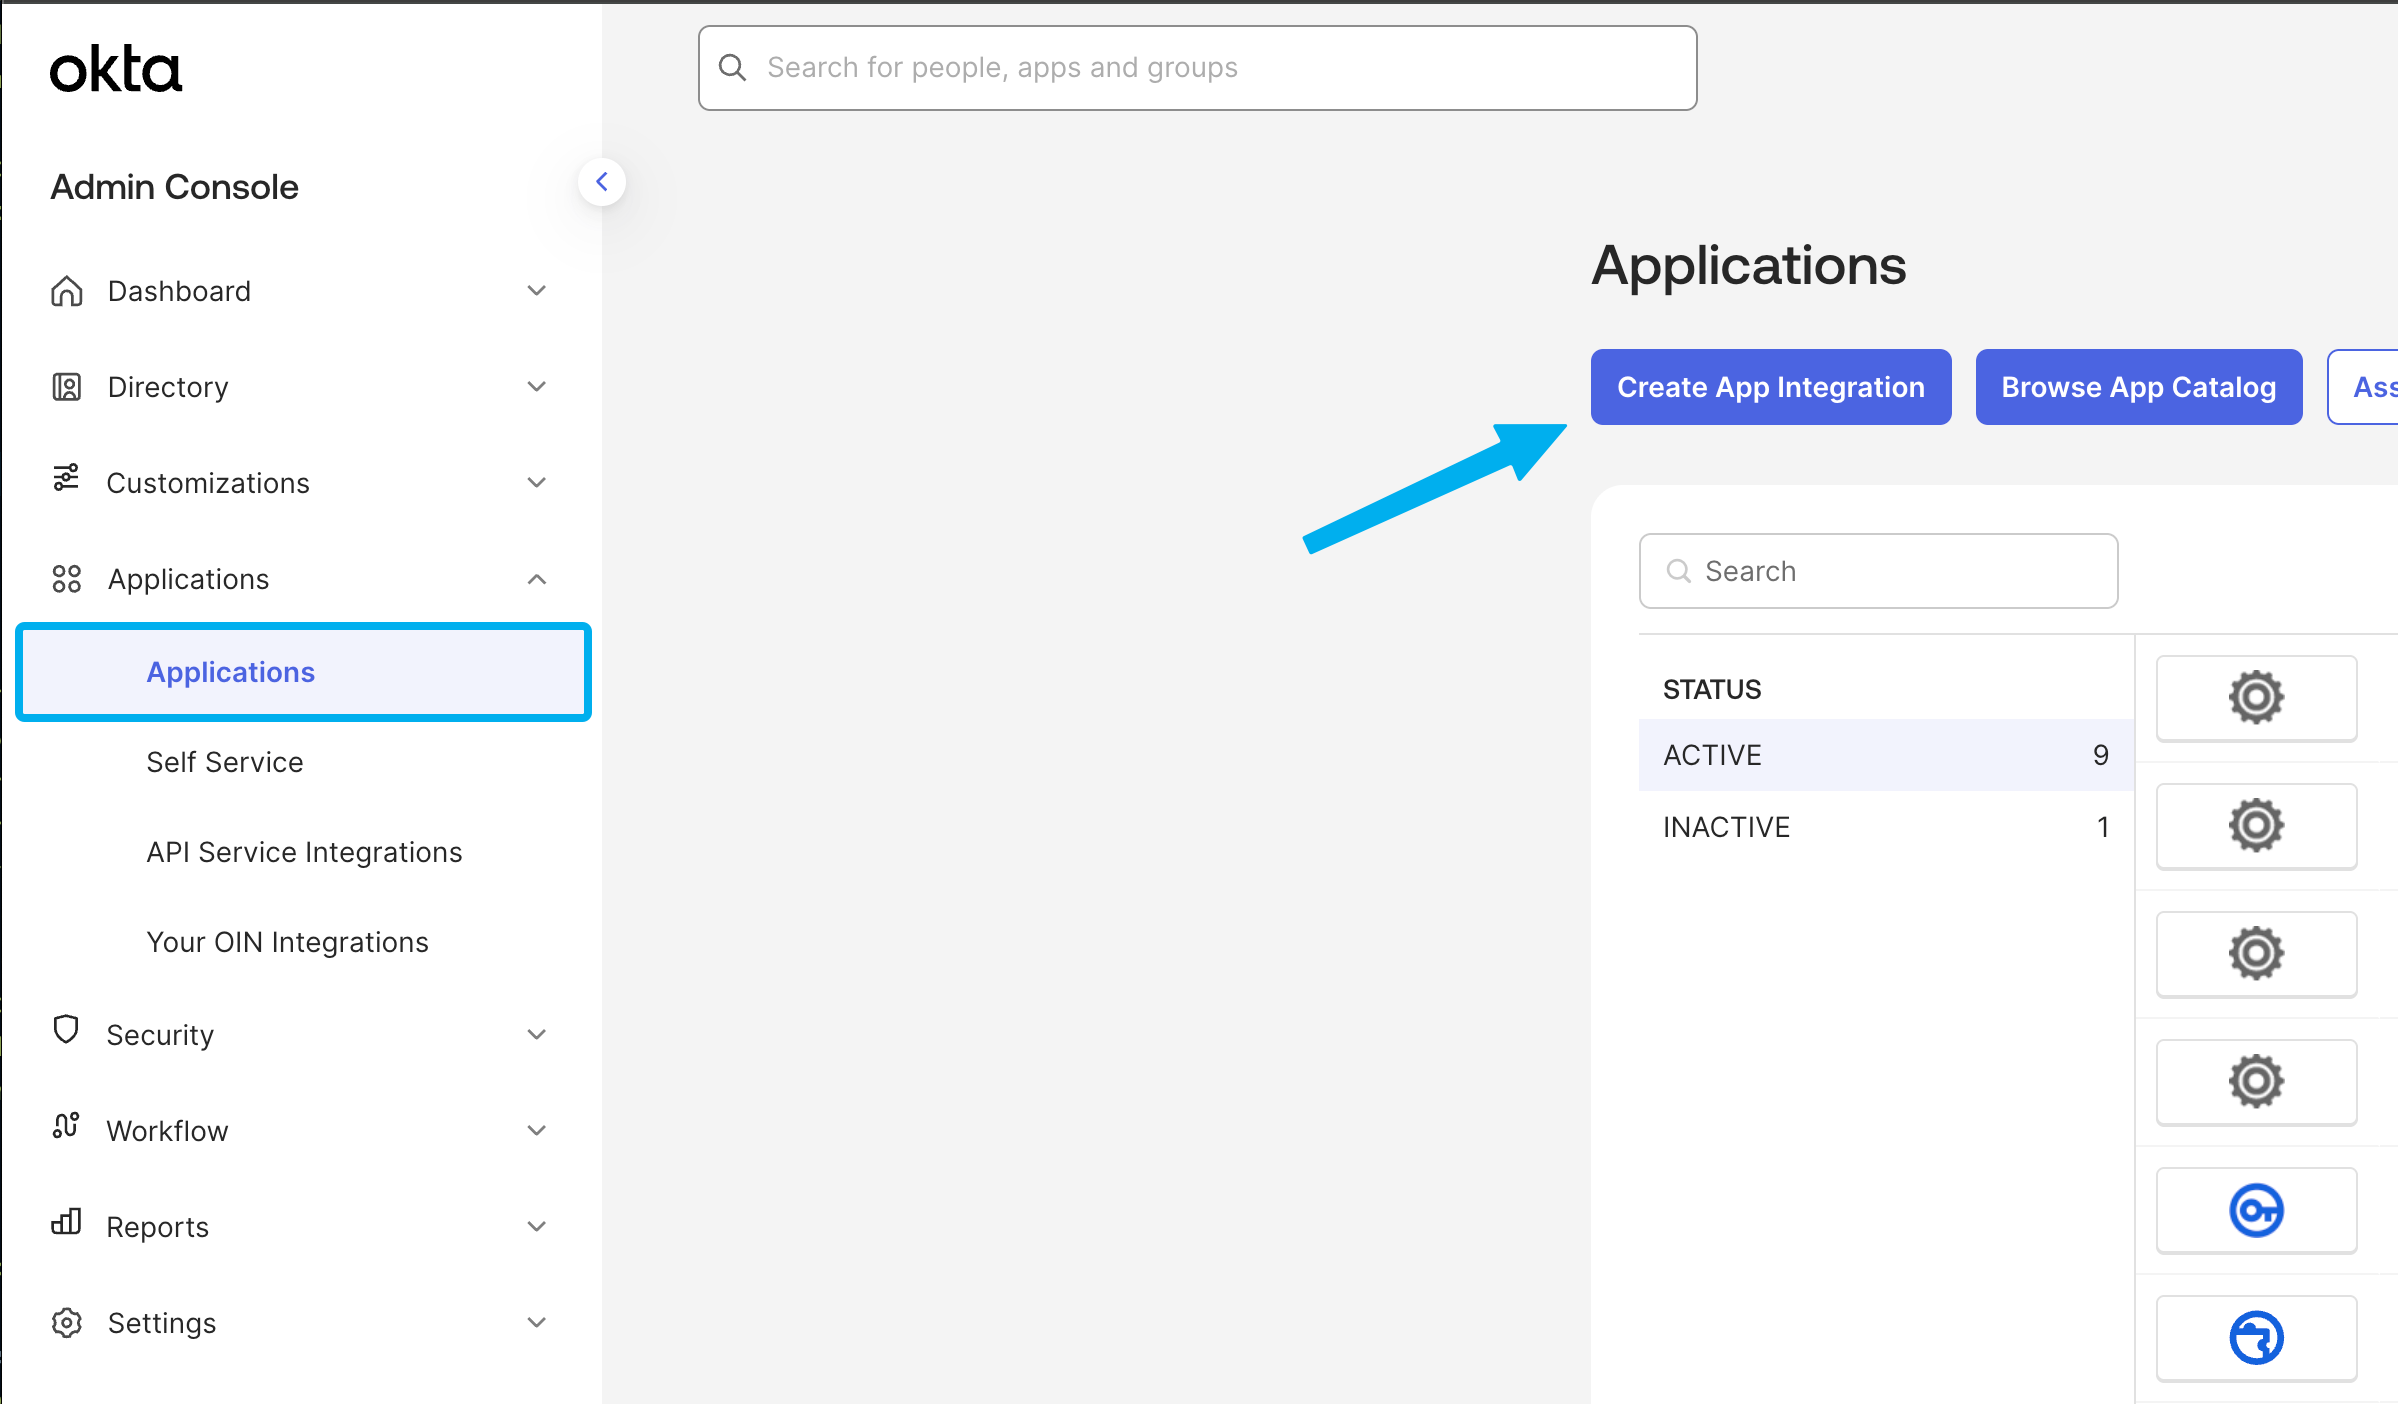
Begin by logging into your Okta admin console and navigating to the “Applications” section.
-
Click Create App integration.
-
Select SWA - Secure Web Authentication as the app type and click Next.
-
On the next page create a name for your app and enter
{your app's login page url}in the App’s login page URL field. Then, click Save. -
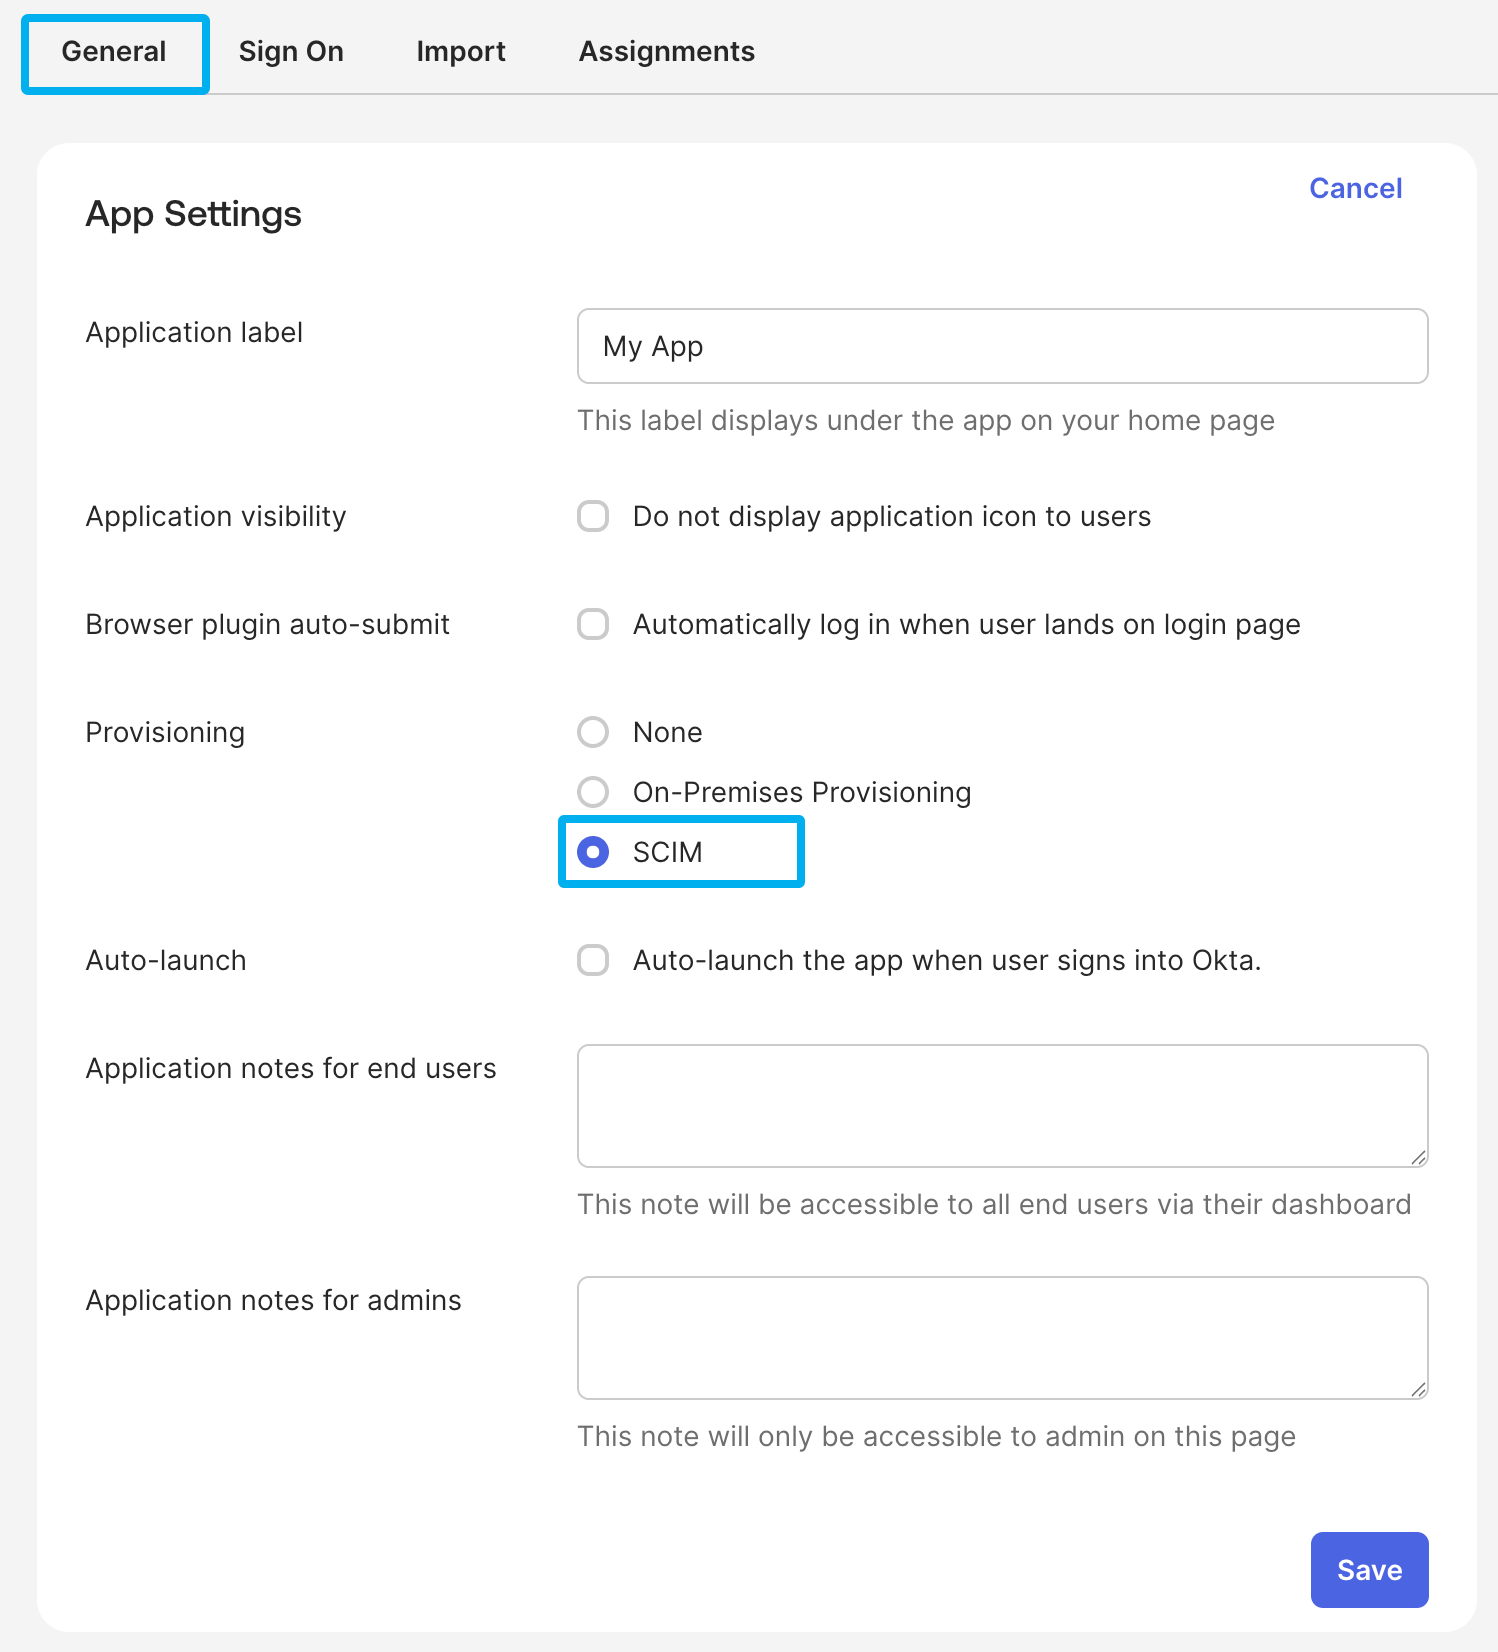
Navigate to the General tab of your newly created app, click on Edit in the App Settings section, and select SCIM. Then, click Save.
-
Switch to the Provisioning tab and click on Edit. Make the following changes:
- SCIM connector base URL: Copy/paste the SCIM URL from
{your application}. - Unique identifier field for users: Enter
userName. - Supported provisioning actions: Select the first four options, leaving
Import Groupsunchecked. - Authentication Mode: Select HTTP Header.
- Authorization: Copy/paste the SCIM API Key from
{your application}.
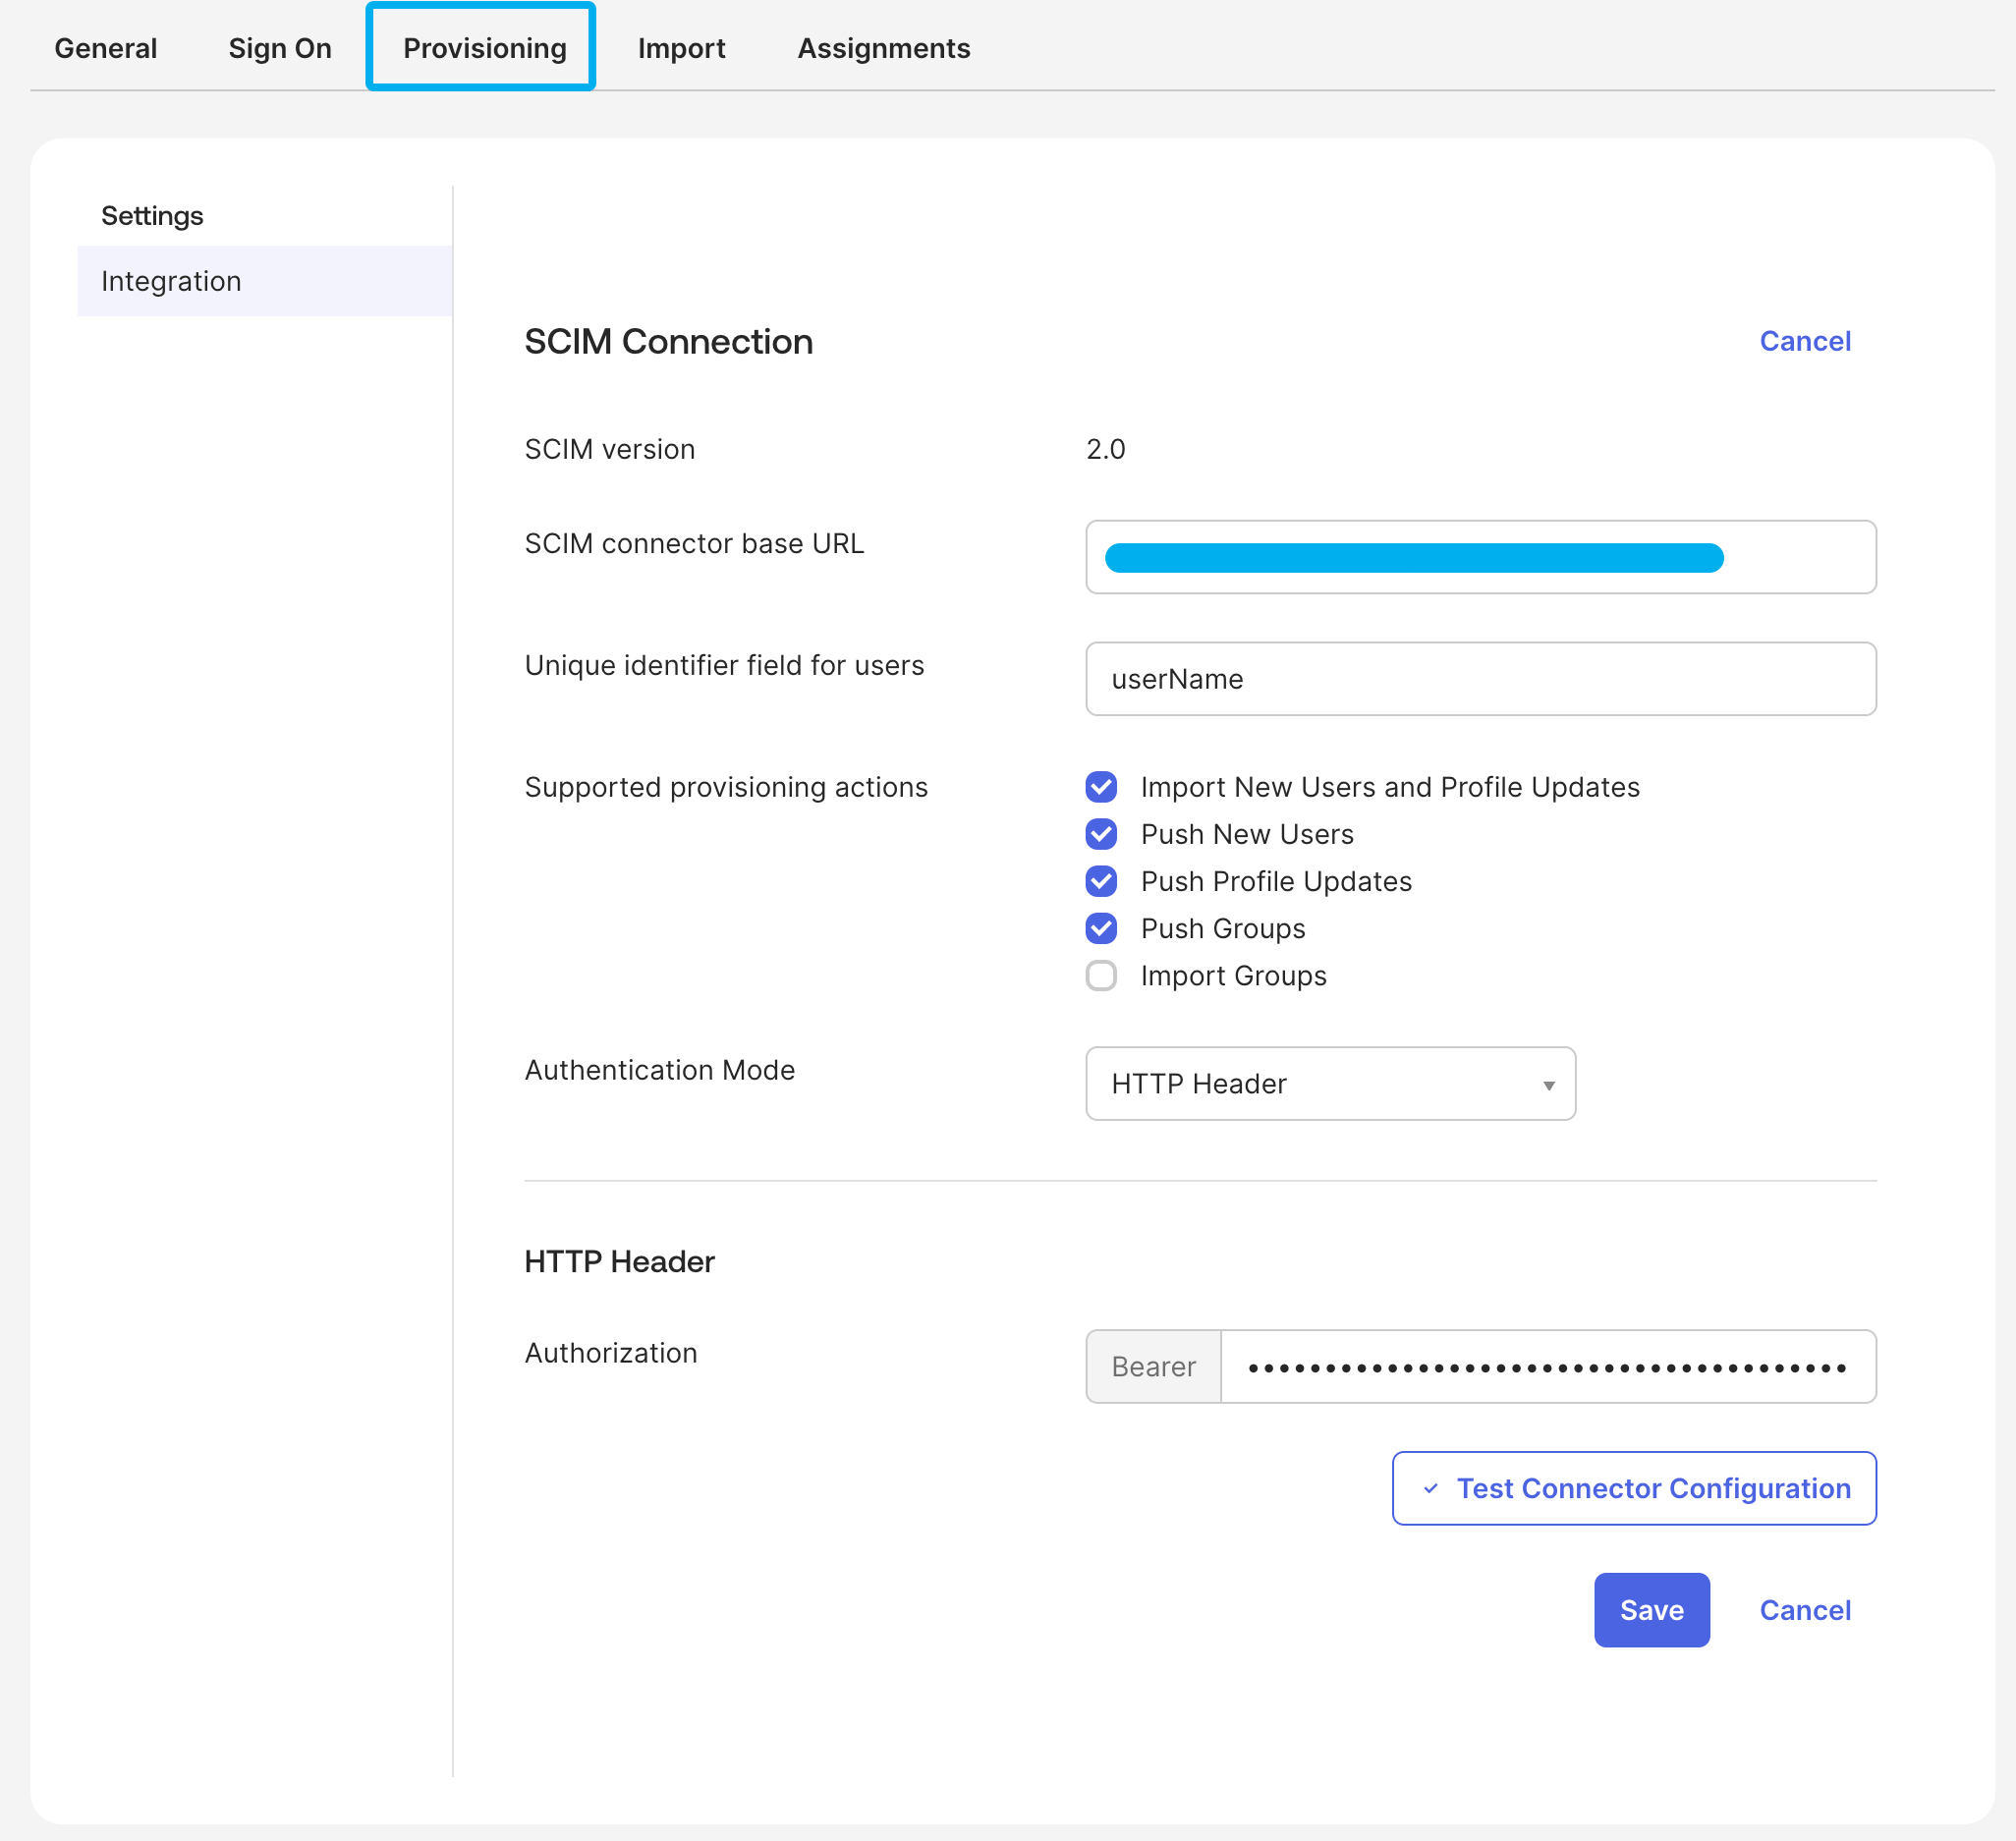
- SCIM connector base URL: Copy/paste the SCIM URL from
-
Click Test Connector Configuration to ensure that everything is working properly. If successful, click Save.
-
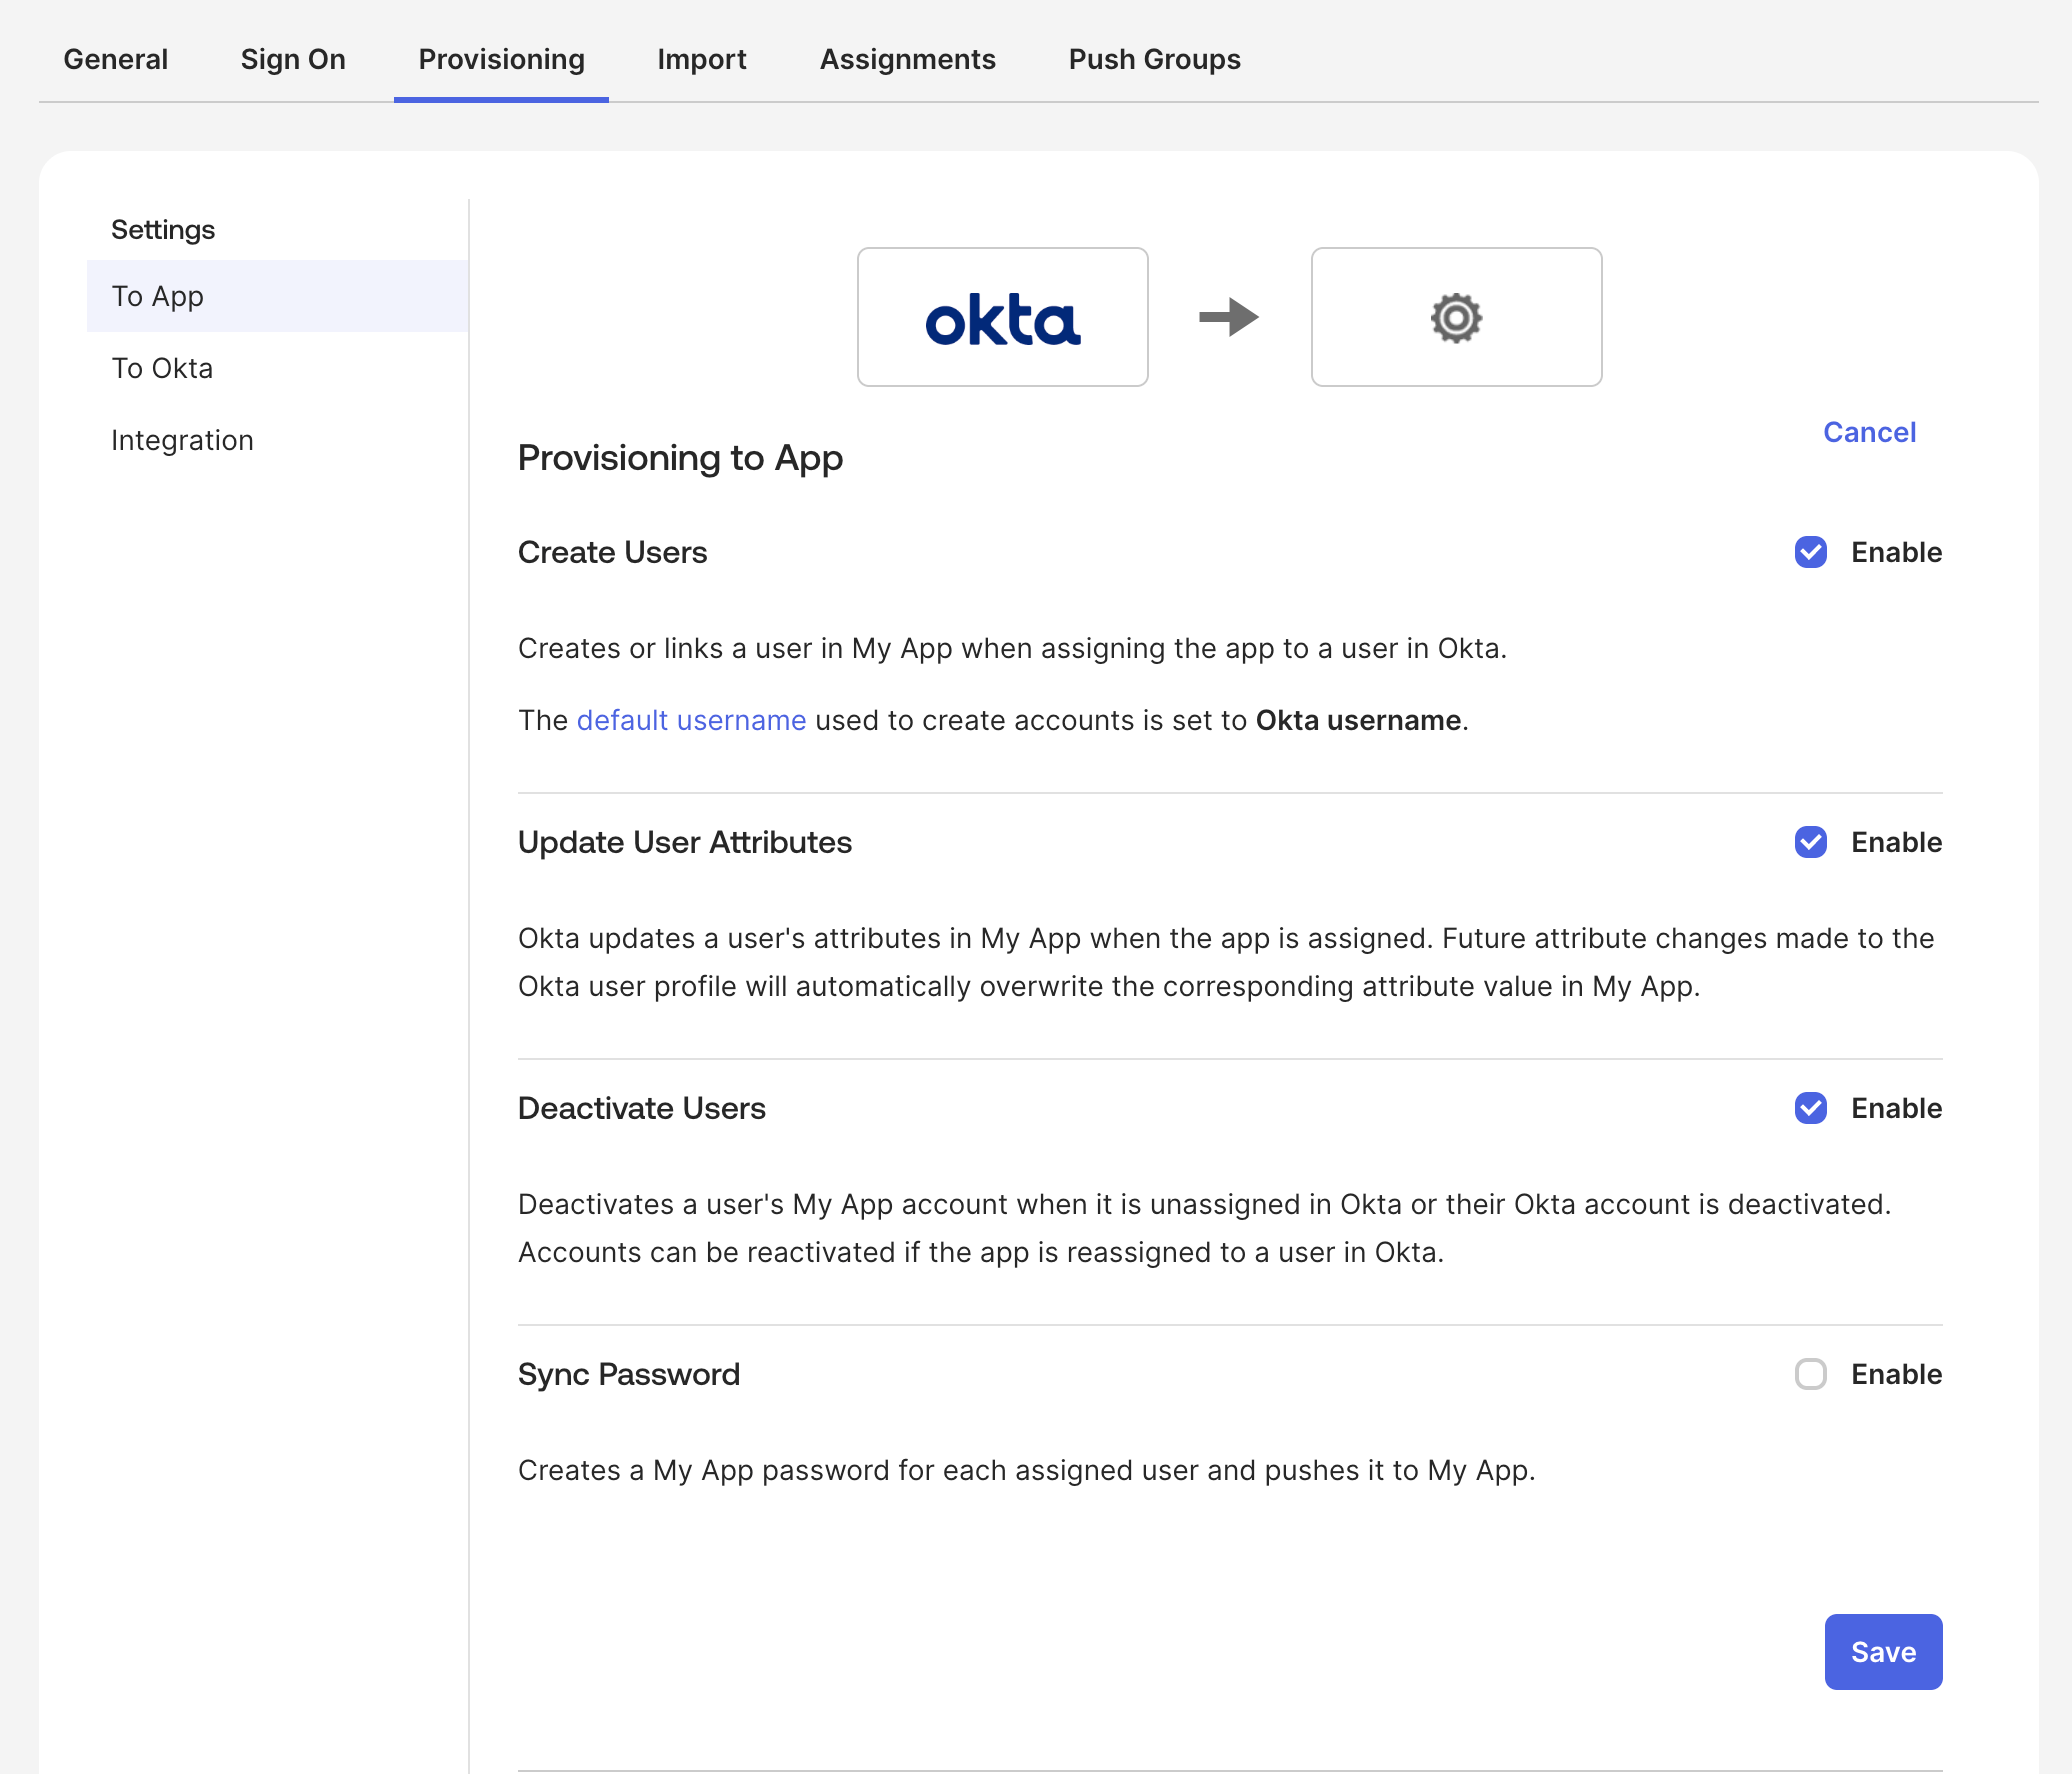
While still in the Provisioning tab, navigate to the To App section and set Create Users, Update User Attributes, and Deactivate Users to On. Then, click Save.
-
Finally, assign users or groups to your app by navigating to the Assignments tab and clicking on Assign.