JumpCloud SSO Setup Guide
Providing documentation to your users on how to set up SSO with JumpCloud is important for a smooth integration process. Below is an example guide of what this documentation could look like.
-
Login to your JumpCloud admin console and navigate to the SSO Applications section. Click on Add New Application.
-
Search for OpenID Connect, select the app, and click Next.
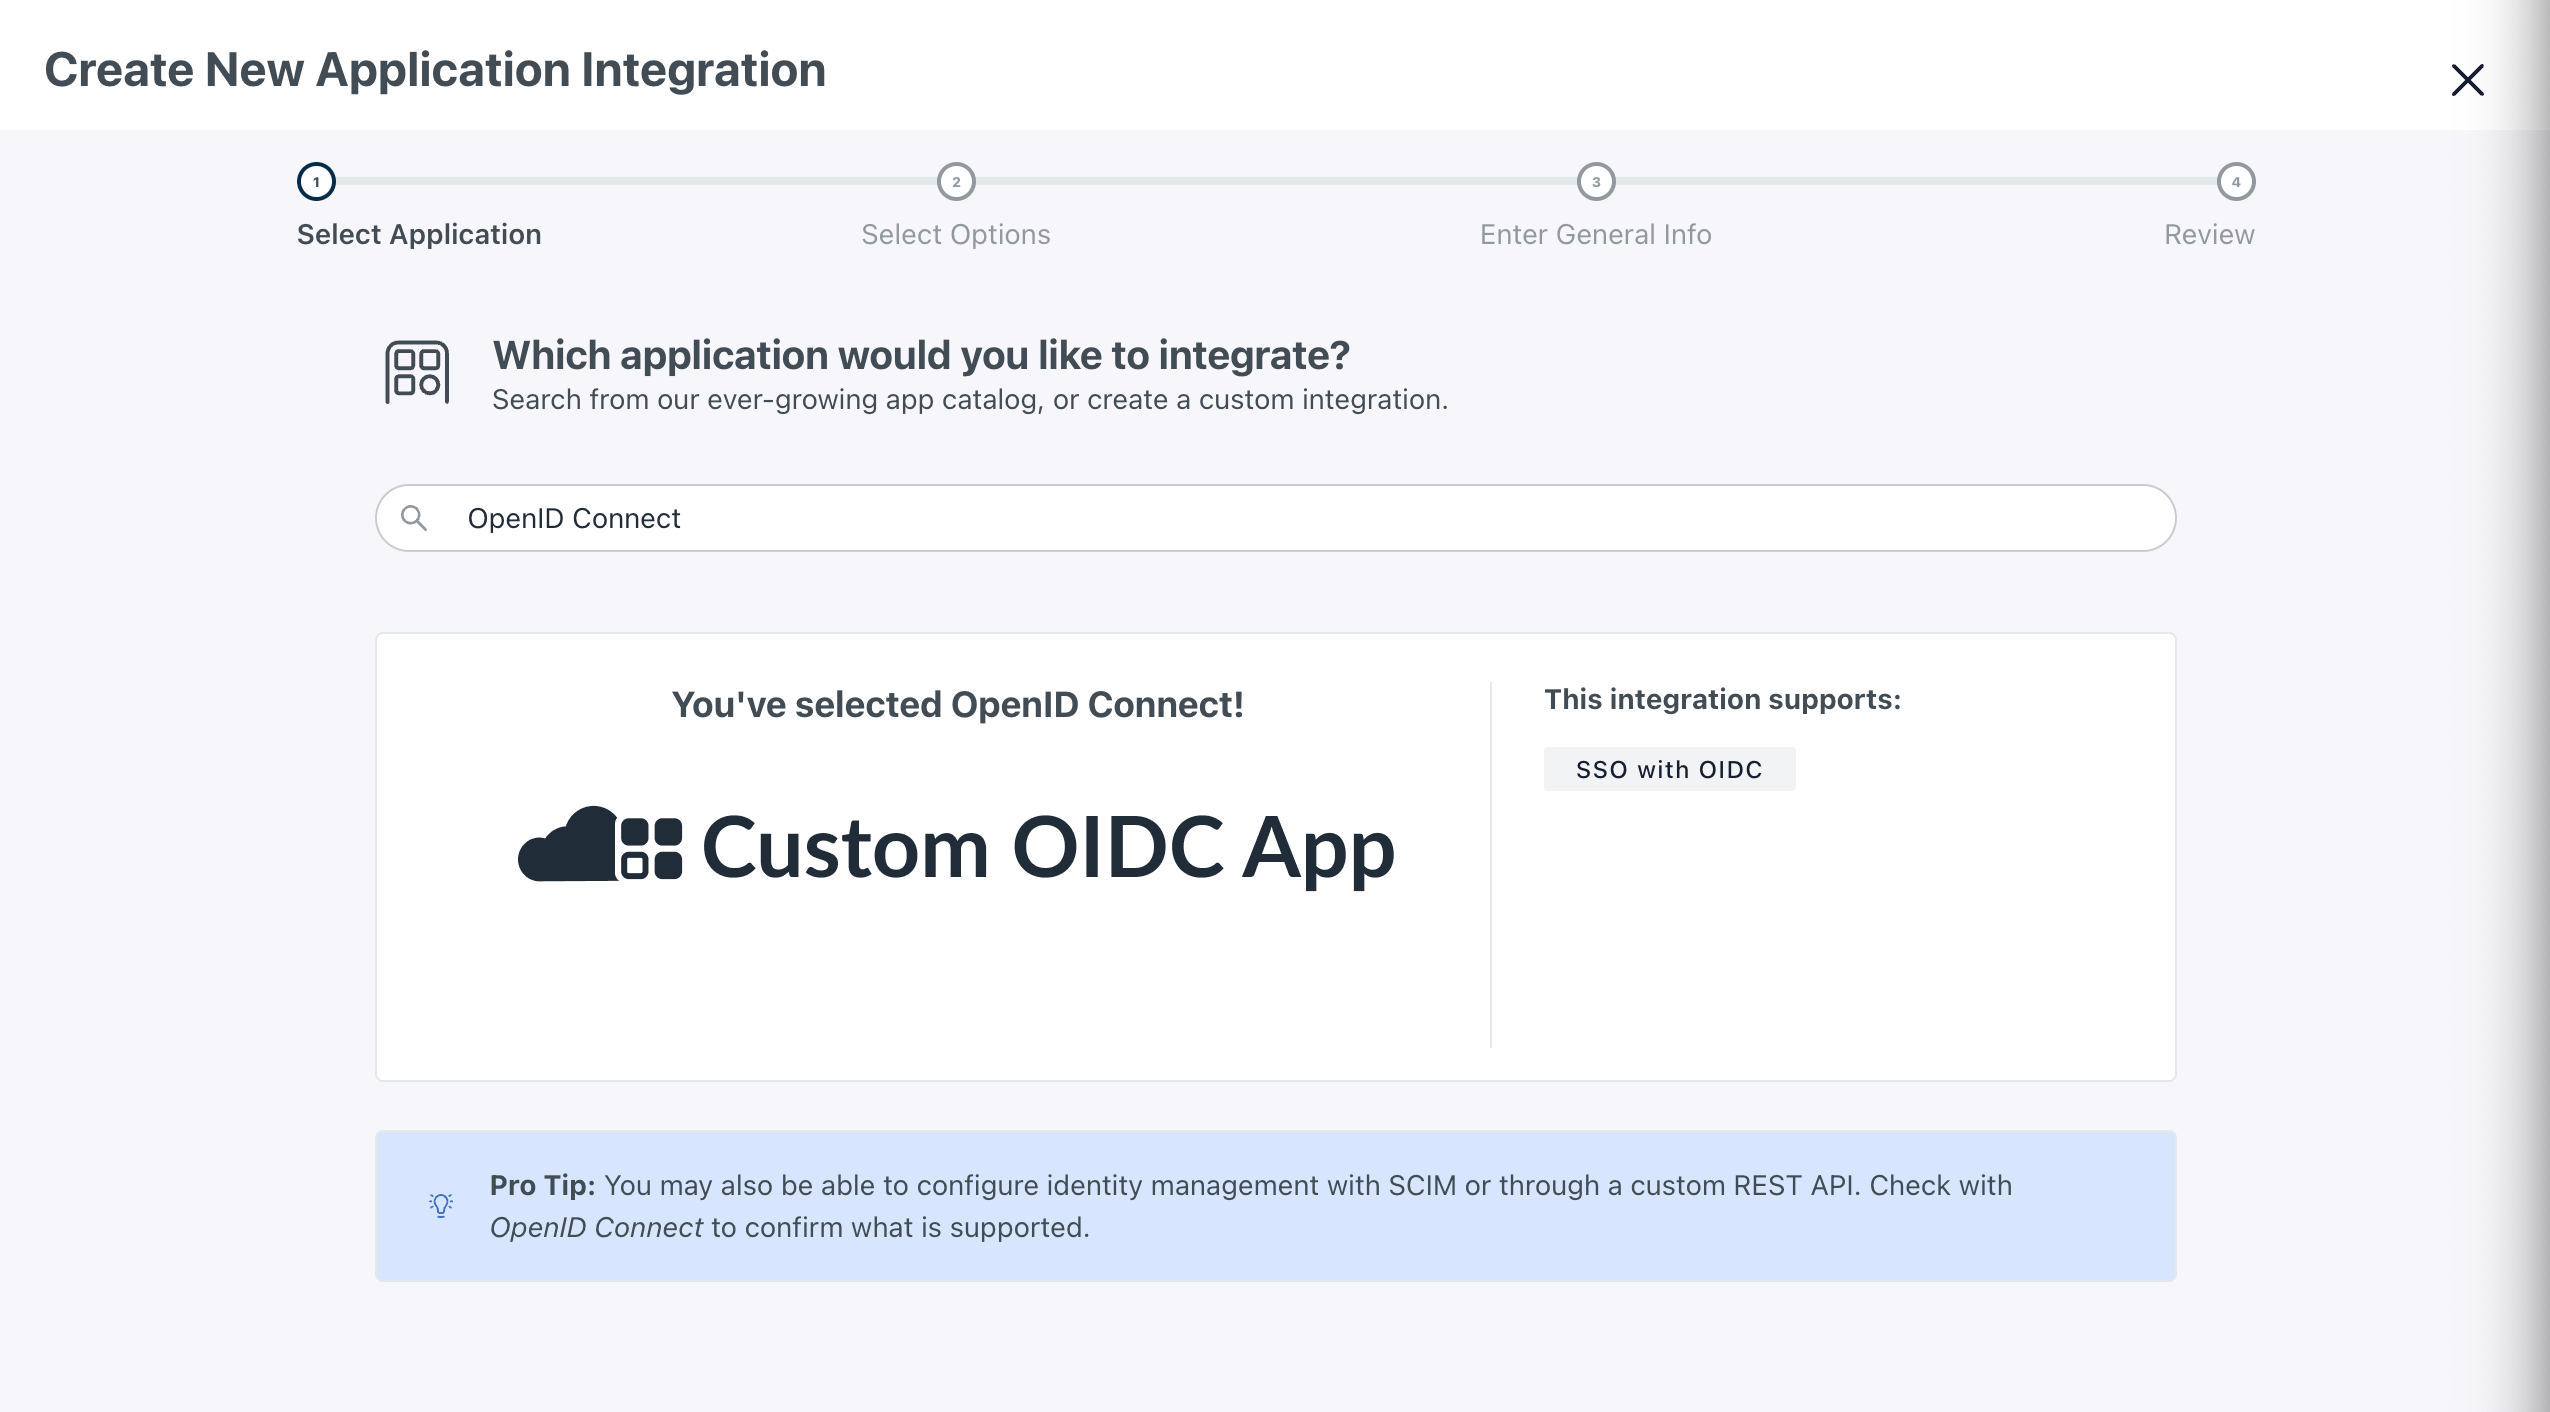
-
Name the application and click Next. Then, click Configure Application.
-
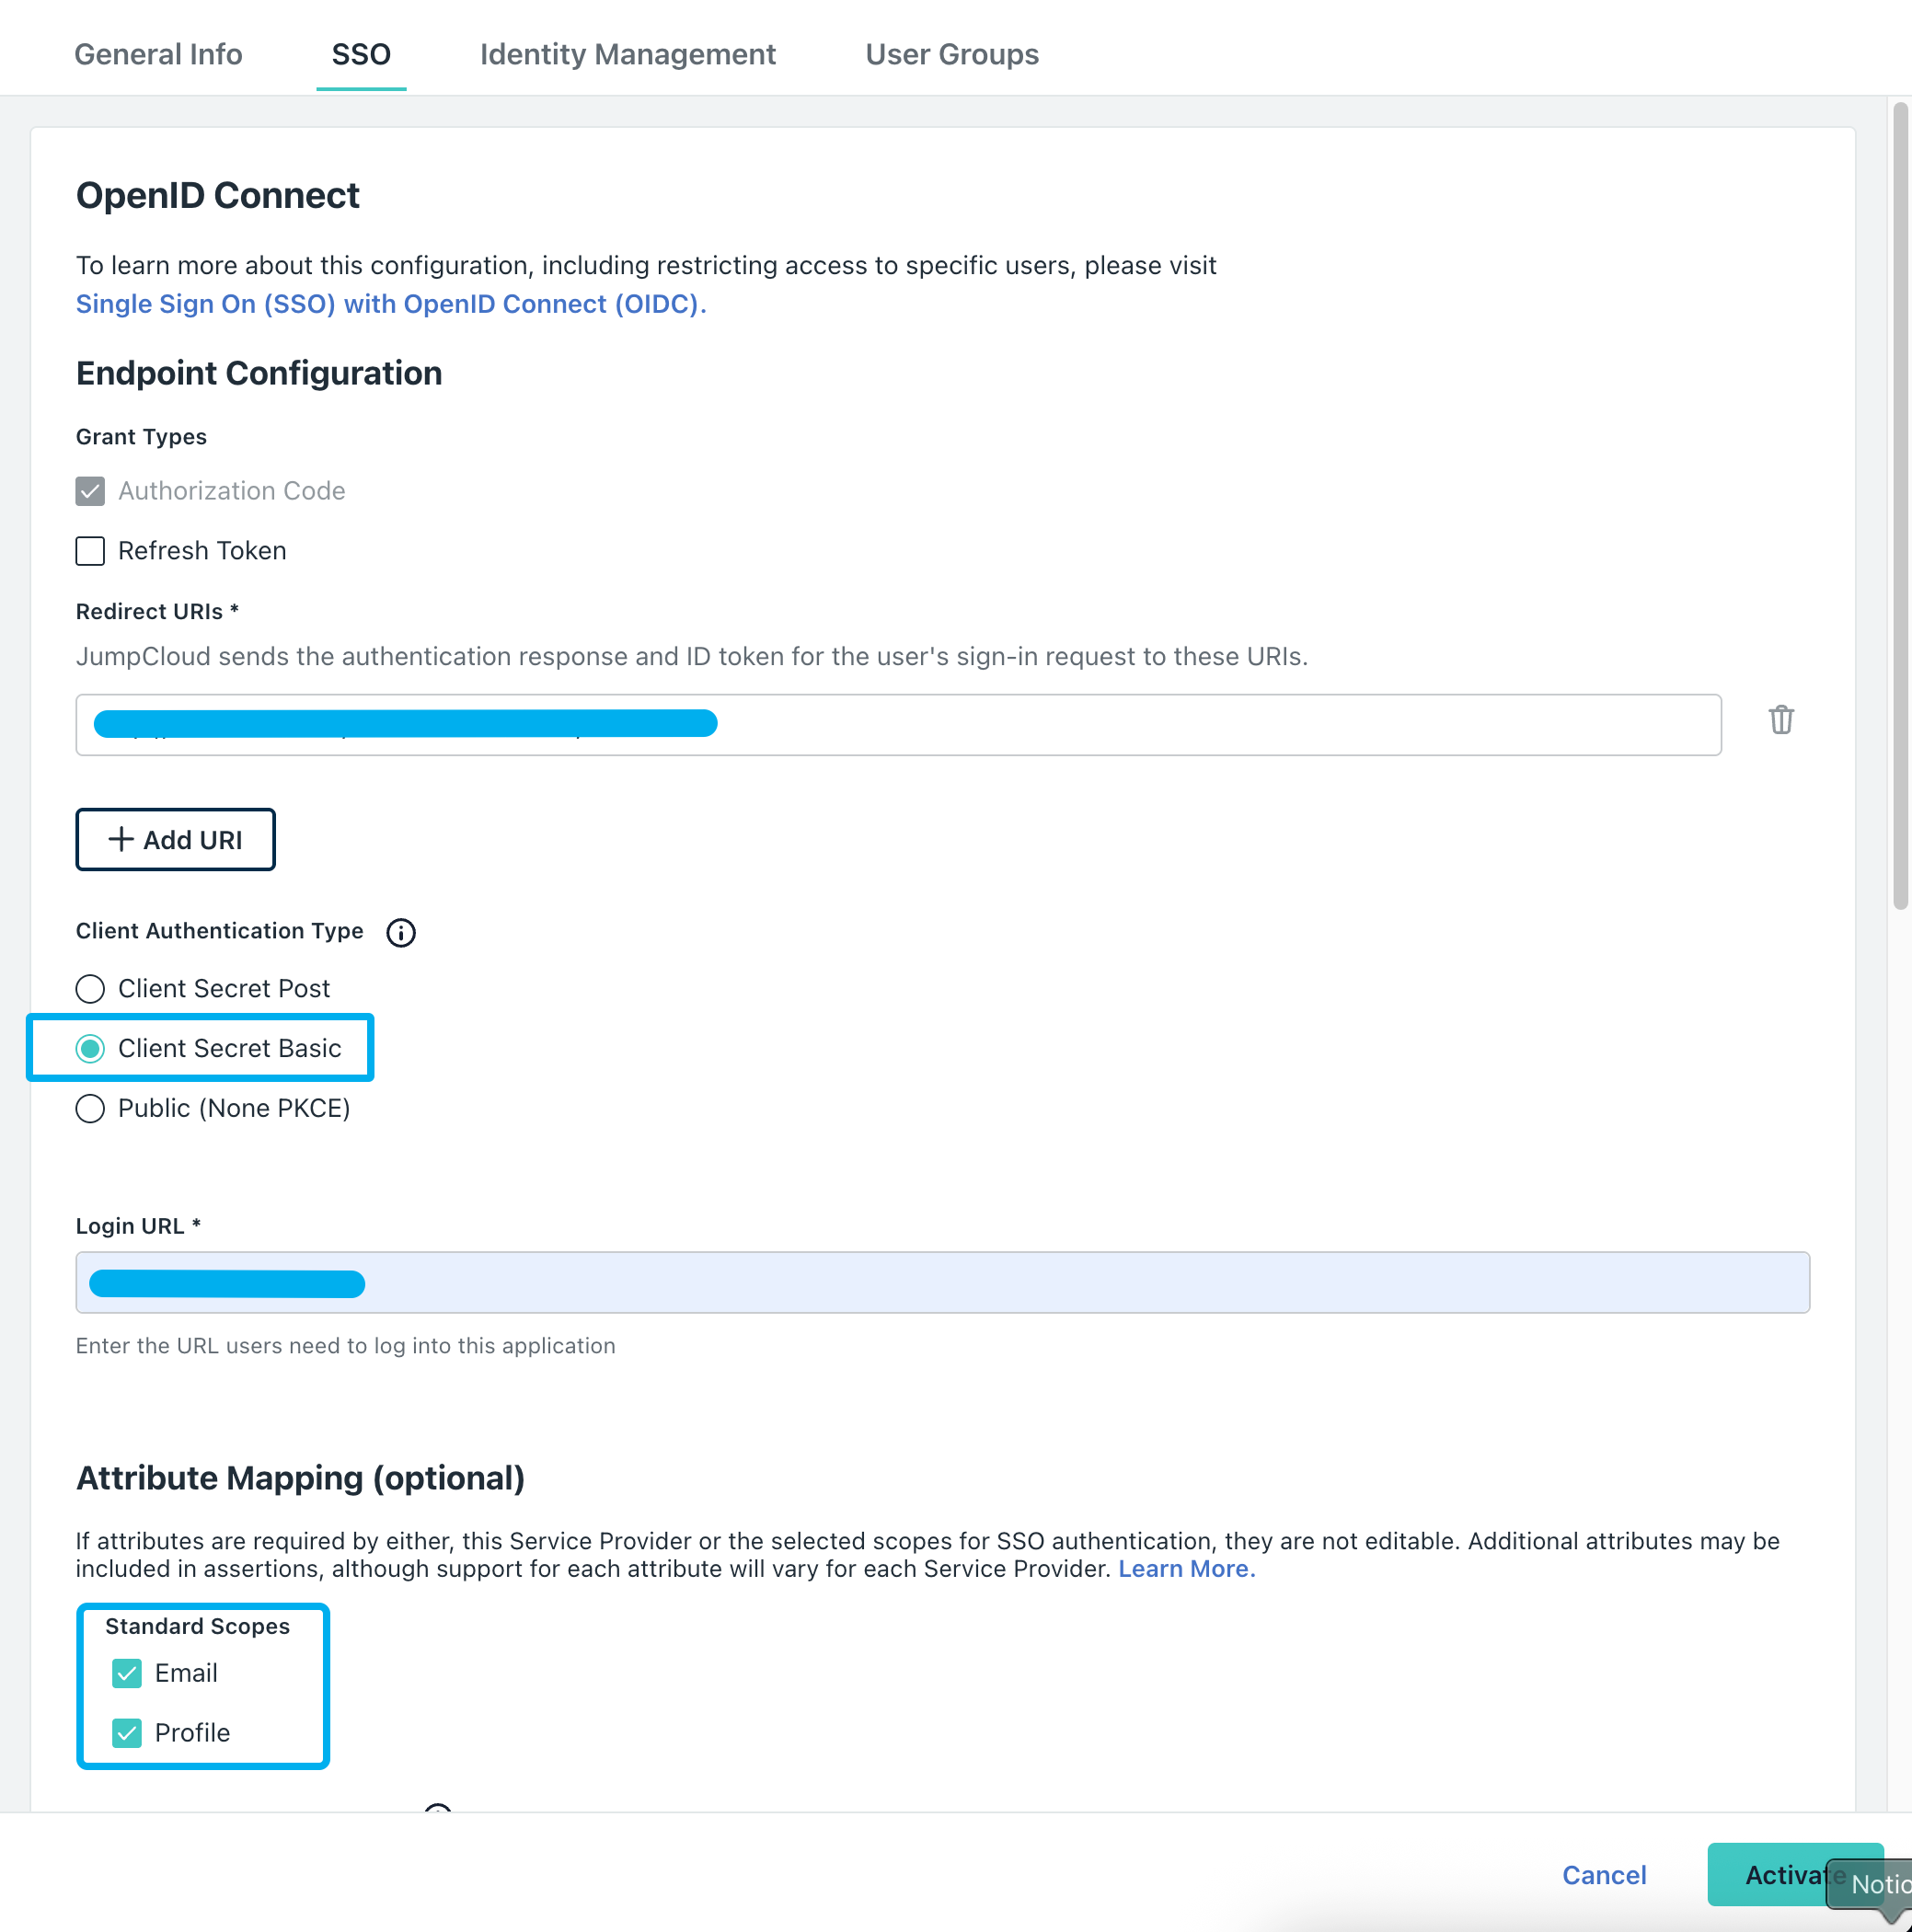
On the SSO page make the following changes:
- Redirect URIs: Enter the redirect URI for your app (e.g.,
https://myapp.com/callback). See here for more details on the callback URL that you should provide to your users. - Client Authentication Type: Select “Client Secret Basic”.
- Login URL: Enter your application’s login URL (e.g.,
https://myapp.com/login). - Attribute Mapping (optional): Select both Email and Profile.
- Redirect URIs: Enter the redirect URI for your app (e.g.,
-
Click Activate.
-
A modal will appear with the Client ID and Client Secret. Copy and paste them into
{your application}.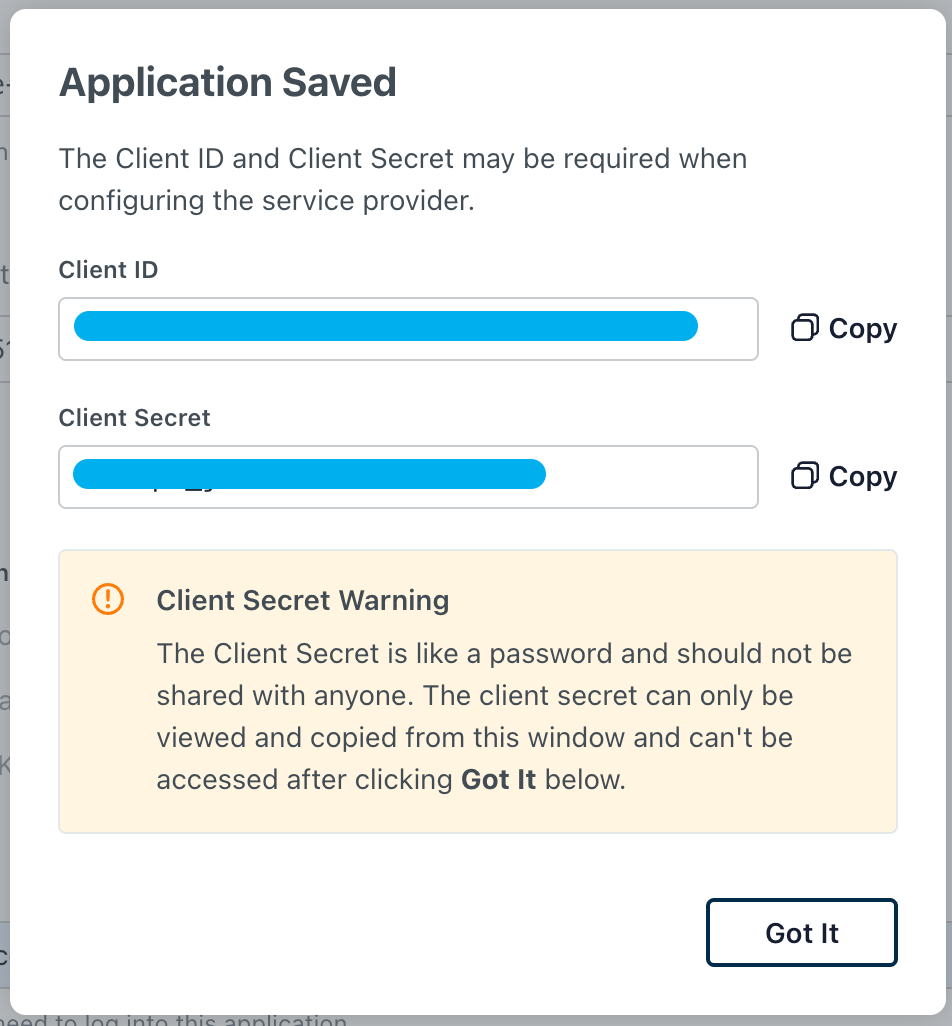
-
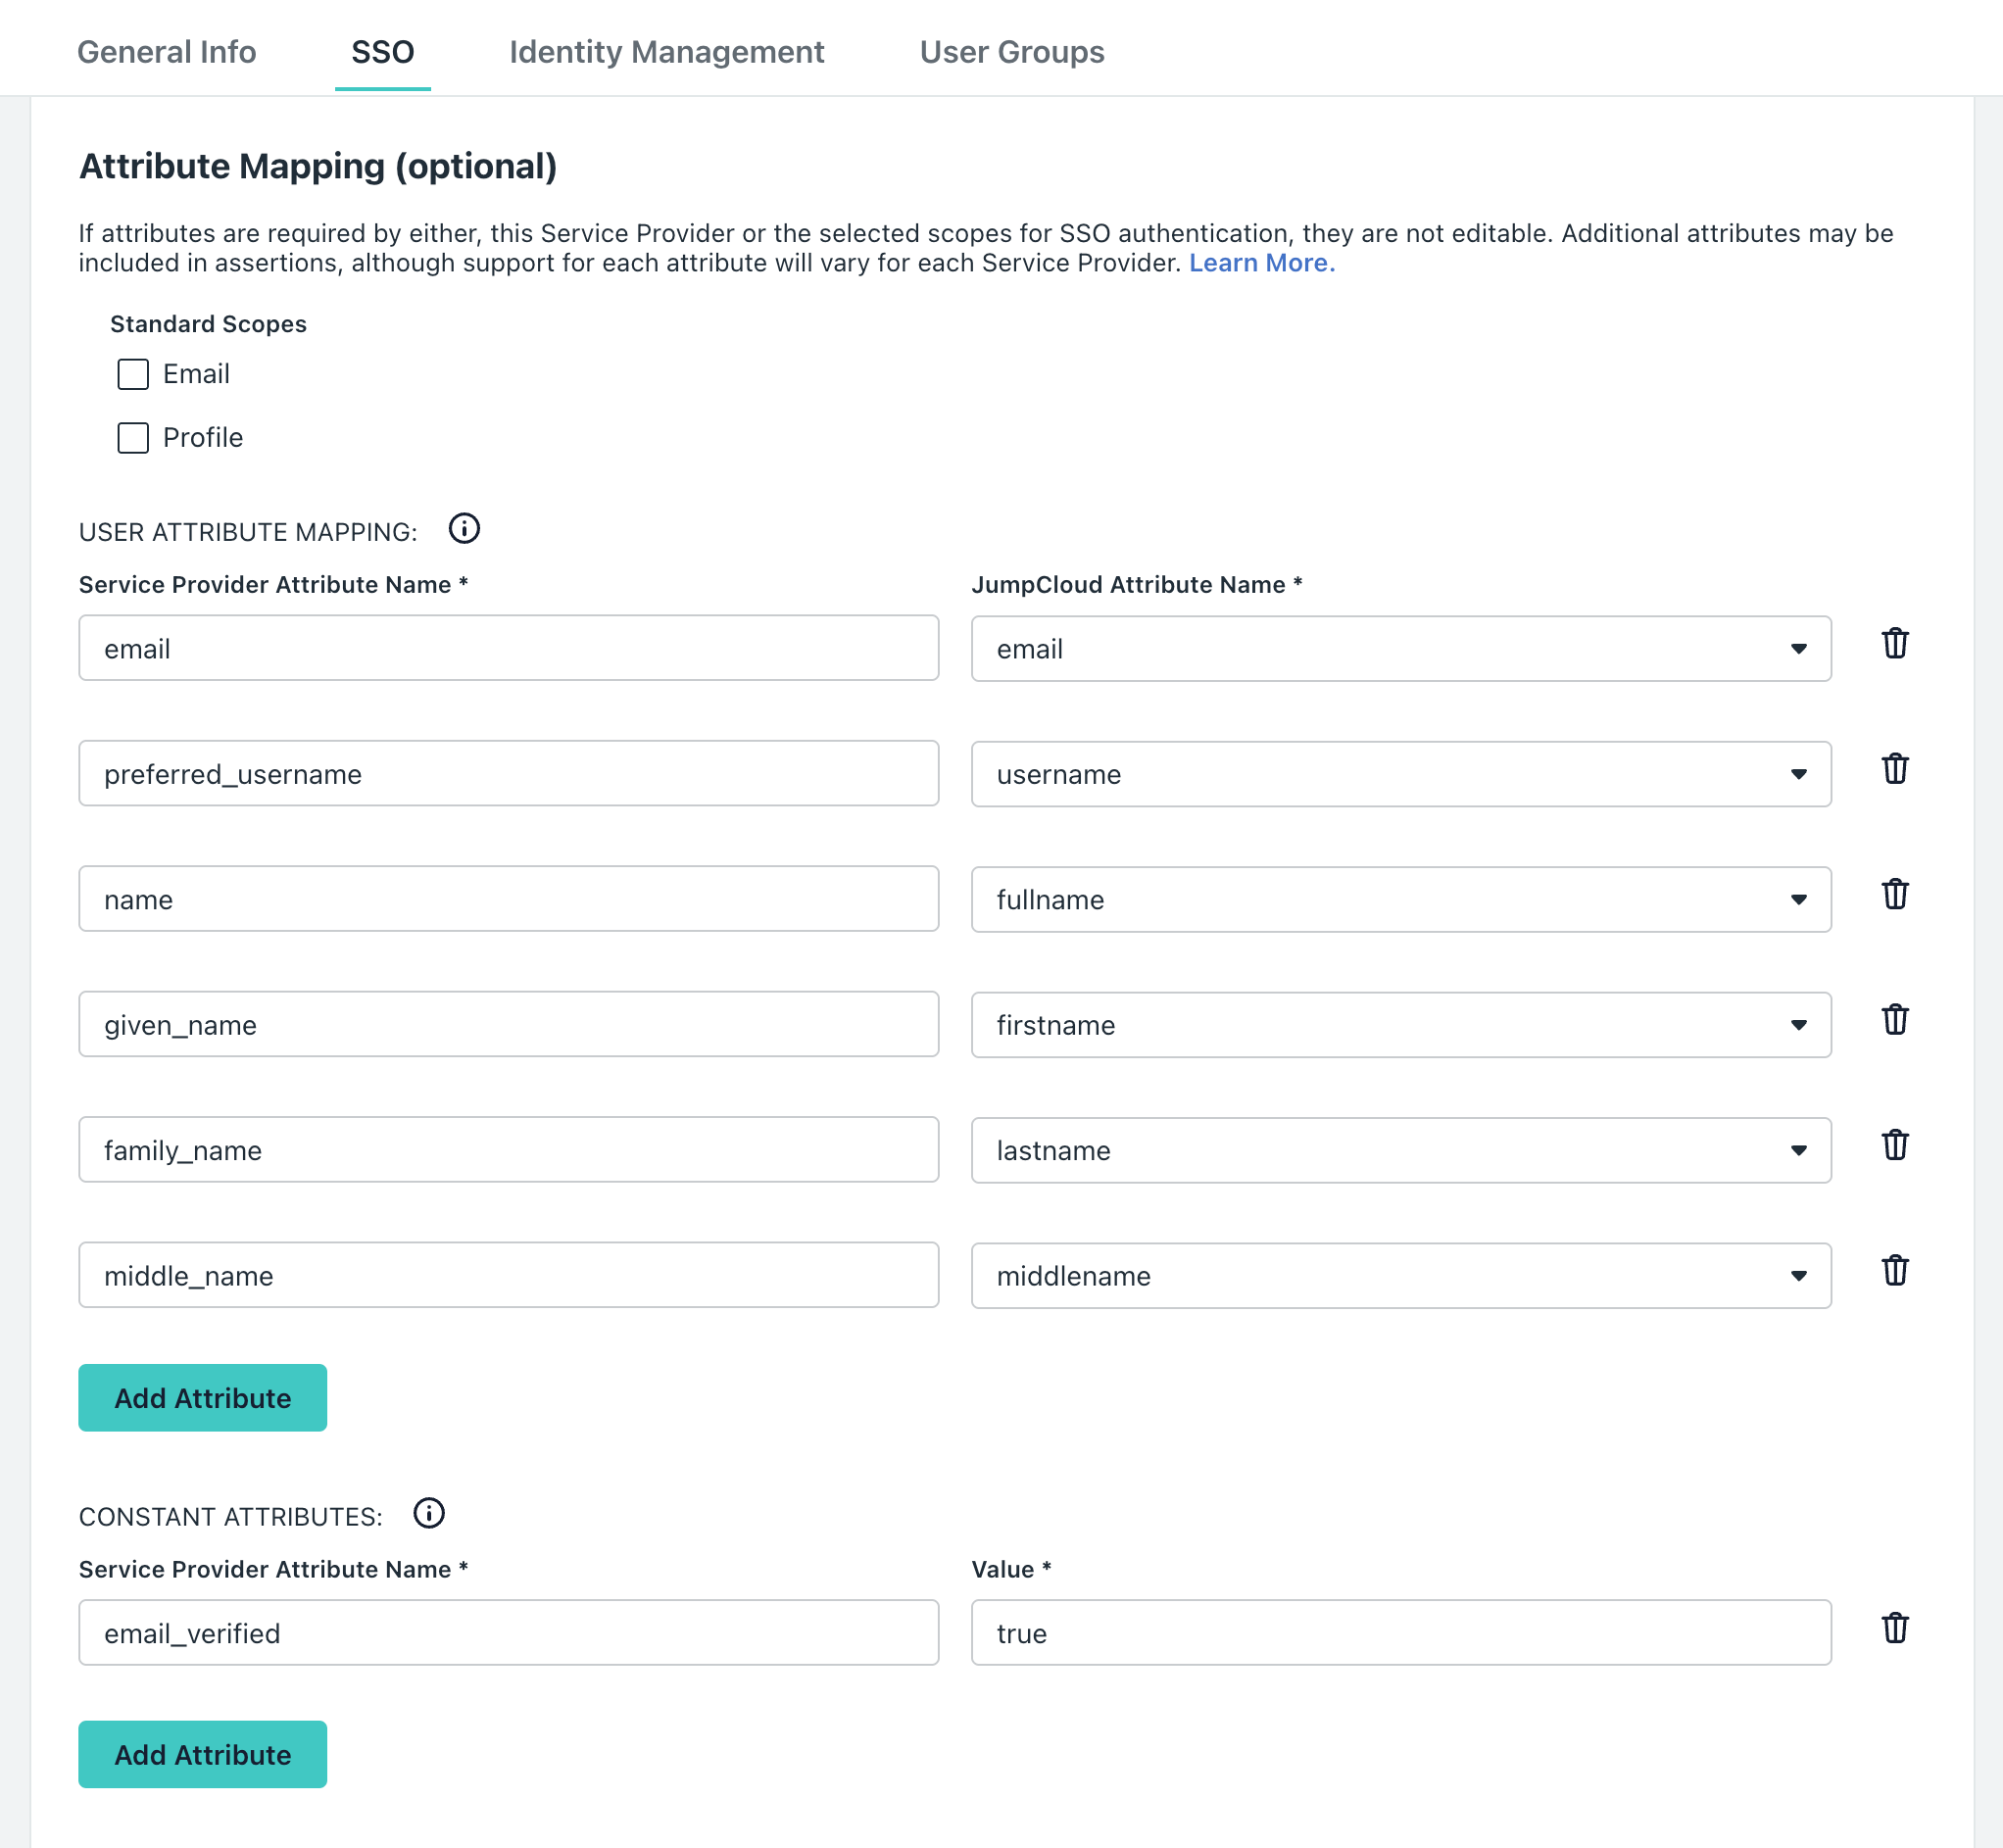
Make sure there are no duplicate attributes in the User Attribute and Constant Attributes sections. If there are duplicates, remove them. Then, click Save.
-
Copy and paste the following URLs into
{your application}:- Authorize URL:
https://oauth.id.jumpcloud.com/oauth2/auth - Token URL:
https://oauth.id.jumpcloud.com/oauth2/token - Userinfo URL:
https://oauth.id.jumpcloud.com/userinfo
- Authorize URL:
-
Click Save in
{your application}.