BYO Dashboard
The PropelAuth BYO Dashboard is your central hub for managing user authentication and authorization. In the BYO Dashboard, you and your co-workers can reset a user’s passkey, terminate a session, and configure custom SSO/SCIM settings without having to make any complicated SQL queries or API calls.
Adding Users to the Dashboard
Section titled “Adding Users to the Dashboard”To give additional users access to the PropelAuth BYO dashboard, click on the gear icon in the upper right and select Manage settings > Users > + New User.
When creating a user you will be asked to choose a username and a role for them.
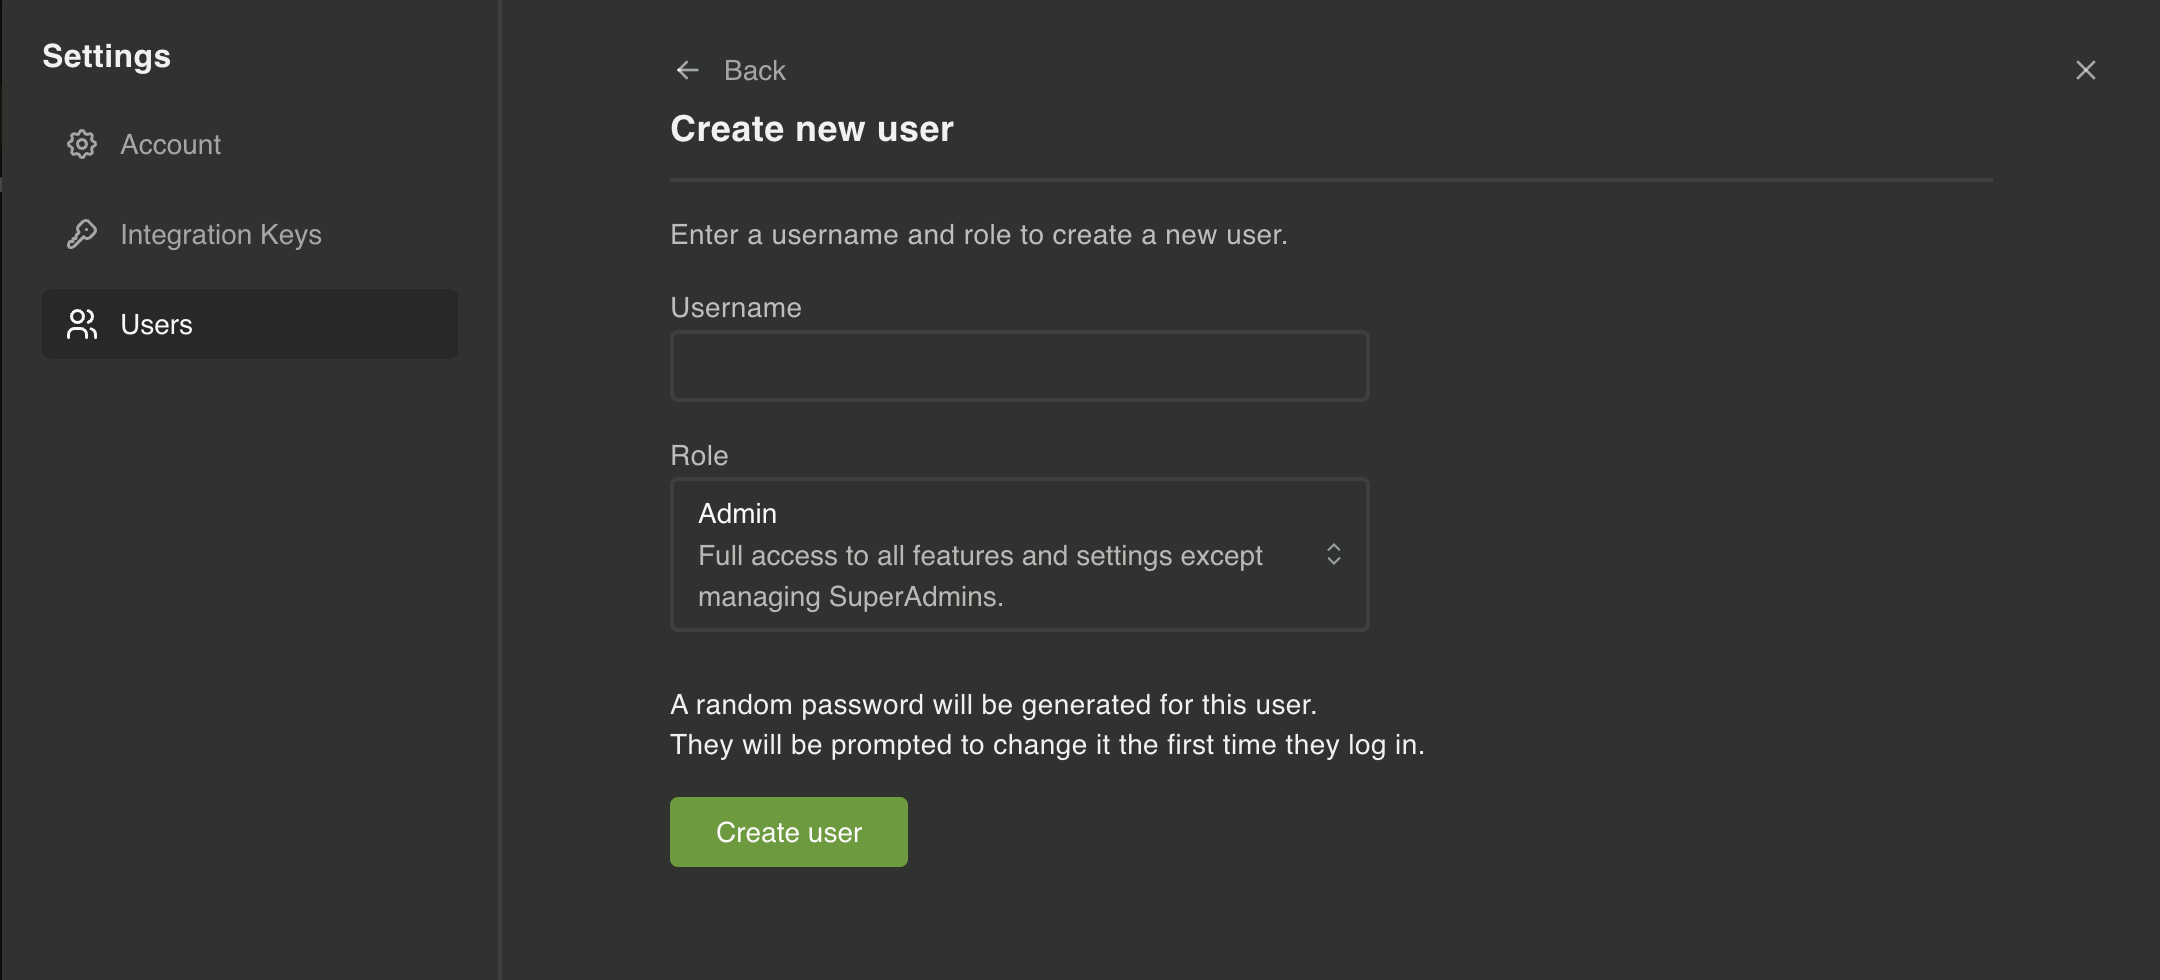
The available roles are:
- SuperAdmin - access to all features, can add and modify all existing users
- Admin - access to all features and settings, can add new users and modify existing users who are not SuperAdmins
- Editor - access to all features and settings, but cannot make changes to other users
- Read Only - can only view features, cannot modify them
Once you create the user, a random password will be generated for their first log in. The user will be prompted to change their password.
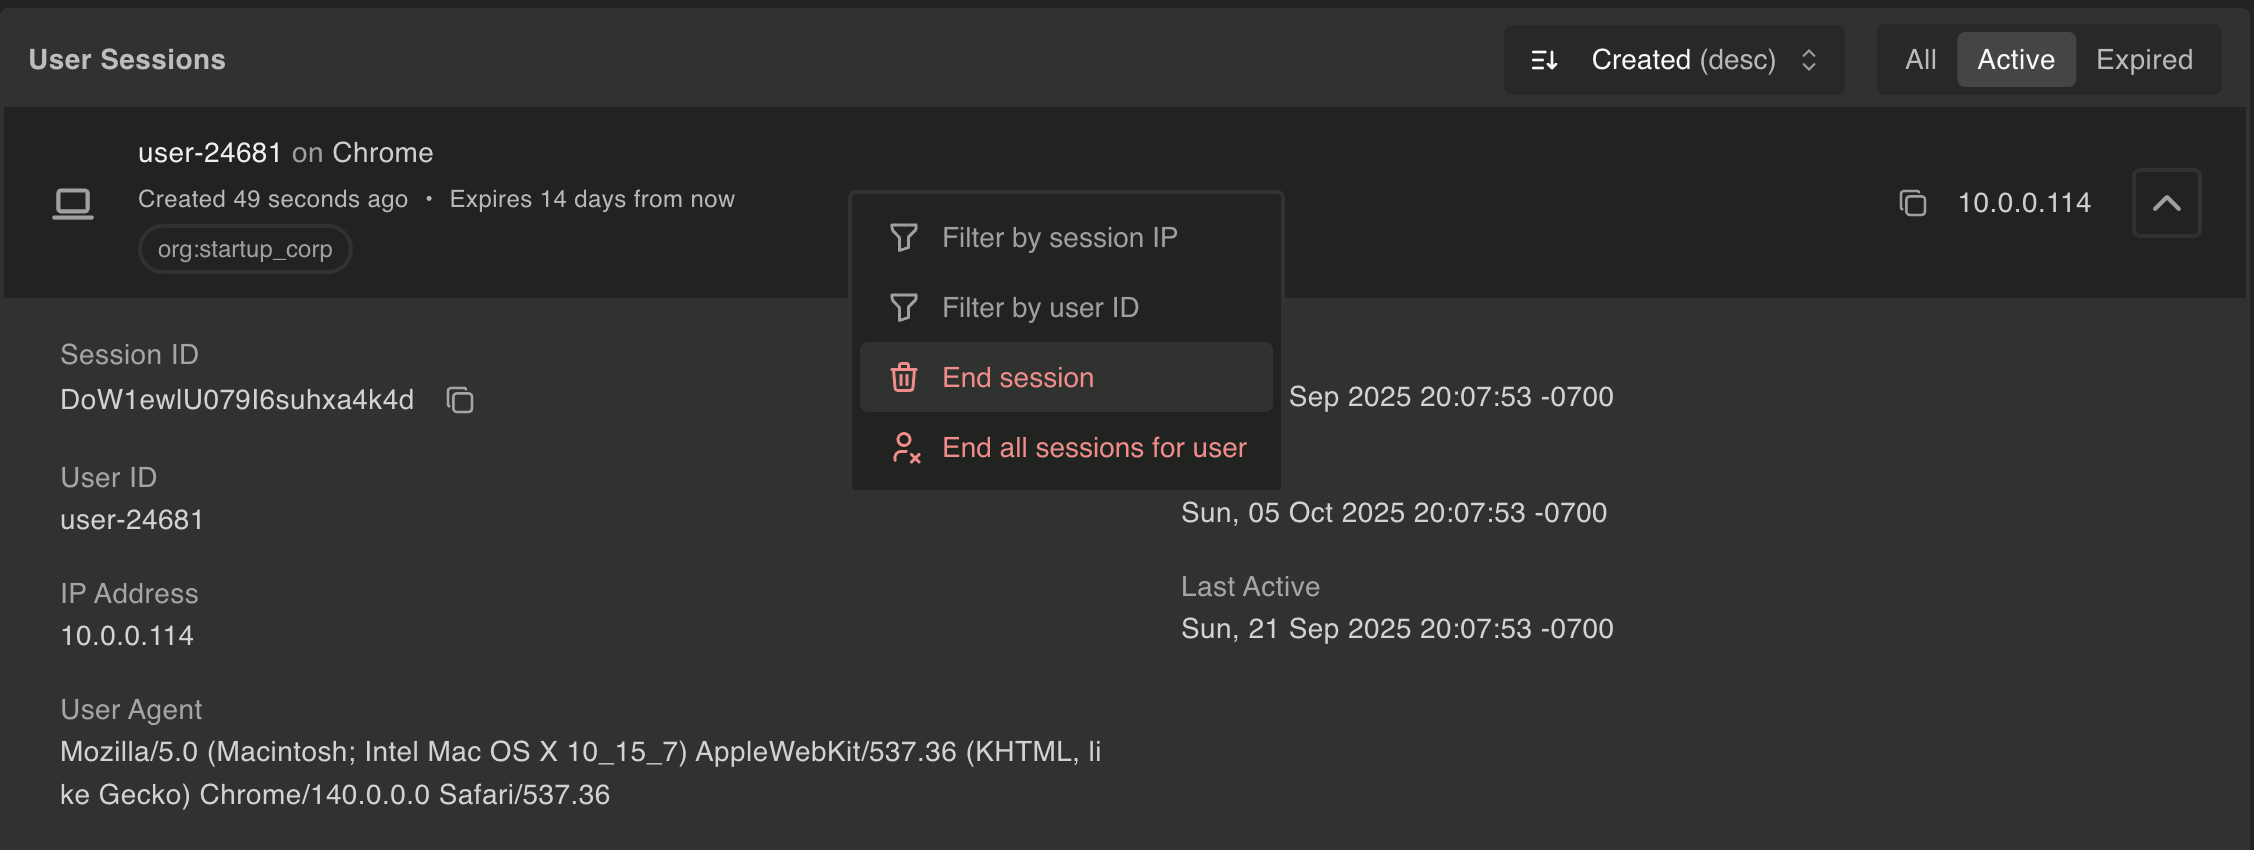
Sessions
Section titled “Sessions”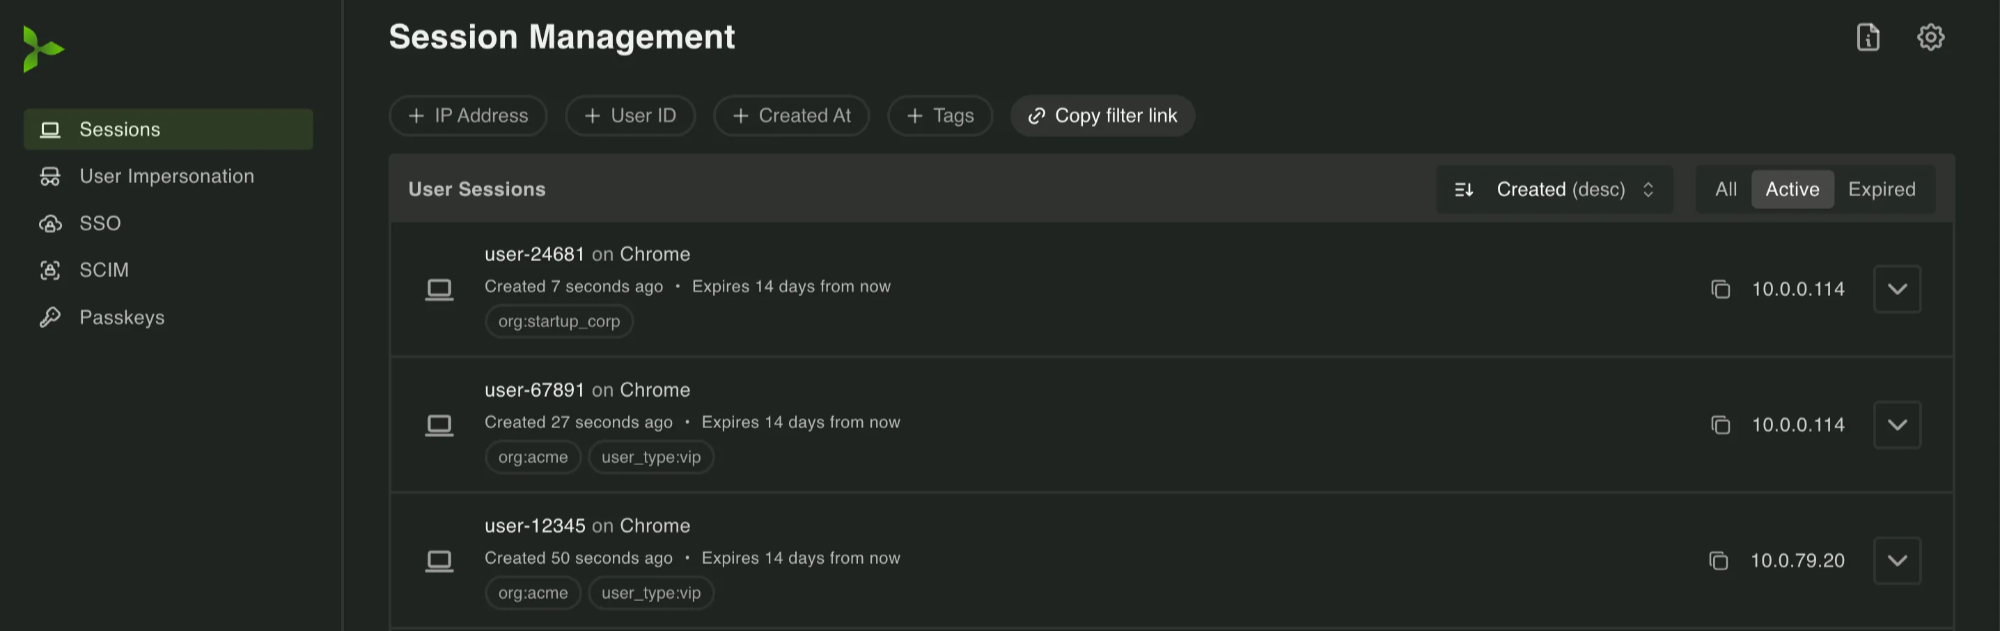
The Sessions page displays a list of all sessions created in your product, both active and expired. Sessions can be filtered by:
- IP address
- User ID
- Created At
- Tags
- Expiration Causes (if applicable)
Each session can be expanded to view more details. You can also click on the session itself to filter down to the session IP or user id, or end that single session or all sessions for that user.
User Impersonation
Section titled “User Impersonation”The User Impersonation page displays a list of all user impersonation sessions created in your product, both active and expired. Sessions can be filtered by:
- IP address
- User ID
- Employee Email
- Created At
- Expiration Causes (if applicable)
Each session can be expanded to view more details. You can also click on the session itself to filter down to the session IP or user id, or end that single session or all sessions for that user or employee.
Sessions
Section titled “Sessions”The SSO page displays a list of all SSO connections in your product.

Clicking on a Client ID will take you to a page with more details about the connection, including users, the SCIM matching strategy (if a SCIM connection is associated with this connection), and Settings.
From here, you can click on an OIDC subject to see the details of their metadata.
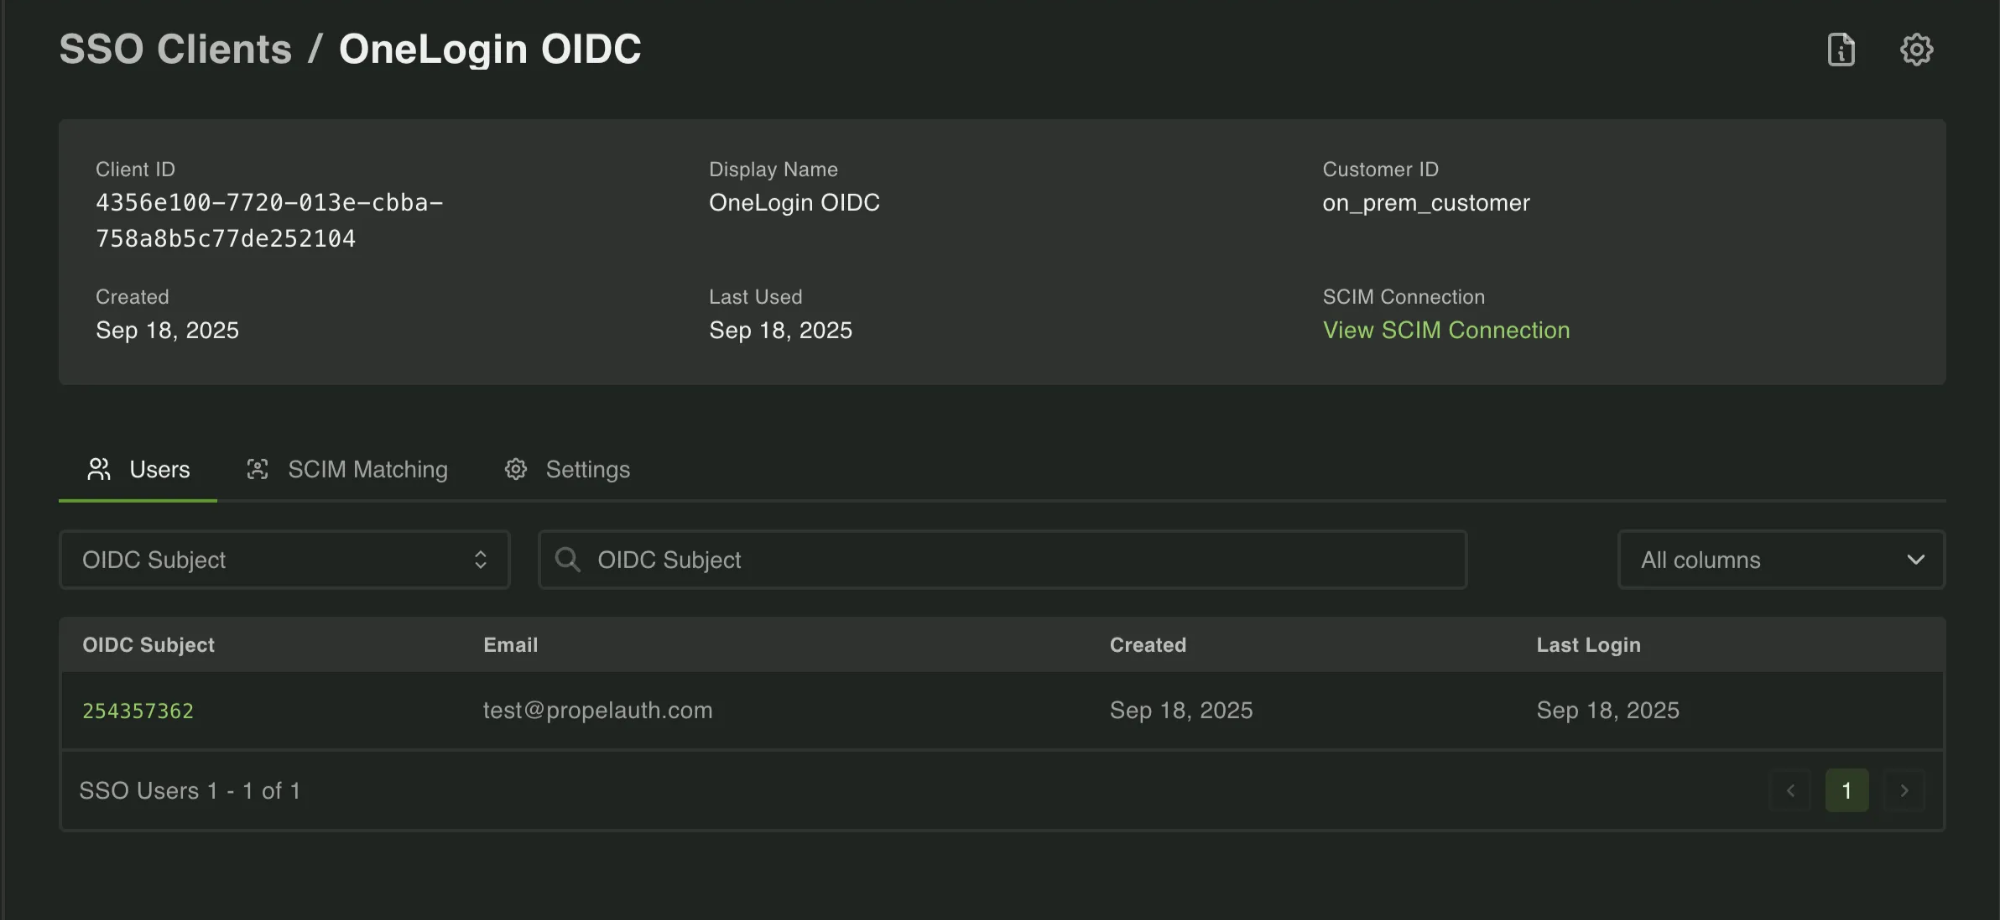
The Settings that can be changed per SSO connection via the dashboard are:
- Email Domain Allowlist - limits the accounts allowed to use this SSO connection to only those in the Allowlist
- Redirect URL - the URL users using this connection will be redirected to upon login
The SCIM page displays a list of all SCIM connections in your product.

Clicking on a Connection ID will take you to a page with more details about the connection, including the users and group associated with the connection, as well as the Mapping configuration.
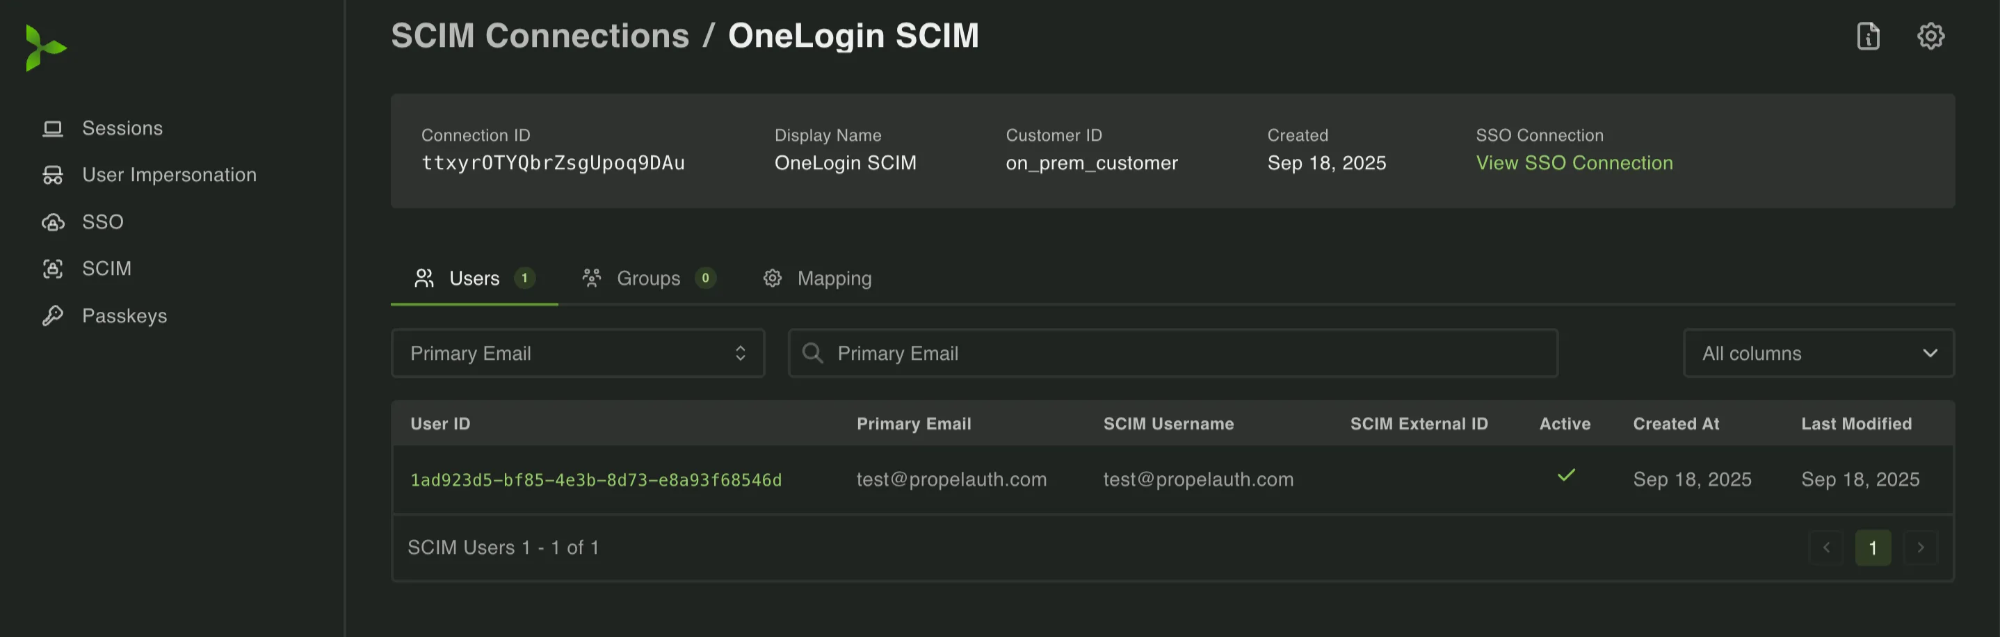
Clicking into a User will show you information about the SCIM User Data sent over during the last SCIM sync.
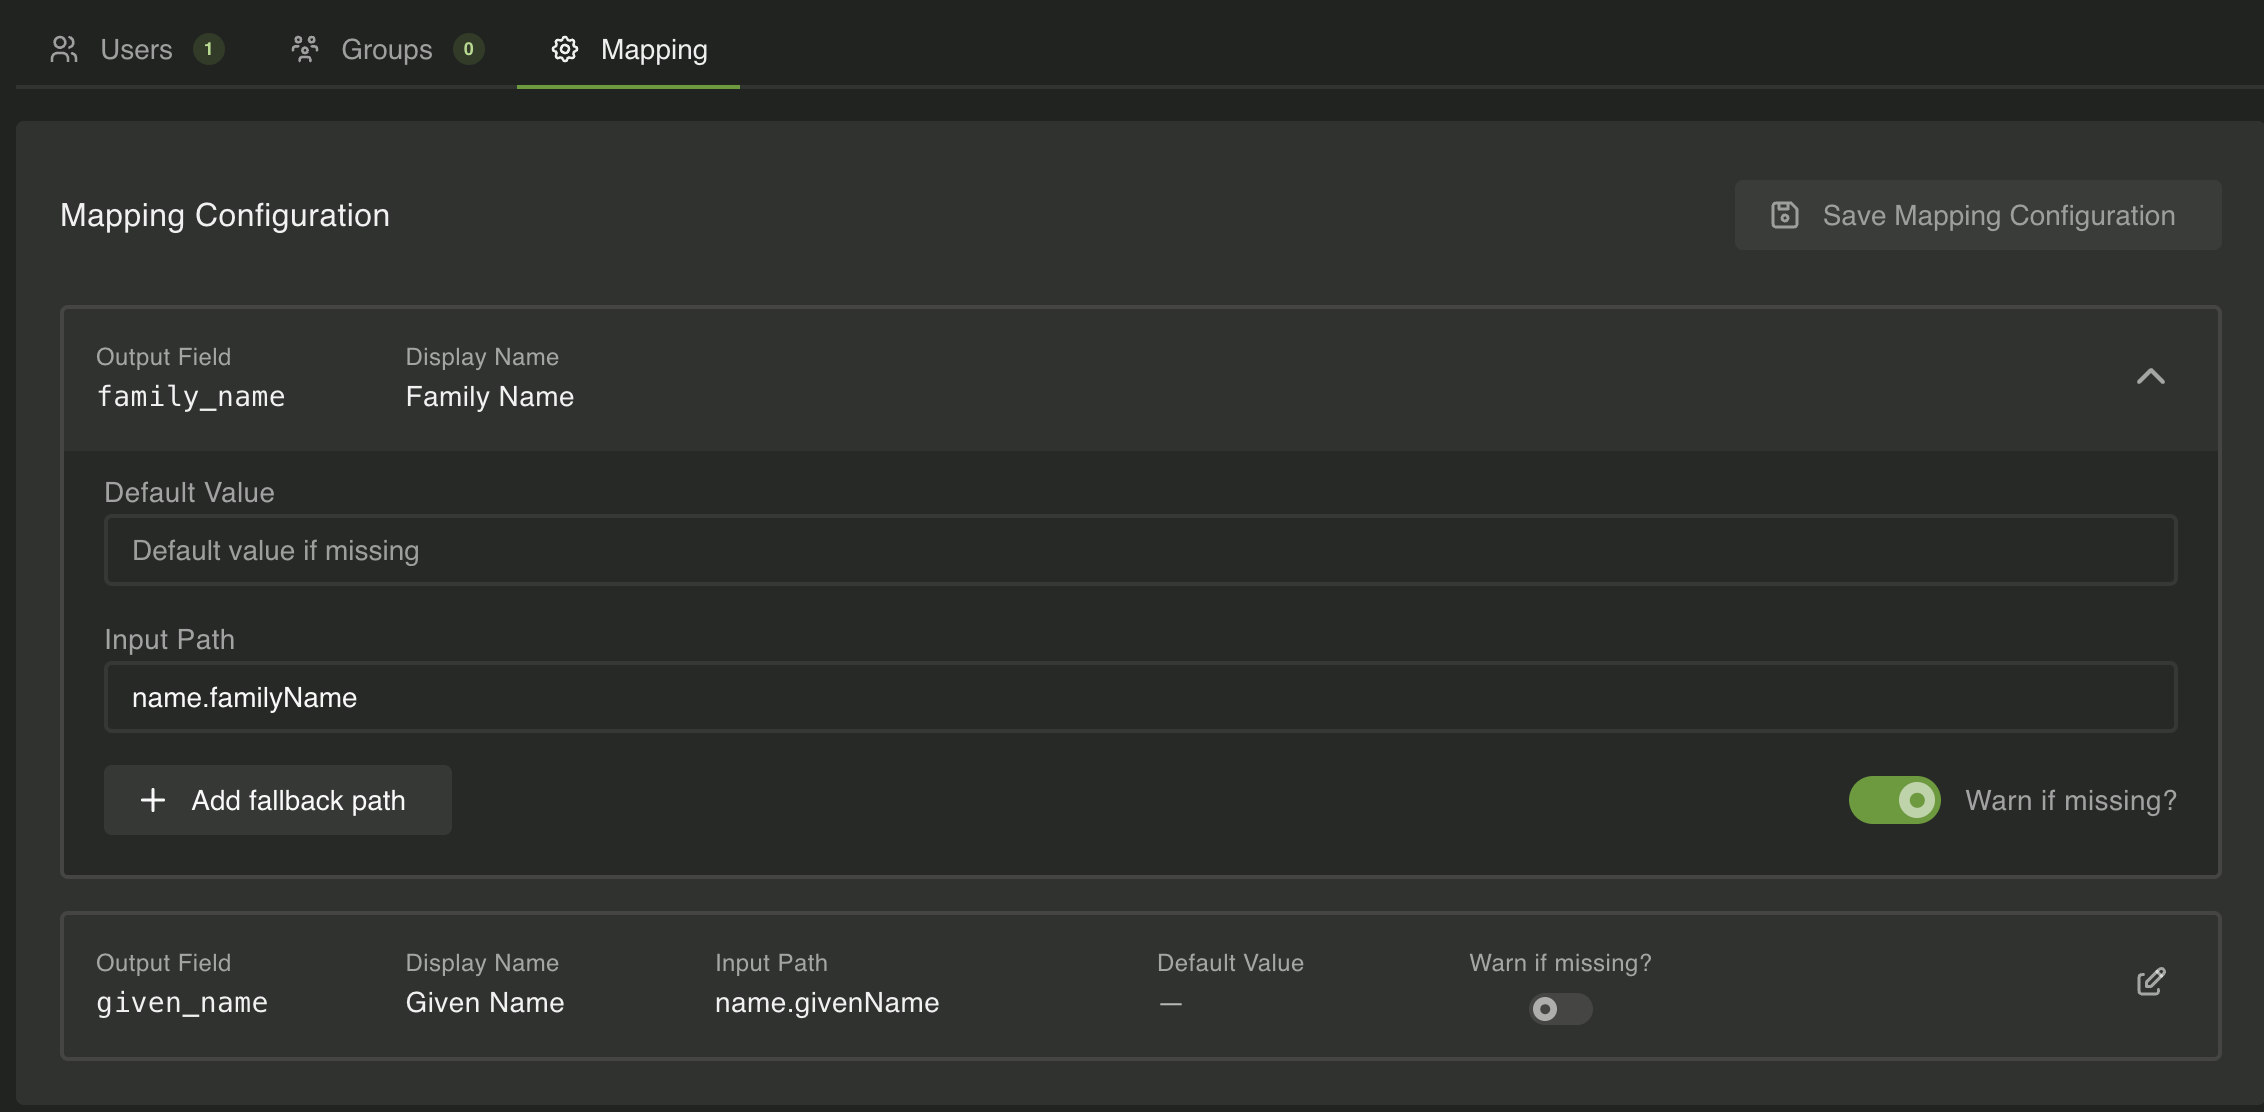
You can make changes to the Mapping configuration via either an individual user’s page or the Mapping tab. Note that if you make a change via an individual’s page it will apply to the entire connection.
Passkeys
Section titled “Passkeys”The Passkeys page displays a list of all Passkeys in use in your product. You can view the passkeys and revoke them from this page.