Okta SSO Setup Guide
Providing documentation to your users on how to set up SSO with Okta is important for a smooth integration process. To make the process easier for your customers we provide a configuration specific to Okta, allowing you to skip collecting the OIDC URLs and instead just collect a SSO Domain.
const result = await client.sso.management.createOidcClient({ redirectUrl: "https://app.example.com/authorization-code/callback", customerId: "your_customer_id", idpInfoFromCustomer: { idpType: "Okta", ssoDomain: "example.okta.com", clientId: "5c891426-22...", clientSecret: "aNb8Q-v2R...", usesPkce: true, },});from propelauth_byo.generated.idp_info_from_customer import IdpInfoFromCustomerOkta
result = await client.sso.management.create_oidc_client( redirect_url="https://app.example.com/authorization-code/callback", customer_id="your_customer_id", idp_info_from_customer=IdpInfoFromCustomerOkta( sso_domain="example.okta.com", client_id="5c891426-22...", client_secret="aNb8Q-v2R...", uses_pkce=True, ),)CreateOidcClientResponse result = client.sso.management.createOidcClient( CreateOidcClientCommand.builder() .redirectUrl("https://app.example.com/authorization-code/callback") .customerId("your_customer_id") .idpInfoFromCustomer( IdpInfoFromCustomer.Okta.builder() .ssoDomain("example.okta.com") .clientId("5c891426-22...") .clientSecret("aNb8Q-v2R...") .usesPkce(true) .build() ) .build());var result = await client.Sso.Management.CreateOidcClientAsync(new CreateOidcClientCommand{ RedirectUrl = "https://app.example.com/authorization-code/callback", CustomerId = "your_customer_id", IdpInfoFromCustomer = new IdpInfoFromCustomerOkta { SsoDomain = "example.okta.com", ClientId = "5c891426-22...", ClientSecret = "aNb8Q-v2R...", UsesPkce = true }});Below is an example guide of what this documentation could look like, as well as how to collect the SSO Domain from your users.
-
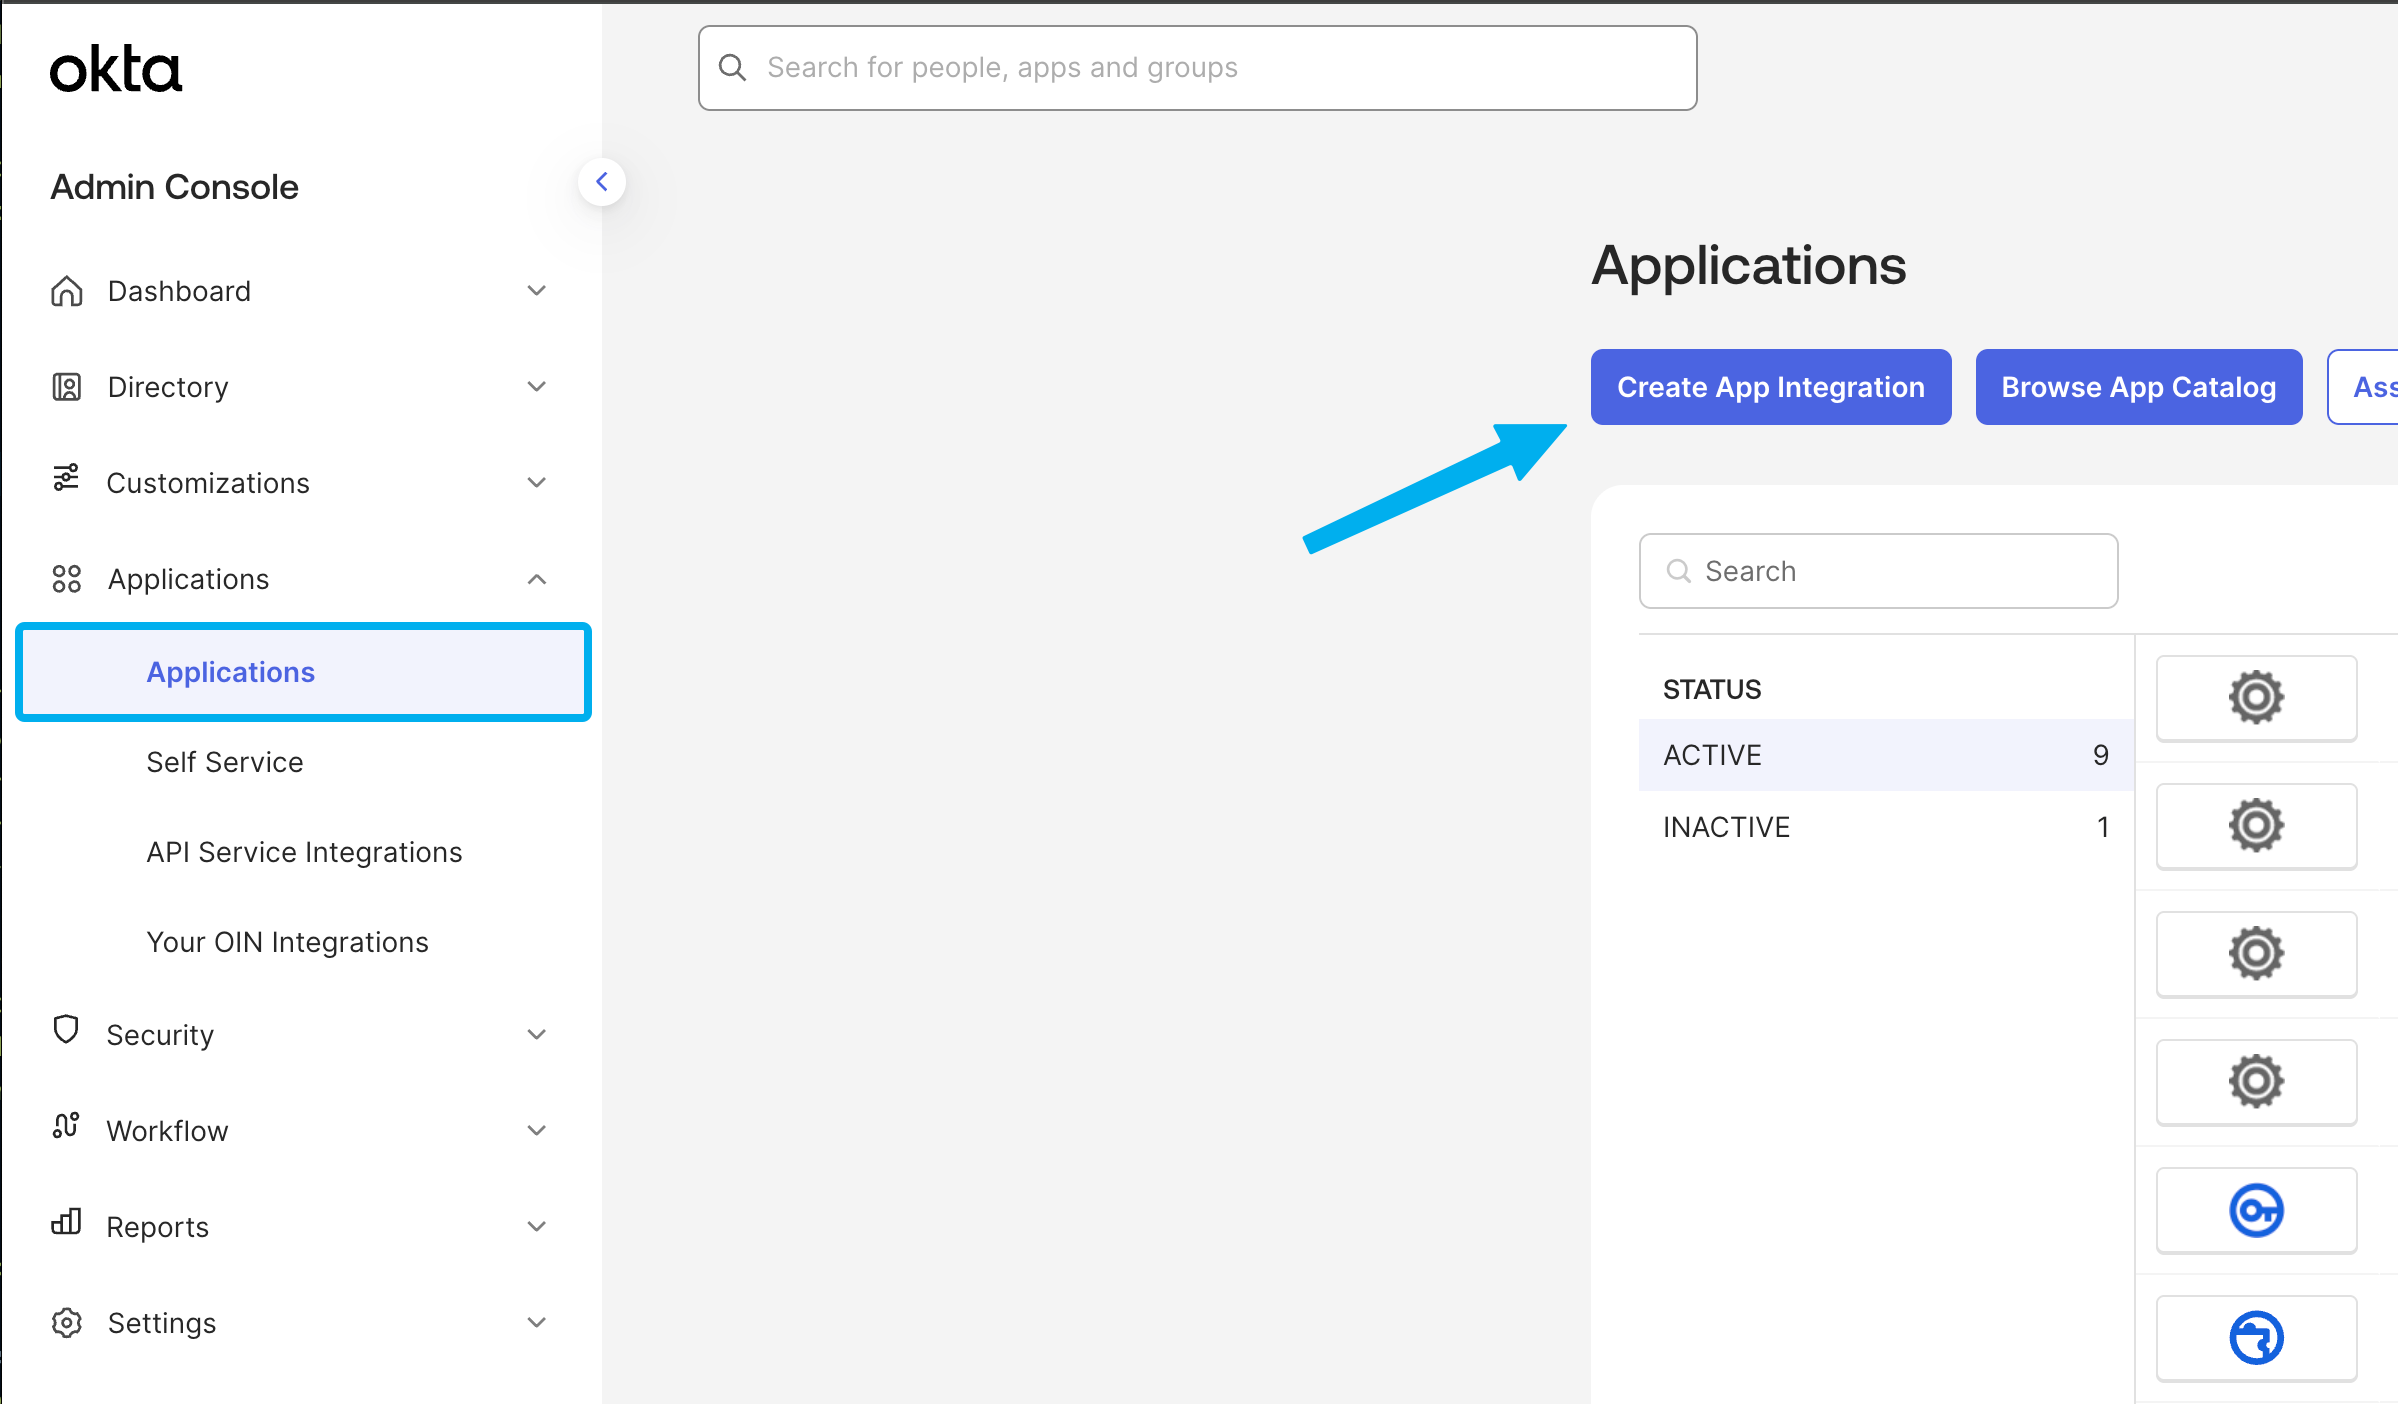
Begin by logging into your Okta admin console and navigating to the “Applications” section.
-
Click Create App integration.
-
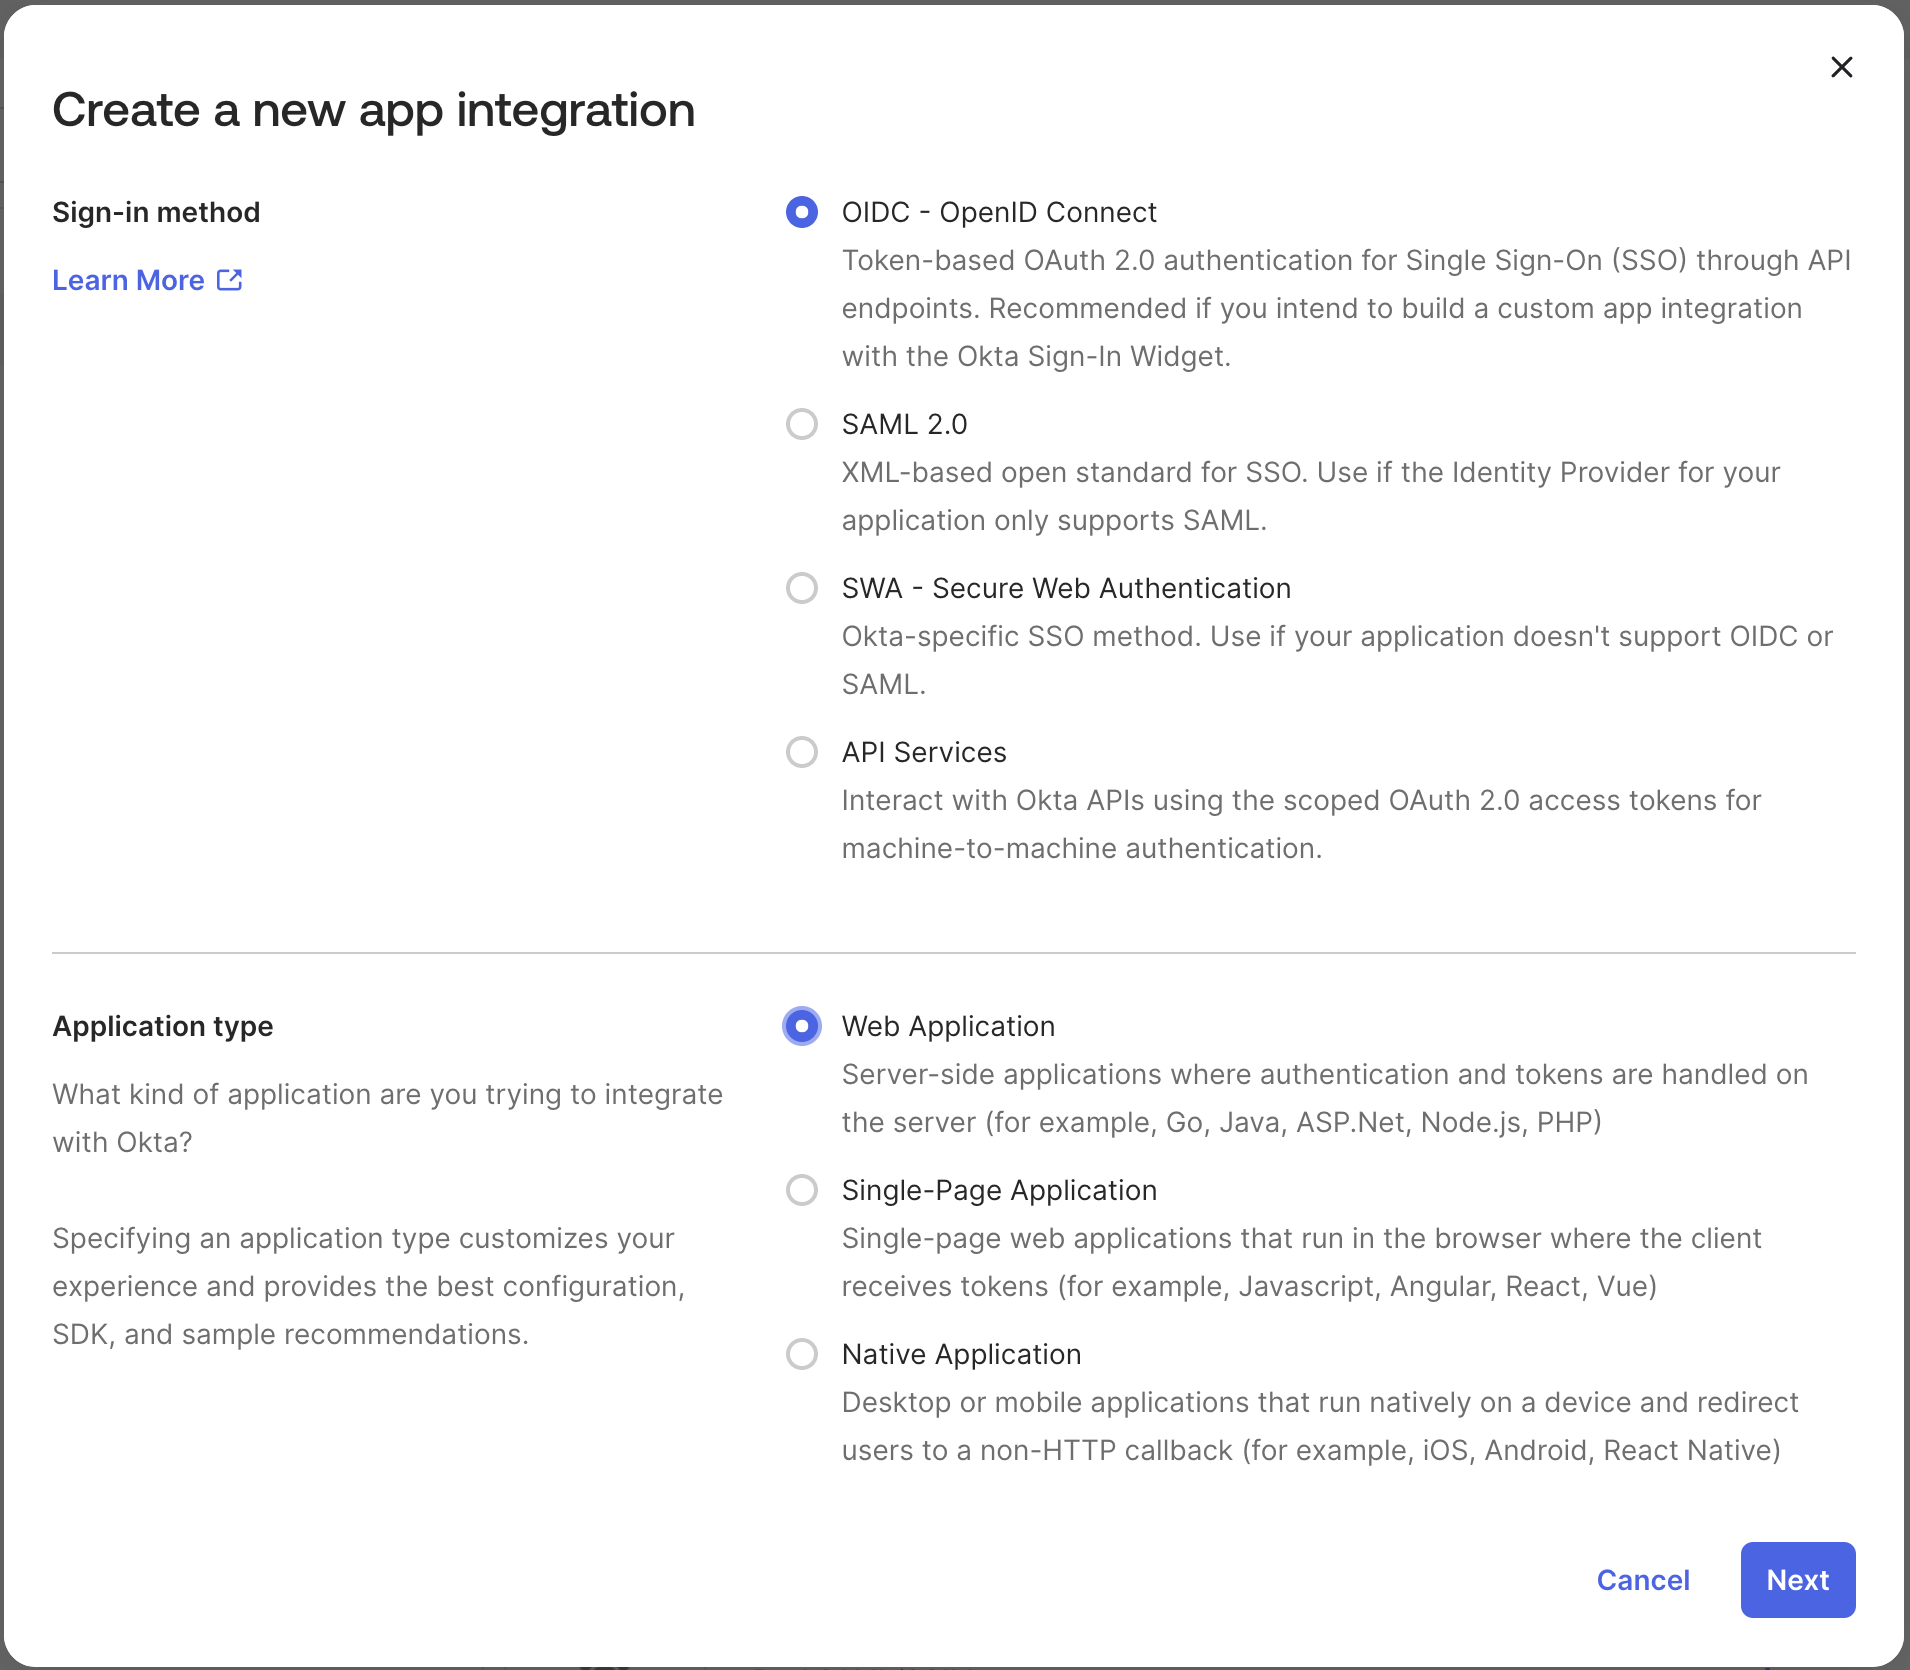
Select OIDC - OpenID Connect as the app type and Web Application as the Application Type. Click Next.
-
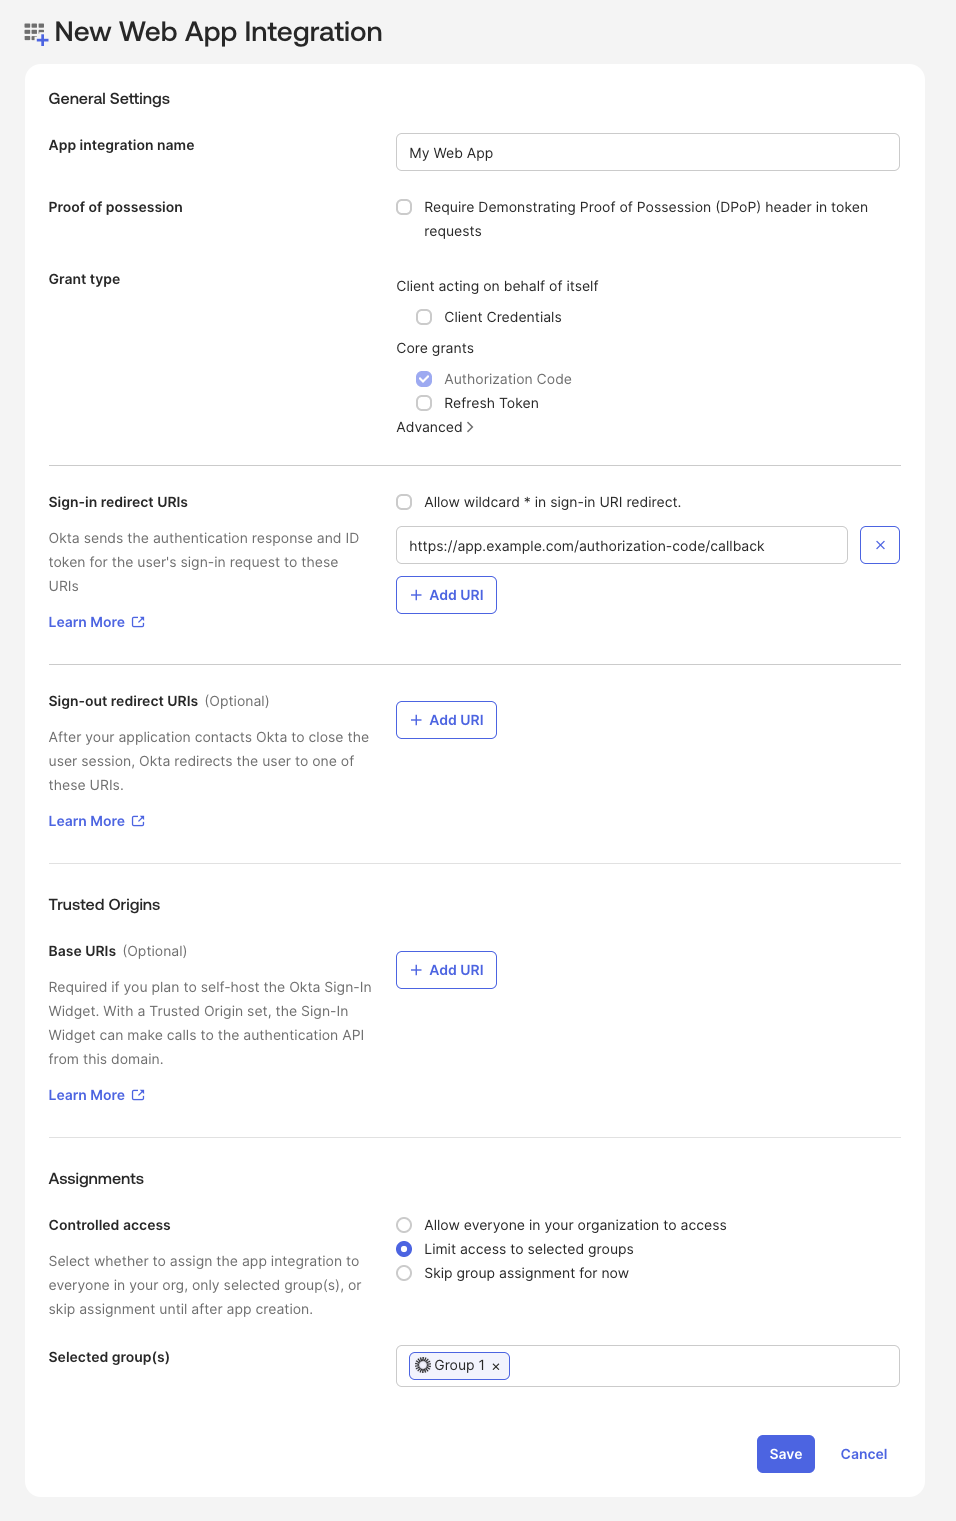
On the next page make the following changes:
- App integration name: Enter a name for your app integration (e.g., “My App”).
- Grant type: Select “Authorization Code” as the grant type.
- Sign-in redirect URIs: Enter the redirect URI for your app (e.g.,
https://myapp.com/callback). See here for more details on the callback URL that you should provide to your users. - Assignments: Assign the app to the appropriate users or groups.
-
Once the app is created, click Edit and select Require PKCE as additional verification. (Make sure to set
usesPkceto true when creating the OIDC client) -
Copy the Client ID and Client Secret and paste them into
{your application}.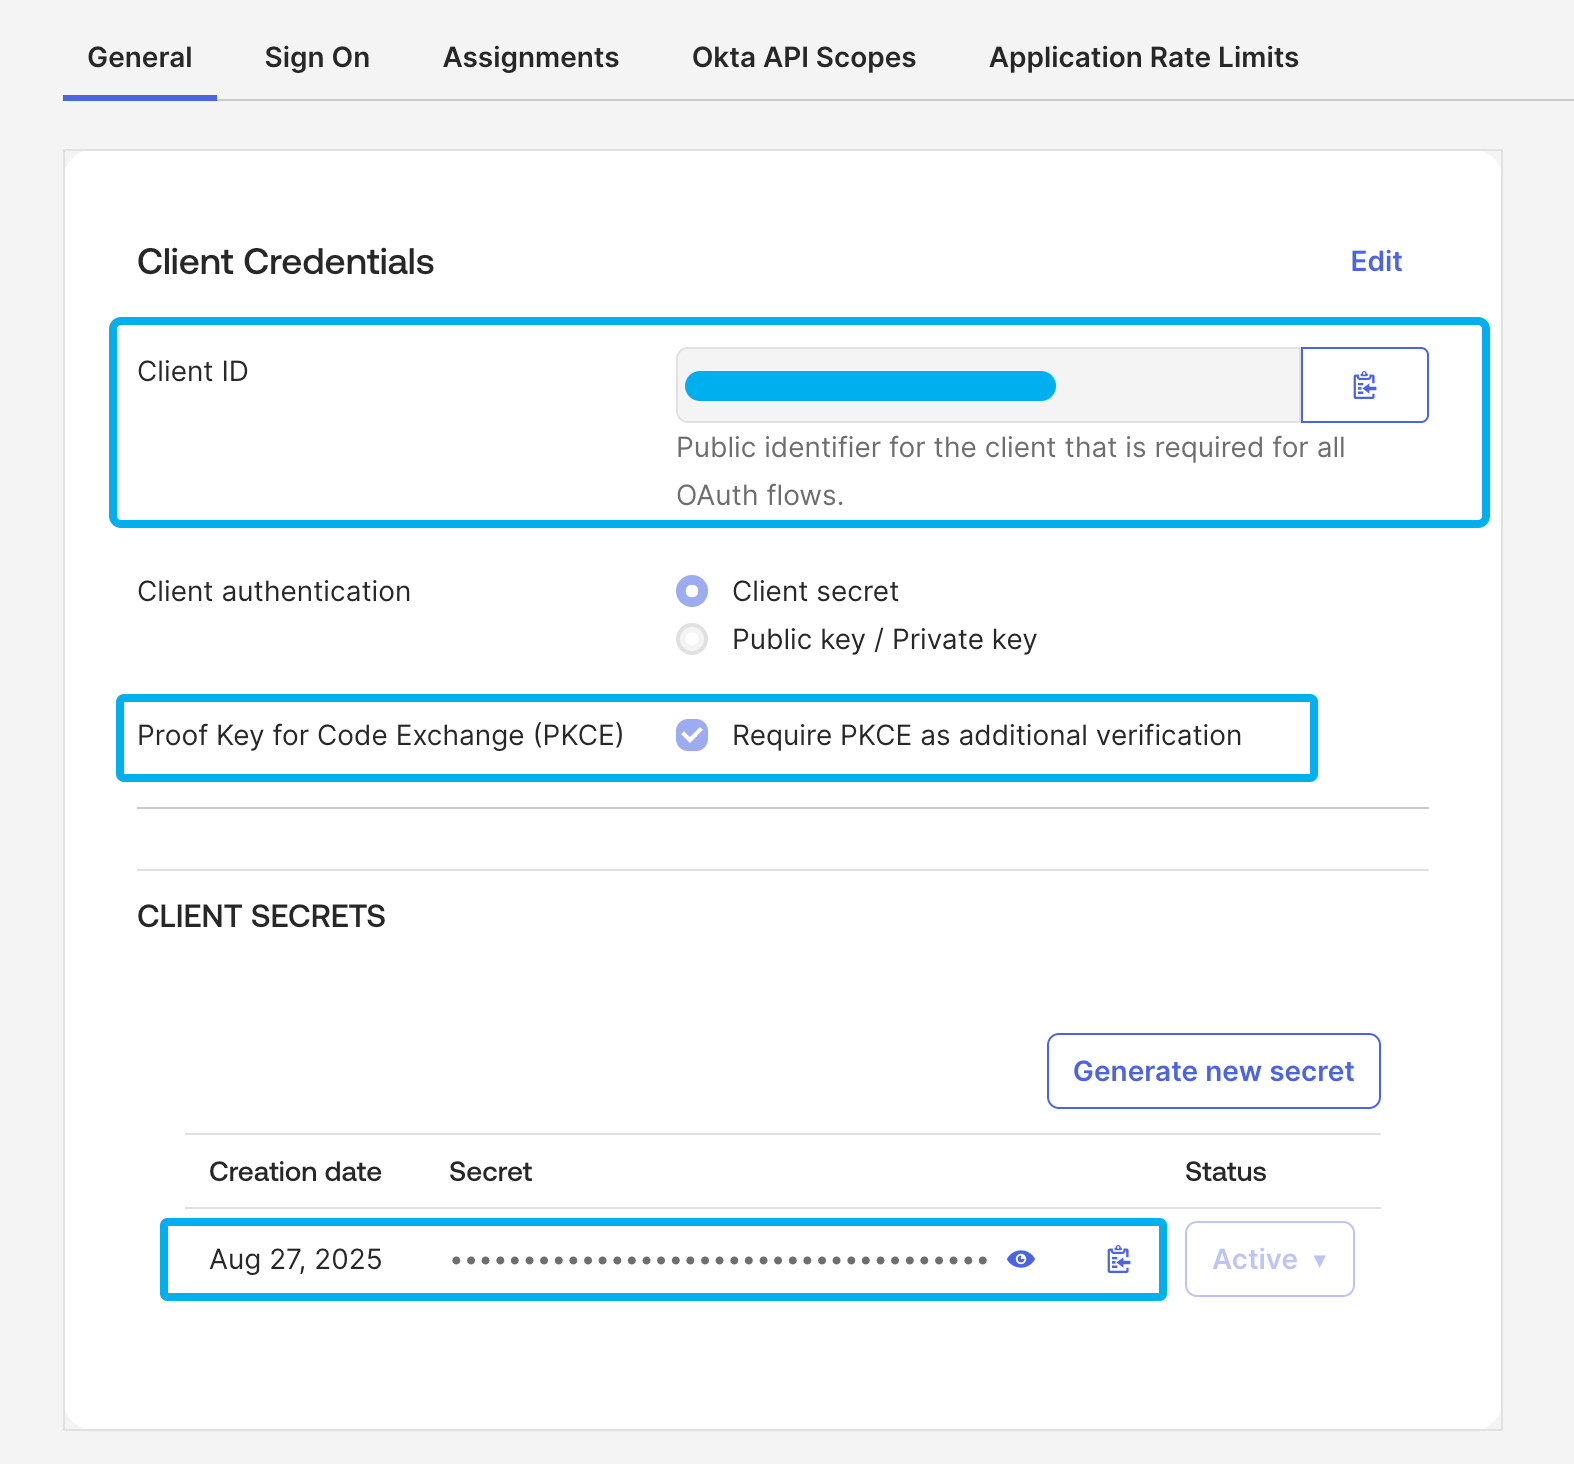
-
Lastly, click on the dropdown menu in the top right corner and copy the SSO Domain and paste it into
{your application}.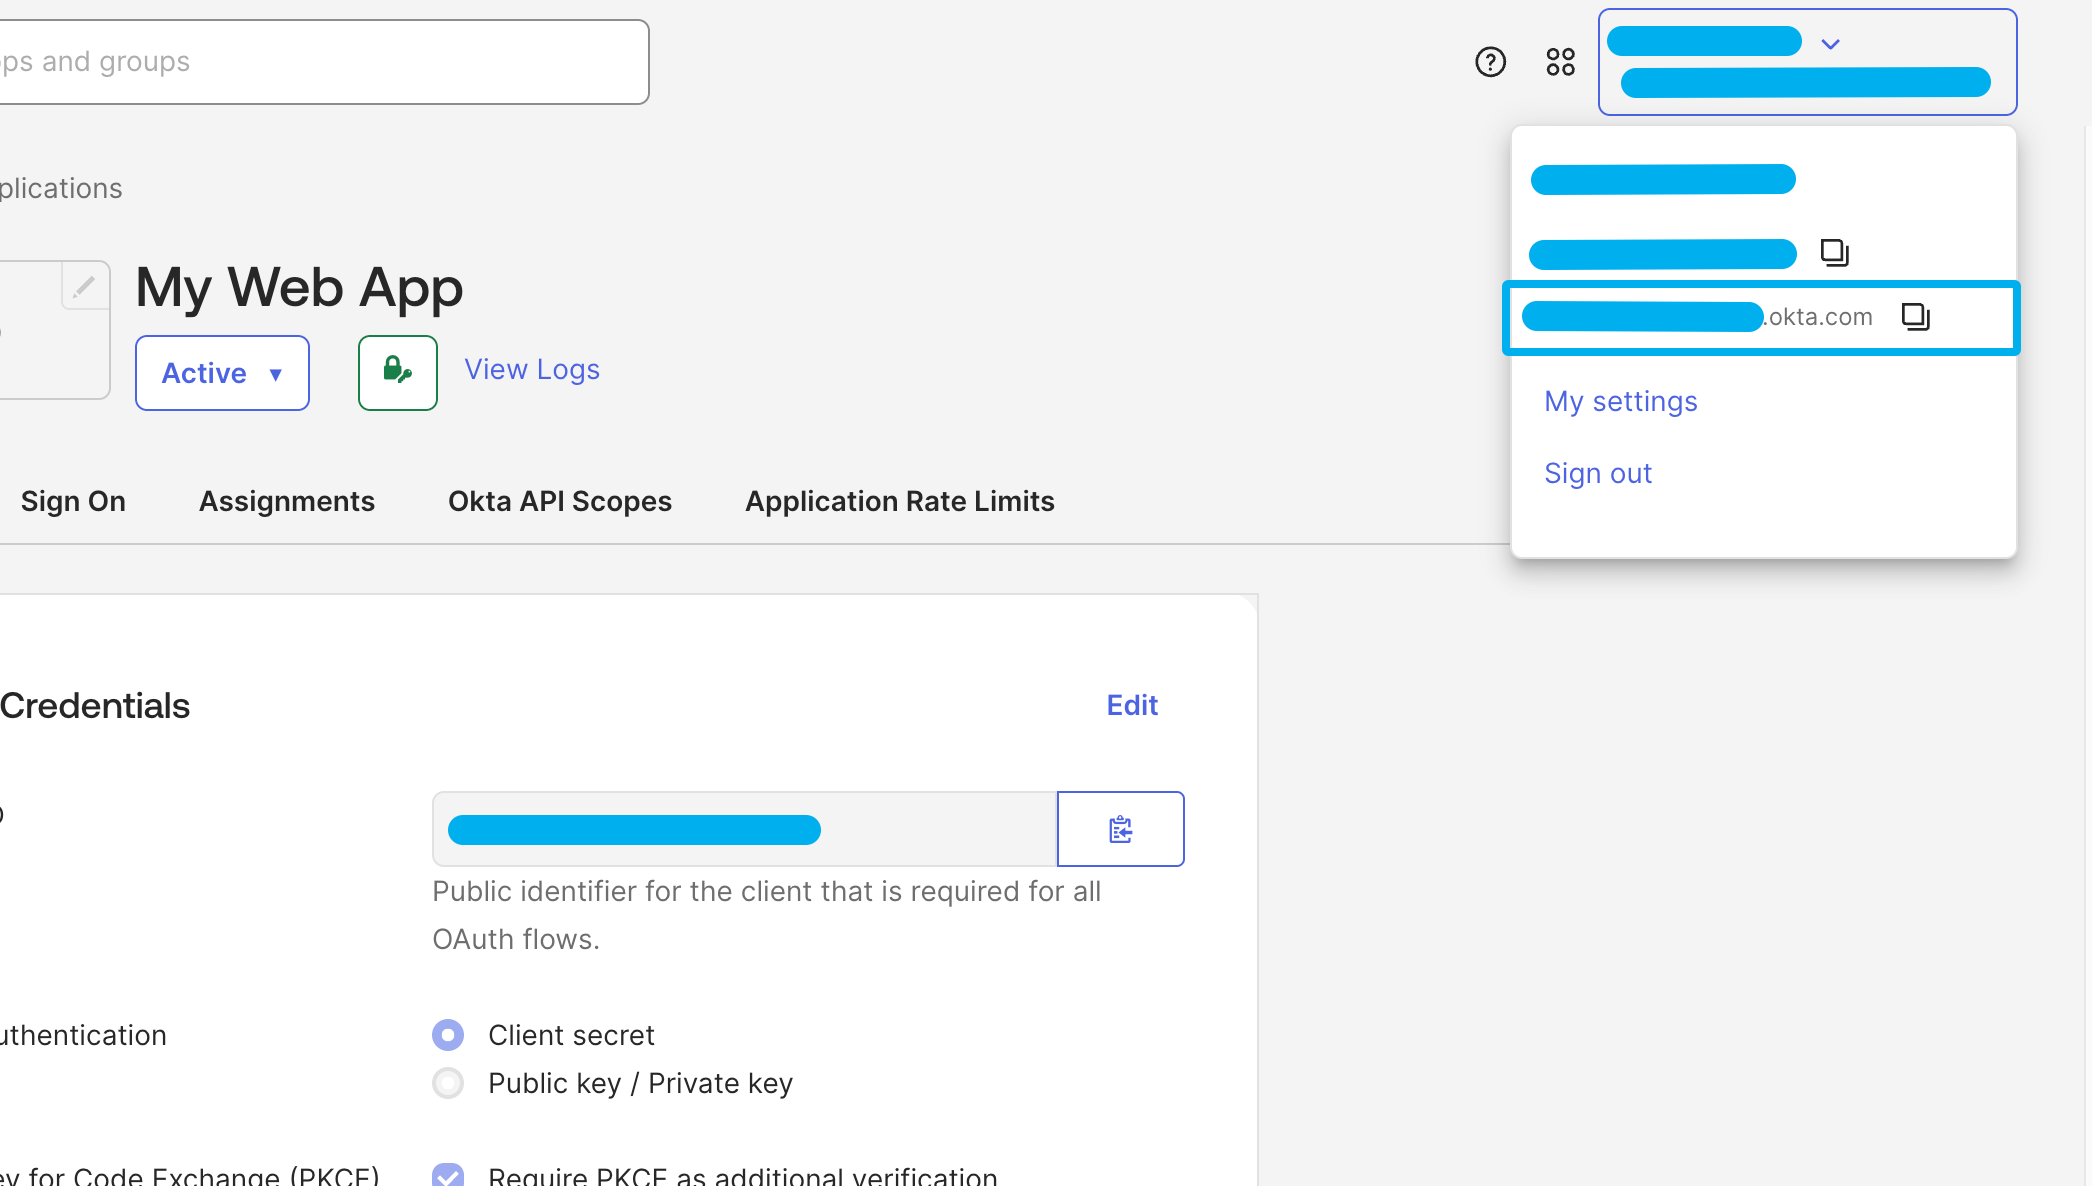
-
Click Save in
{your application}.