On-Prem Deployment Guide
Deploying to on-prem environments is often a requirement for customers with strict security and compliance needs. These environments are designed to either eliminate or restrict external network requests, making authentication with third-party auth providers virtually impossible.
PropelAuth BYO is designed to solve this problem. It runs entirely within your customer’s infrastructure, ensuring their data never leaves their environment. This guide walks you through deploying PropelAuth BYO in an on-prem environment using three core features: SSO, Sessions, and SCIM.
What We’ll Use
Section titled “What We’ll Use”This guide leverages three core PropelAuth BYO features:
- SSO: Integrate with your customer’s internal Identity Provider (IdP) for authentication.
- Sessions: Remember authenticated users without needing to call an external auth provider.
- SCIM (optional): Automate user provisioning and de-provisioning with your customer’s IdP.
Prerequisites
Section titled “Prerequisites”- An Express application. If you do not have one, follow the guide here.
- The
@propelauth/byo-nodelibrary installed.
Configuring SSO
Section titled “Configuring SSO”Your customers will authenticate through their internal Identity Provider—typically Okta, Entra ID (formerly Azure AD), or OneLogin. But this creates a chicken-and-egg problem: users need to log in to configure SSO, but they can’t log in without SSO being configured first.
Creating an Admin Dashboard
Section titled “Creating an Admin Dashboard”We’ll solve this by using a SETUP_SECRET environment variable. This secret allows users to access a special setup page where they can configure SSO without needing an existing account.
SETUP_SECRET=some-very-secure-random-stringWhen a user visits the admin dashboard in your app, they will be prompted to enter this secret. If it matches, they will gain access to the setup page where they can configure SSO.
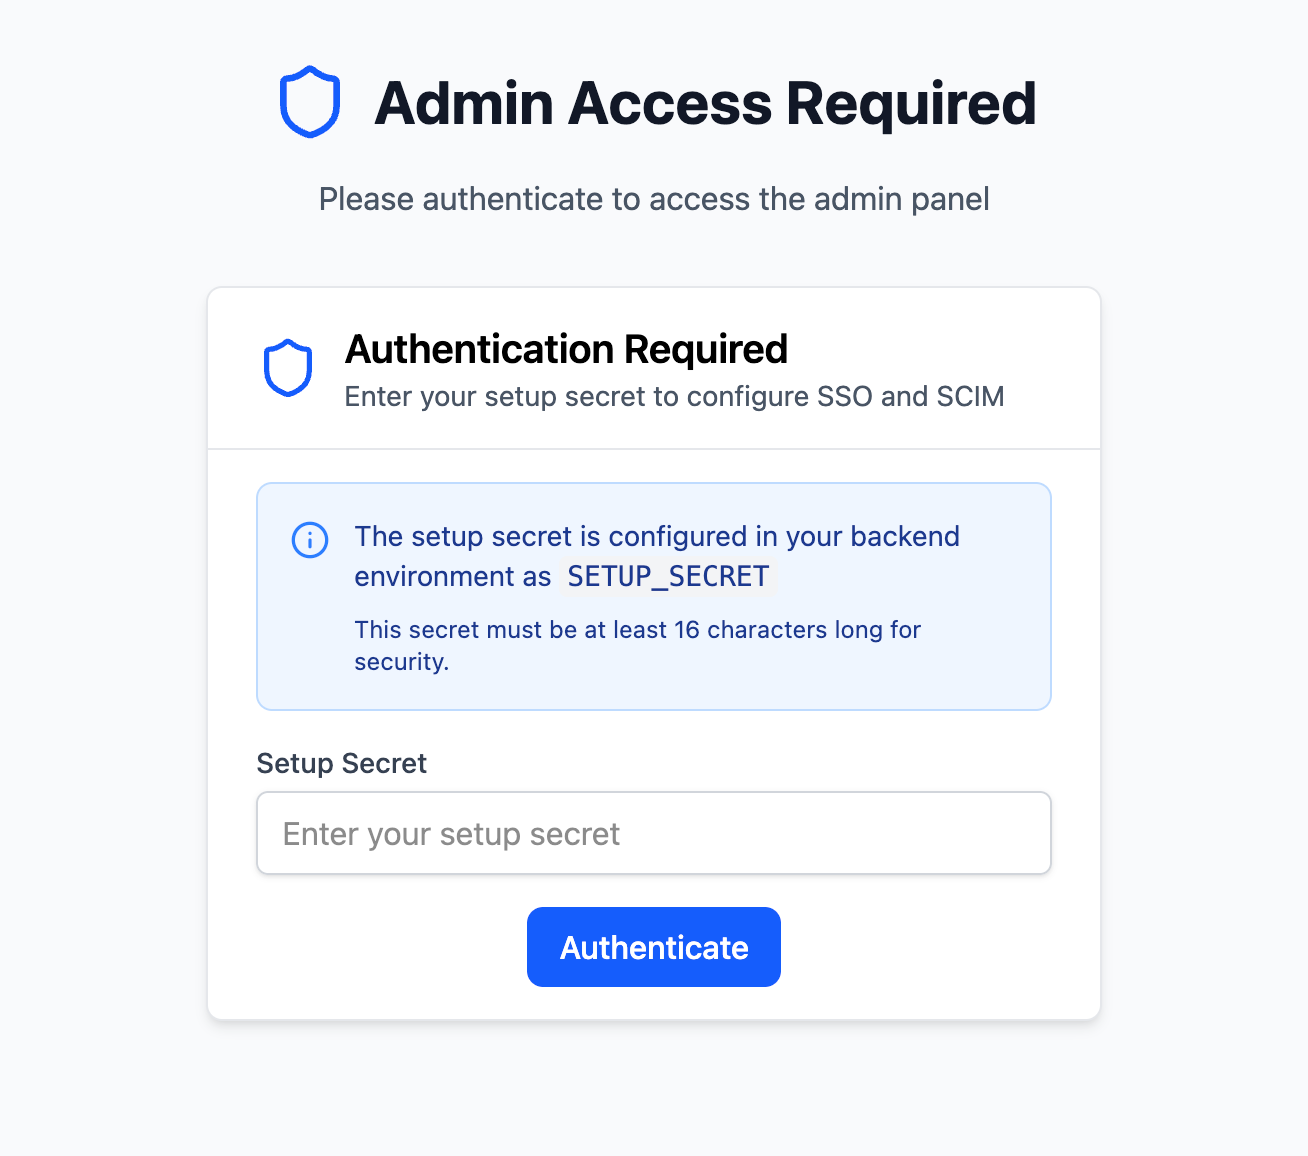
To achieve this we can use middleware to check for the SETUP_SECRET cookie. If it exists and matches the environment variable, we allow access to the setup page. Otherwise, we deny access with a 401 error.
import { Request, Response, NextFunction } from "express";
const MINIMUM_SECRET_LENGTH = 16;
export const requireSetupSecret = (req: Request, res: Response, next: NextFunction) => { const setupSecret = process.env.SETUP_SECRET;
// These three cases all return the same message to avoid leaking information if (!setupSecret) { return res.status(401).json({ error: "Authorization failed. The provided value must match the SETUP_SECRET environment variable (minimum 16 characters).", }); }
const authHeader = req.headers.authorization; if (!authHeader || !authHeader.startsWith("Bearer ")) { return res.status(401).json({ error: "Authorization failed. The provided value must match the SETUP_SECRET environment variable (minimum 16 characters).", }); }
const providedSecret = authHeader.substring(7); if (providedSecret !== setupSecret) { return res.status(401).json({ error: "Authorization failed. The provided value must match the SETUP_SECRET environment variable (minimum 16 characters).", }); }
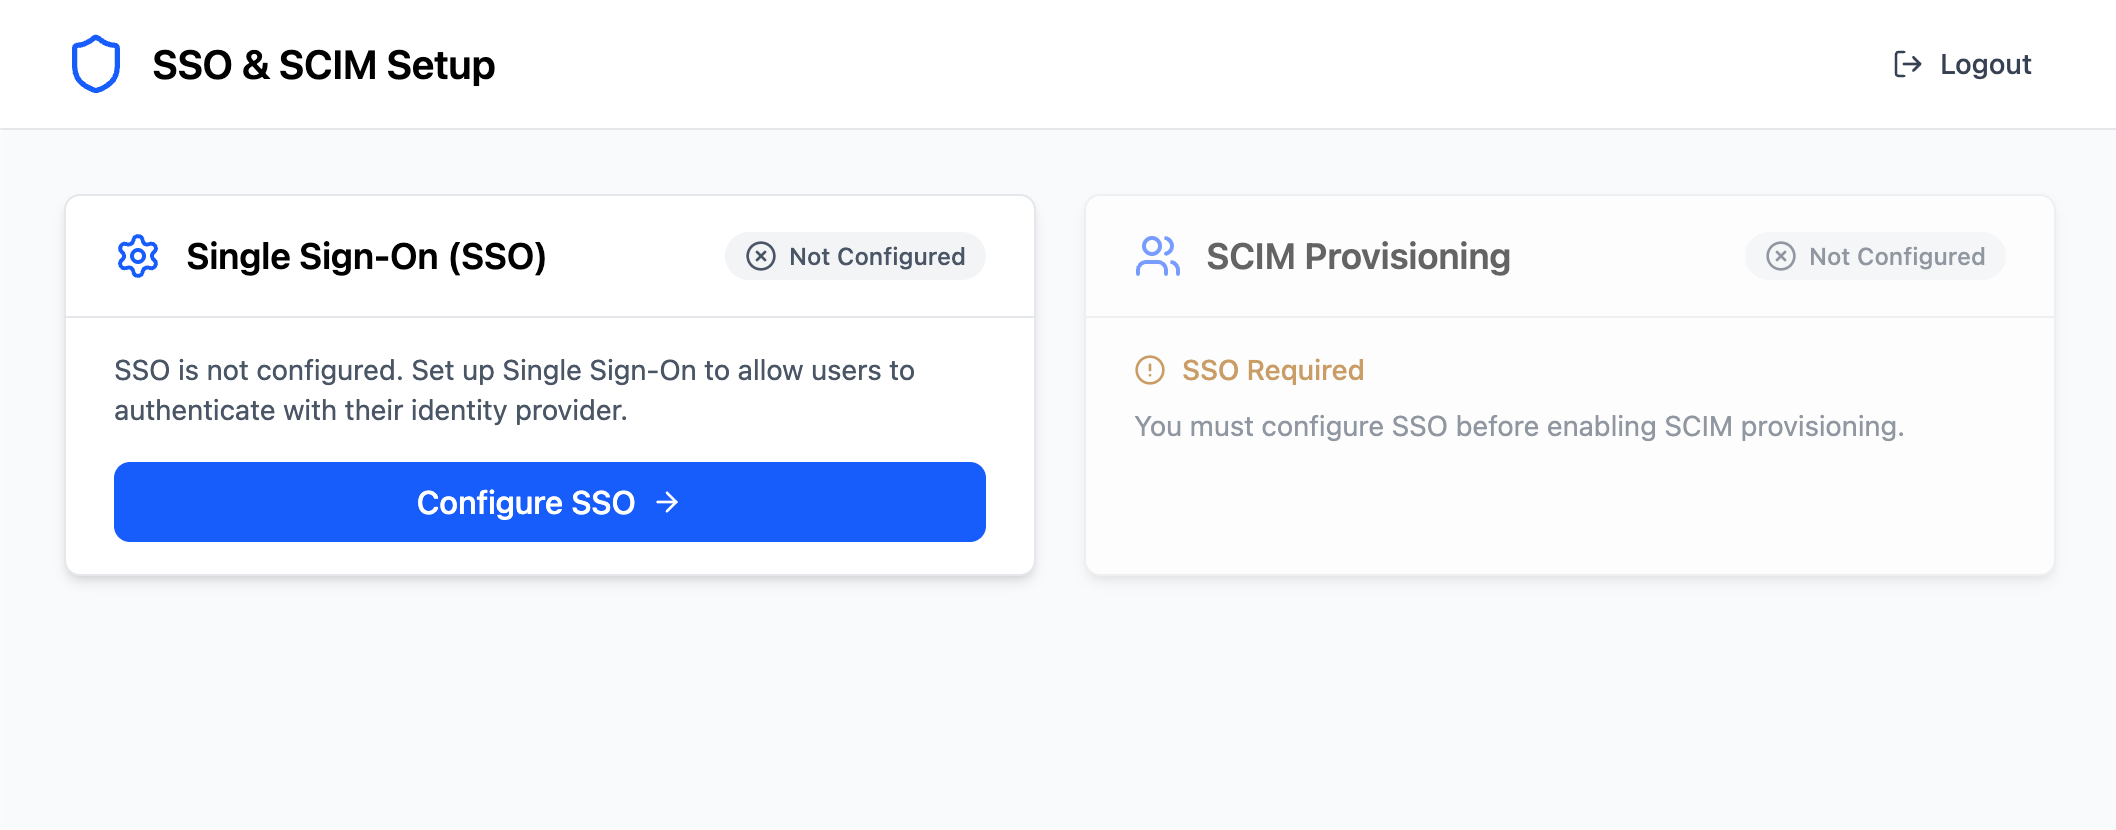
next();};When the admin user enters their secret successfully, we’ll redirect them to the admin dashboard where they can configure SSO and SCIM.
Creating an SSO Client
Section titled “Creating an SSO Client”Now that we have a way for users to access the admin dashboard we can start setting up SSO support. This starts with creating an SSO client. If you haven’t already, check out the SSO overview to understand how PropelAuth BYO handles SSO connections.
Creating an SSO client begins with collecting information from your customer about their IdP. This includes the following:
- Client ID: The unique identifier for their application.
- Client Secret: The secret key used to authenticate their application.
- Authorize URL: The URL used to initiate the authorization request.
- Token URL: The URL used to exchange the authorization code for an access token.
- Userinfo URL: The URL used to retrieve user information.
However, we provide IdP-specific configurations for Okta and Entra/Azure that you can use to streamline the setup process for your users. These configurations automatically populate the necessary fields based on the identity provider selected by the user.
We recommend creating a UI that collects this information from your customer such as the one below:
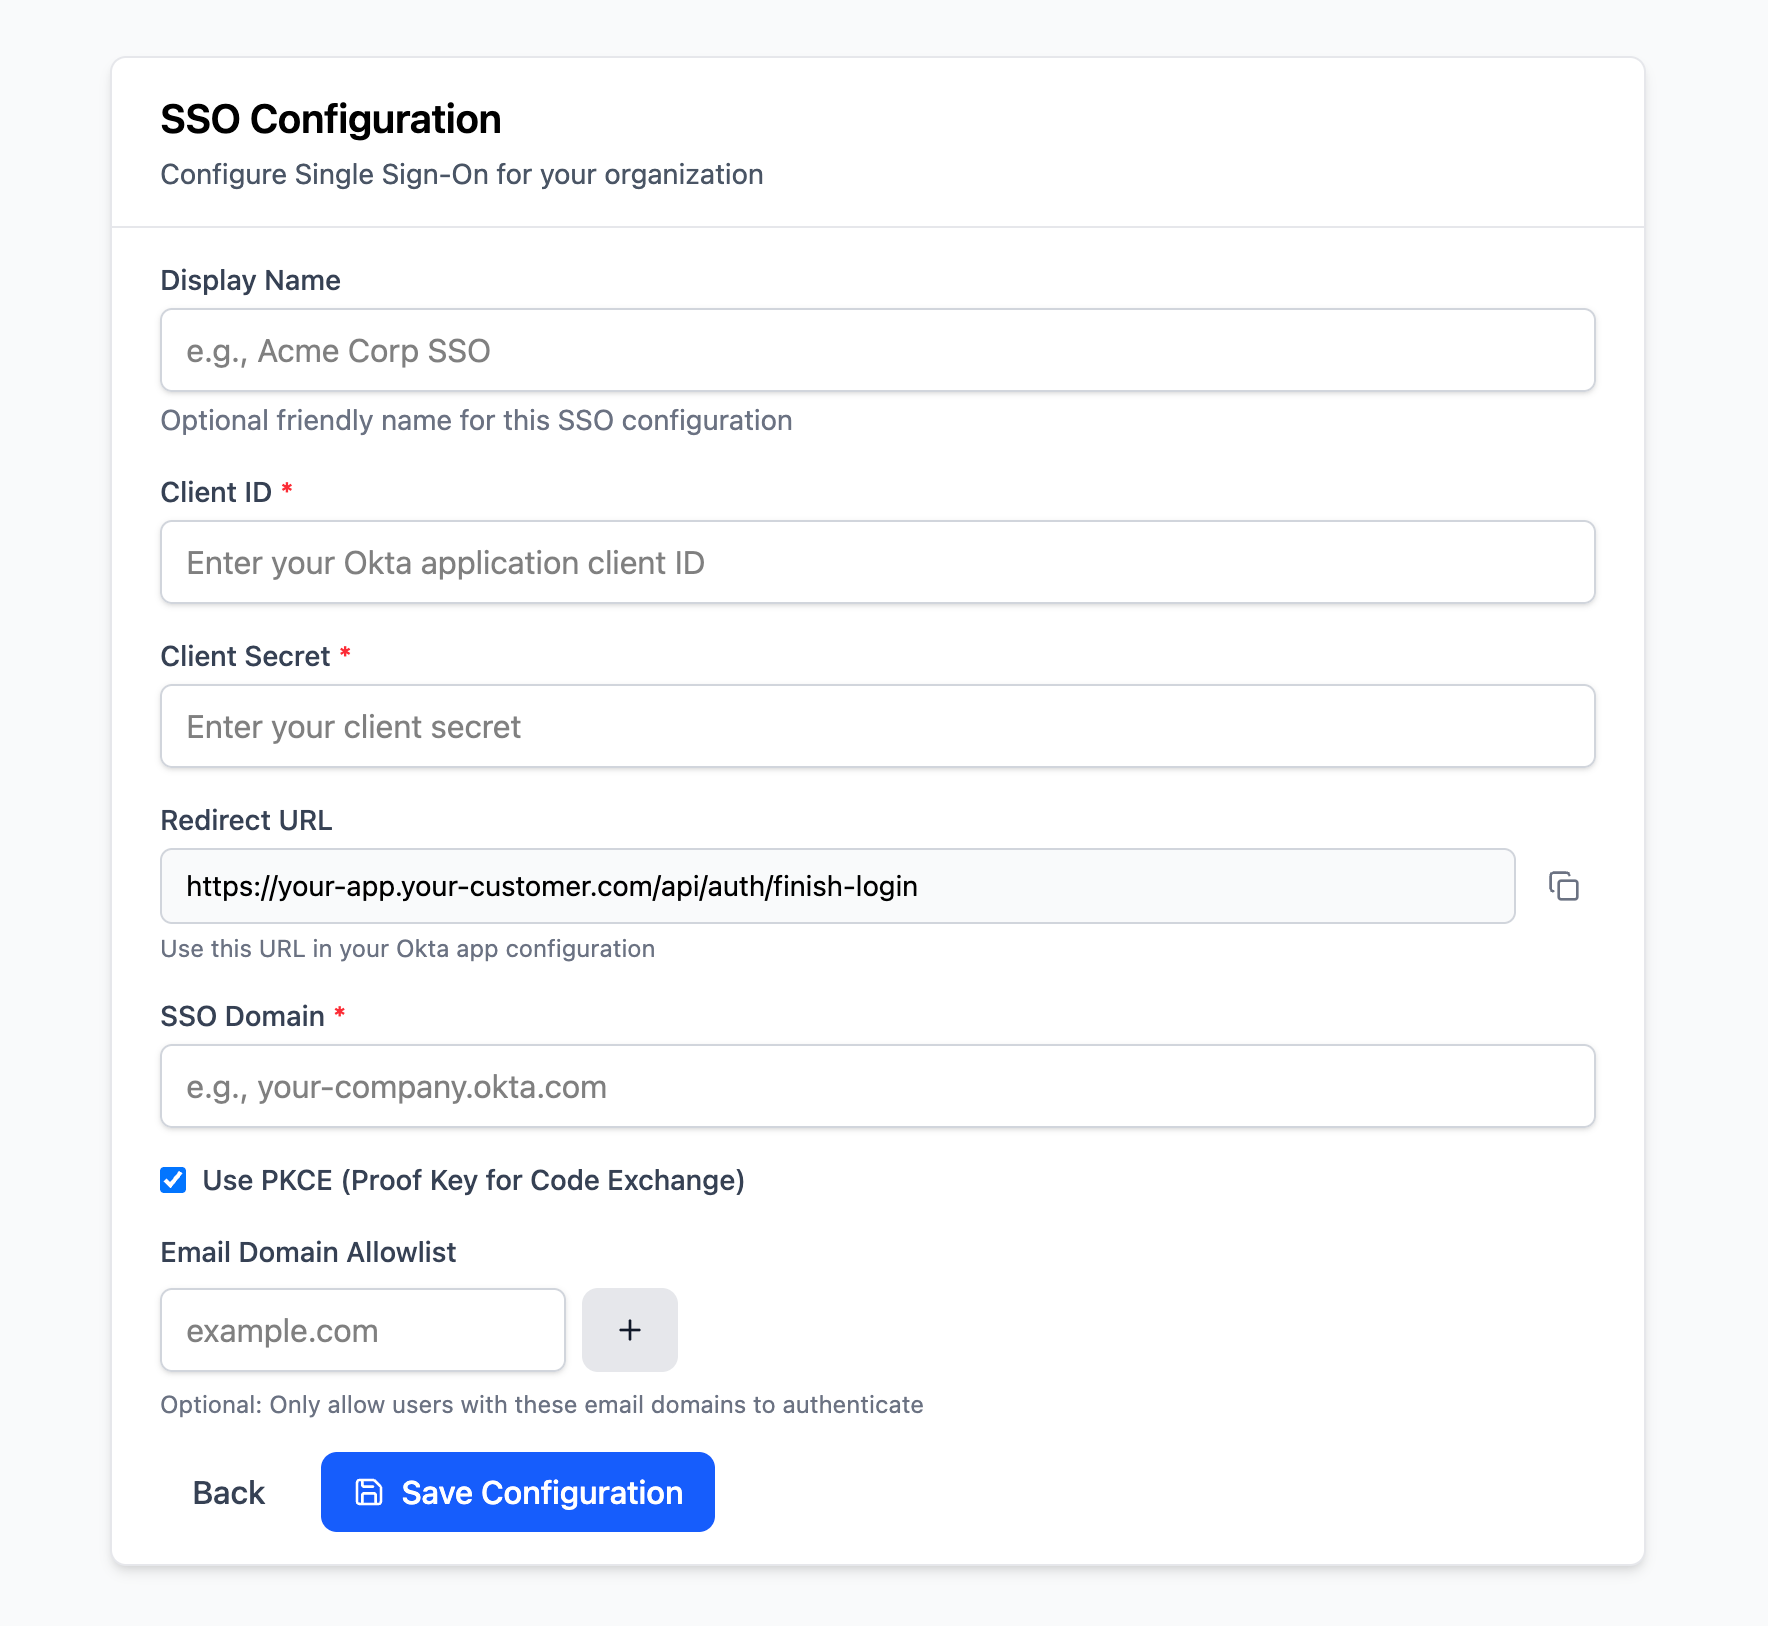
We also need to provide the customer with a Redirect URL (also known as a Callback URL) that they need to provide to their IdP. This is where users will be redirected to after authenticating with their identity provider and will finish the login process. This URL must be a backend endpoint in your on-prem application that can handle the SSO callback, such as https://yourapp.com/api/auth/finish-login. We’ll set this up later in the guide.
We recommend providing guides for popular IdPs to help your customers in collecting the correct information and configuring their IdPs to point to your app. See our Example OIDC Setup Guides for inspiration.
On the backend, we can create an endpoint that uses the Create OIDC Client function to create the SSO client in PropelAuth BYO.
router.post("/sso", async (req: Request, res: Response) => {    // Validate request body    const parseResult = SsoCreateRequestSchema.safeParse(req.body);    if (!parseResult.success) {        throw createError(400, "Invalid request", { details: parseResult.error.flatten() });    }
    const createResult = await auth.sso.management.createOidcClient({        // You'd grab these values from parseResult, we're hard coding for clarity        idpInfoFromCustomer: {            idpType: "Generic",            clientId: "0oaulhbkt9YBiT3Pn697",            clientSecret: "MHppDLafzd...",            authUrl: "https://example-idp.com/oauth2/v2/auth",            tokenUrl: "https://example-idp.com/oauth2/v2/token",            userinfoUrl: "https://example-idp.com/oauth2/v2/userinfo",            usesPkce: true        },        customerId: "on_prem_customer",        redirectUrl: "https://yourapp.com/api/auth/finish-login",        // additional fields if necessary    });
if (createResult.ok) { res.status(201).json({ message: "SSO configuration created successfully" }); } else { console.error("Failed to create SSO configuration:", createResult.error); throw createError(500, "Failed to create SSO configuration"); }});We are now able to create an SSO client for our on-prem customer! The next step is to add the SSO login flow to your app.
Adding an SSO Login Flow
Section titled “Adding an SSO Login Flow”In a cloud environment, you’ll have more than one customer and each customer can have their own SSO connection. By contrast, in an on-prem environment, there’s only one customer and only one SSO connection. This simplifies the login flow significantly because you don’t need to figure out which customer is trying to log in.
When a user wants to log in, initiate the login flow using the Initiate SSO Login function. This function requires a Customer ID to determine which SSO connection to use. Since we only have one customer in this on-prem setup, we can use a hardcoded value like on_prem_customer. This function returns a URL to redirect the user to their IdP for authentication. Additionally, it returns a state value that should be stored in a cookie to validate the callback later.
router.get("/login", async (_req: Request, res: Response) => {    const loginResult = await auth.sso.initiateOidcLogin({        customerId: "on_prem_customer",    });
    if (loginResult.ok) {        // Set state cookie        res.cookie("__sso_state", loginResult.data.stateForCookie, {            ...COOKIE_OPTIONS,            maxAge: 5 * 60 * 1000,        });
        // Return the SSO URL for the frontend to redirect to        res.json({            redirectUrl: loginResult.data.sendUserToIdpUrl,        });    } else if (loginResult.error.type === "ClientNotFound") {        // SSO not configured - return 200 with a specific response so frontend can handle it        res.json({            error: "SSO_NOT_CONFIGURED",            message: "Single Sign-On has not been configured yet. Please contact your administrator.",        });    } else {        console.error("Unexpected error during login:", loginResult.error);        throw UnexpectedError();    }});
The frontend for this could not be simpler - just call the login endpoint and redirect the user to the provided URL. This URL will take the user to their IdP to authenticate.
const initiateLogin = async () => {    const response = await fetch("/api/auth/login");    const data = await response.json();
    if (data.redirectUrl) {        // Redirect to SSO provider        window.location.href = data.redirectUrl;    } else {        console.log("Failed to initiate login. Please try again.");    }};
<button onClick={initiateLogin} disabled={loading}>    Login with SSO</button>
Handling the SSO Callback
Section titled “Handling the SSO Callback”After the user authenticates with their IdP they will be redirected back to your application at the Redirect URL you provided when creating the SSO client. We can create a backend endpoint to handle this callback using the Complete SSO Login function.
router.get("/finish-login", async (req: Request, res: Response) => {    const callbackResult = await auth.sso.completeOidcLogin({        stateFromCookie: req.cookies["__sso_state"],        callbackPathAndQueryParams: req.originalUrl,    });
    if (callbackResult.ok) {        // TODO: Create a session for the user    } else {        console.error("Unexpected error during login callback:", callbackResult.error);        res.redirect("/login?error=login_failed");    }});
We have now finished the SSO login flow! The final step is to create a session for the user to complete the login process.
Managing Sessions
Section titled “Managing Sessions”Now that the user has authenticated with their IdP, we need to create a session for them in our application to maintain their authenticated status. This is done using the BYO Session functions. There are two main parts to this: creating the session and validating the session on subsequent requests.
Creating Sessions
Section titled “Creating Sessions”Creating a session typically happens right after a successful SSO login. We can use the user information returned from the Complete SSO Login function above to create a session using the Create Session function. This will return a session token that we can set as a cookie in the user’s browser.
const COOKIE_OPTIONS: CookieOptions = {    httpOnly: true,    sameSite: "lax",    secure: true,};
router.get("/finish-login", async (req: Request, res: Response) => {    const callbackResult = await auth.sso.completeOidcLogin({        stateFromCookie: req.cookies["__sso_state"],        callbackPathAndQueryParams: req.originalUrl,    });
    if (callbackResult.ok) {        /**        * The SSO provider returns information on the user:        * - oidcUserId: The provider's ID of the user        * - scimUser: SCIM user info if SCIM is enabled        * - dataFromSso: Raw user data from the provider        * - email: The user's email from the provider        */        const { oidcUserId, scimUser, dataFromSso, email } = callbackResult.data;
        // We need to store the user's data on our end to use it later when managing sessions        const user = await getOrCreateUserFromSso(oidcUserId, scimUser, dataFromSso, email);
        const sessionResult = await auth.session.create({            userId: user.id,            ipAddress: req.ip,            userAgent: req.headers["user-agent"],        });
        if (!sessionResult.ok) {            console.error("Failed to create session:", sessionResult.error);            throw UnexpectedError();        }
        // Set session cookie and redirect to frontend        res.cookie("__session", sessionResult.data.sessionToken, COOKIE_OPTIONS);
        // Clear SSO state cookie        res.clearCookie("__sso_state");
        // Redirect to frontend home page        res.redirect("/");    } else {        console.error("Unexpected error during login callback:", callbackResult.error);        res.redirect("/login?error=login_failed");    }});
Now that we have created a session and set the session cookie, our user is officially logged in! The final piece of the puzzle is validating the session on subsequent requests to protected endpoints.
Validating Session
Section titled “Validating Session”To validate the session, we can create middleware that checks for the session cookie and validates it using the Validate Session function. If the session token has expired or invalid, we can clear the cookie and either return a 401 error or redirect the user to the login page.
import { Request, Response, NextFunction } from "express";import { auth } from "../auth";import { UnexpectedError } from "../utils/errors";
export const requireSessionOr401 = async (req: Request, res: Response, next: NextFunction) => {    if (req.sessionData) {        return next();    }
    const validateResult = await auth.session.validate({        sessionToken: req.cookies.__session,        ipAddress: req.ip,        userAgent: req.headers["user-agent"] || "unknown",    });
    if (validateResult.ok) {        req.sessionData = validateResult.data;        next();    } else if (validateResult.error.type === "InvalidSessionToken" || validateResult.error.type === "IpAddressError") {        res.clearCookie("__session");        res.status(401).json({ error: "Unauthorized" });    } else {        console.error("Unexpected error validating session:", validateResult.error);        throw UnexpectedError();    }};
We can then use this middleware to protect any routes that require authentication, such as a user information endpoint.
import { requireSessionOr401 } from "../middleware/session";
router.get("/user", requireSessionOr401, async (req: Request, res: Response) => {    const sessionData = req.sessionData!;
    // Get user from your database    const user = await userService.getUserById(sessionData.userId);
    if (!user) {        throw UnauthorizedError("User not found");    }
    res.json({        id: user.id,        email: user.email,        firstName: user.first_name,        lastName: user.last_name,    });});
Lastly, we should also provide a logout endpoint that invalidates the session and clears the session cookie.
router.post("/logout", async (req: Request, res: Response) => {    const sessionToken = req.cookies["__session"];
    if (sessionToken) {        await auth.session.invalidateByToken({            sessionToken,        });    }
    // Clear session cookie    res.clearCookie("__session");    res.json({ success: true });});
We have now added auth to our on-prem app! Our users can now login via their IdP and remain authenticated via sessions, all without making a request to an external auth provider. While this may be enough for many applications, some customers may require automated user provisioning and de-provisioning via SCIM. The next, optional part of this guide will cover how to set up SCIM in an on-prem environment.
Configuring SCIM
Section titled “Configuring SCIM”Combining SCIM and SSO is a powerful way to manage user access in an on-prem environment. SCIM allows your customer’s IdP to automatically create, update, and deactivate users in your application based on their internal user directory. This ensures that only authorized users can access your app, and it reduces the administrative overhead of managing user accounts manually.
If you haven’t already, check out the SCIM overview to understand how PropelAuth BYO handles SCIM connections.
Creating a SCIM Connection
Section titled “Creating a SCIM Connection”Earlier in this guide we covered setting up an admin dashboard to configure SSO. We can use the same dashboard to also configure SCIM.
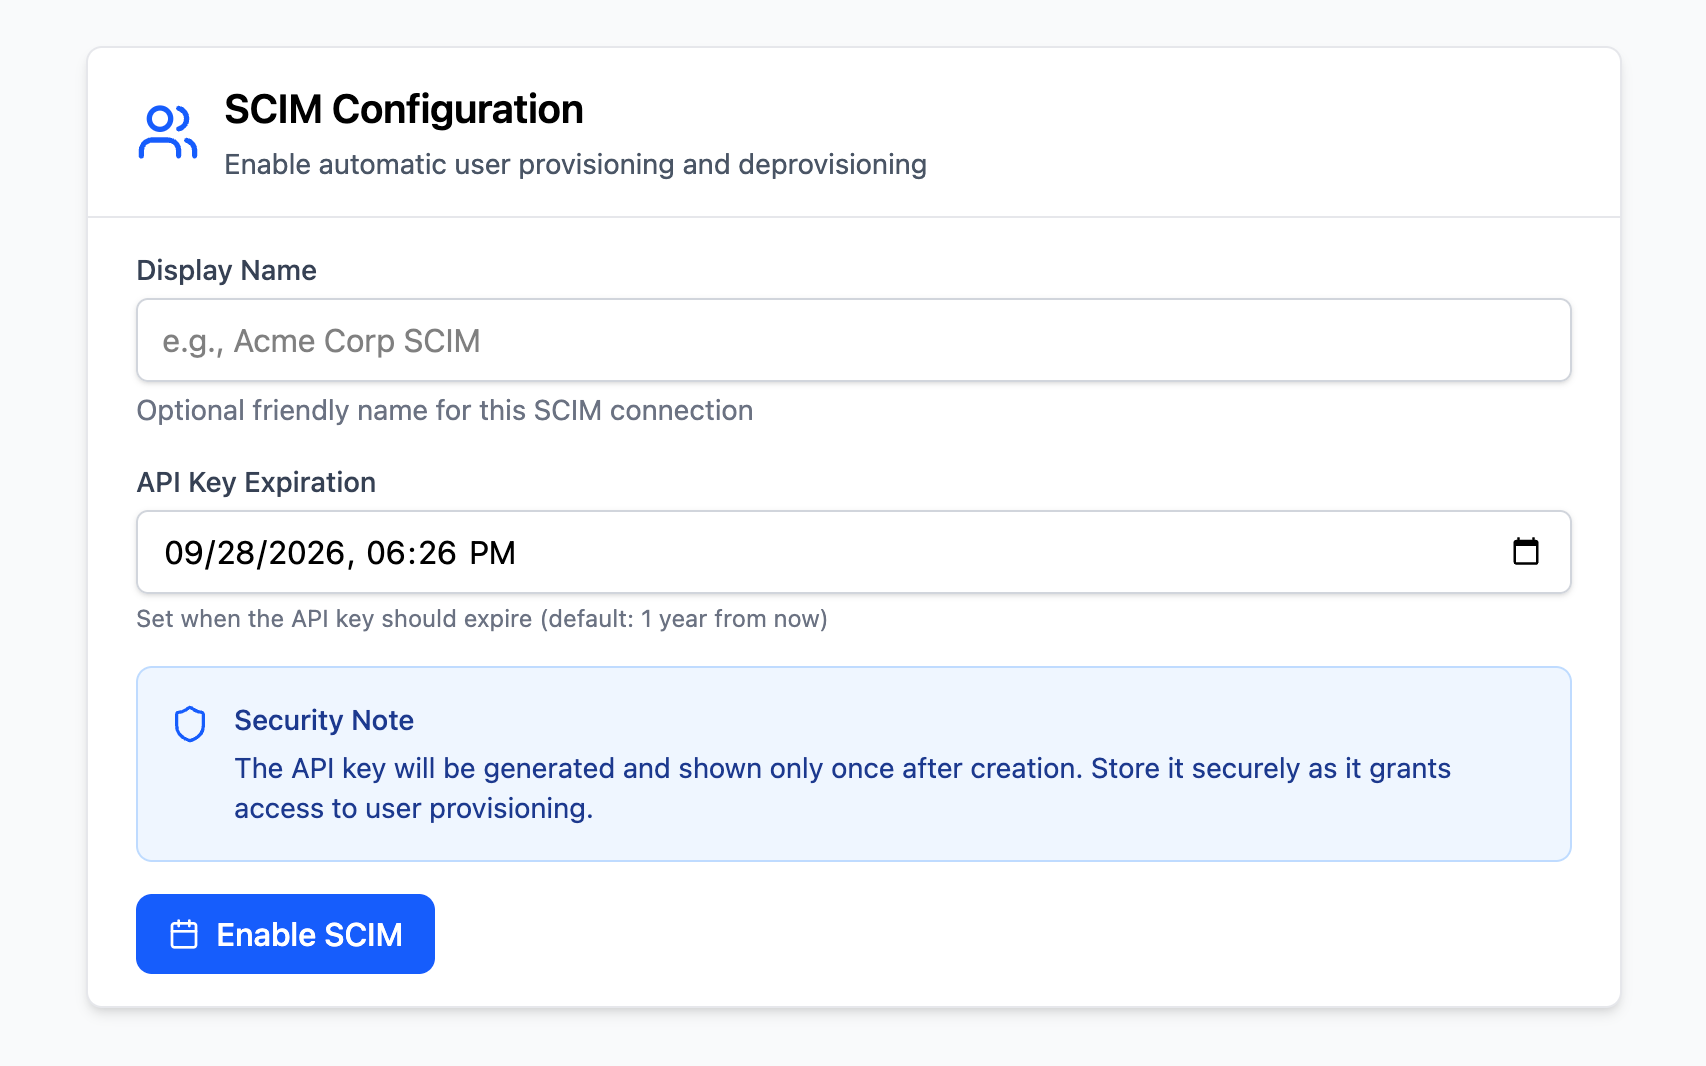
Creating a SCIM connection does not require as much of an exchange of data between you and your customer as creating an SSO Client. Instead, there are just two values you need to provide your customer: a SCIM Base URL and SCIM API Key.
The SCIM Base URL is the backend endpoint in your application that will handle SCIM requests. The SCIM API Key is a secret that your customer will use to authenticate their SCIM requests to your app. You can generate this key using the Create SCIM Connection function.
router.post("/scim", async (req: Request, res: Response) => {    // Validate the request body    const parseResult = ScimCreateRequestSchema.safeParse(req.body);    if (!parseResult.success) {        throw createError(400, "Invalid request", { details: parseResult.error.flatten() });    }
    // Create the connection    const createResult = await auth.scim.management.createScimConnection({        customerId: "on_prem_customer",        displayName: parseResult.data.displayName,        scimApiKeyExpiration: parseResult.data.scimApiKeyExpiration,    });
// Respond based on the result if (createResult.ok) { const response: ScimCreateResponse = { connectionId: createResult.data.connectionId, scimApiKey: createResult.data.scimApiKey, }; res.status(201).json(response); } else { console.error("Failed to create SCIM connection:", createResult.error); throw createError(500, "Failed to create SCIM connection"); }});Similar to SSO, we recommend providing guides for popular IdPs to help your customers in configuring their IdPs to point to your SCIM endpoint. See our Example SCIM Setup Guides for examples. We also recommend taking a look at our Using SSO and SCIM Guide for best practices when using SSO and SCIM together.
Handling SCIM Requests
Section titled “Handling SCIM Requests”Now that you have created a SCIM connection you need to handle incoming SCIM requests. When a SCIM request is received, you typically need to validate the request, determine the type of operation (create, update, delete, etc.), perform the corresponding action in your application’s user database, and return the appropriate SCIM response.
PropelAuth BYO greatly simplifies this process via the SCIM Request function. This function takes care of validating the request, determining which user operations need to occur, and then formatting the response according to the SCIM specification.
export const scimRoutes = async (req: Request, res: Response) => {    const scimResult = await auth.scim.scimRequest({        method: req.method.toUpperCase() as HttpMethod,        pathAndQueryParams: req.originalUrl,        body: req.body,        scimApiKey: req.headers["authorization"] as string,    });
    if (scimResult.ok) {        await handleSuccessfulScimResponse(scimResult.data, res);    } else {        handleErrorScimResponse(scimResult.error, res);    }};
async function handleSuccessfulScimResponse(data: ScimRequestResponse, res: Response) {    if (data.status === "Completed") {        res.status(data.responseHttpCode).json(data.responseData);    } else if (data.action === "LinkUser") {        const { parsedUserData, commitId, connectionId, ssoUserSubject } = data;        // Link the SCIM user to a user in your database        await handleLinkUserAction({ parsedUserData, commitId, connectionId, ssoUserSubject }, res);    } else if (data.action === "DisableUser") {        const { userId, commitId, connectionId } = data;        // Disable the user, they should no longer be able to log in        handleSensitiveUserAction("disable", { userId, commitId, connectionId }, res);    } else if (data.action === "EnableUser") {        const { userId, commitId, connectionId } = data;        // Re-enable a previously disabled user        handleSensitiveUserAction("enable", { userId, commitId, connectionId }, res);    } else if (data.action === "DeleteUser") {        const { userId, commitId, connectionId } = data;        // Delete the user from your database        handleSensitiveUserAction("delete", { userId, commitId, connectionId }, res);    } else {        // unreachable        throw UnexpectedError("Unknown SCIM action");    }}
async function handleSensitiveUserAction(    action: "disable" | "enable" | "delete",    { userId, commitId, connectionId }: { userId: string; commitId: string; connectionId: string },    res: Response,) {    // Perform the action in your user database    await performActionOnUserInOurDb(action, userId);
    const commitResult = await auth.scim.commitScimUserChange({ connectionId, commitId });    if (commitResult.ok) {        // We are done, return the provided response to for the SCIM request        res.status(commitResult.data.responseHttpCode).json(commitResult.data.responseData);    } else {        console.error(`Error committing SCIM user ${action}:`, commitResult.error);        throw UnexpectedError(`Failed to commit SCIM user ${action}`);    }}
In the code snippet above, the SCIM Request function handles the heavy lifting of processing the SCIM request. Depending on the result, we either send a completed response back to the IdP or perform one of several user-related actions (linking, enabling, disabling, deleting). See the docs here for more information on handling these actions.
Wrapping Up
Section titled “Wrapping Up”Congratulations! Your application can now authenticate users via SSO, manage sessions, and optionally handle user provisioning via SCIM, all without relying on any external network calls. But what’s next? There are a few things we didn’t cover in this guide that you may want to consider, such as implementing additional security measures like setting session lengths and session rotation.
For information on deploying your application with PropelAuth BYO, check out our Deployment Guide. If you run into any issues or have questions, don’t hesitate to reach out to us at support@propelauth.com.